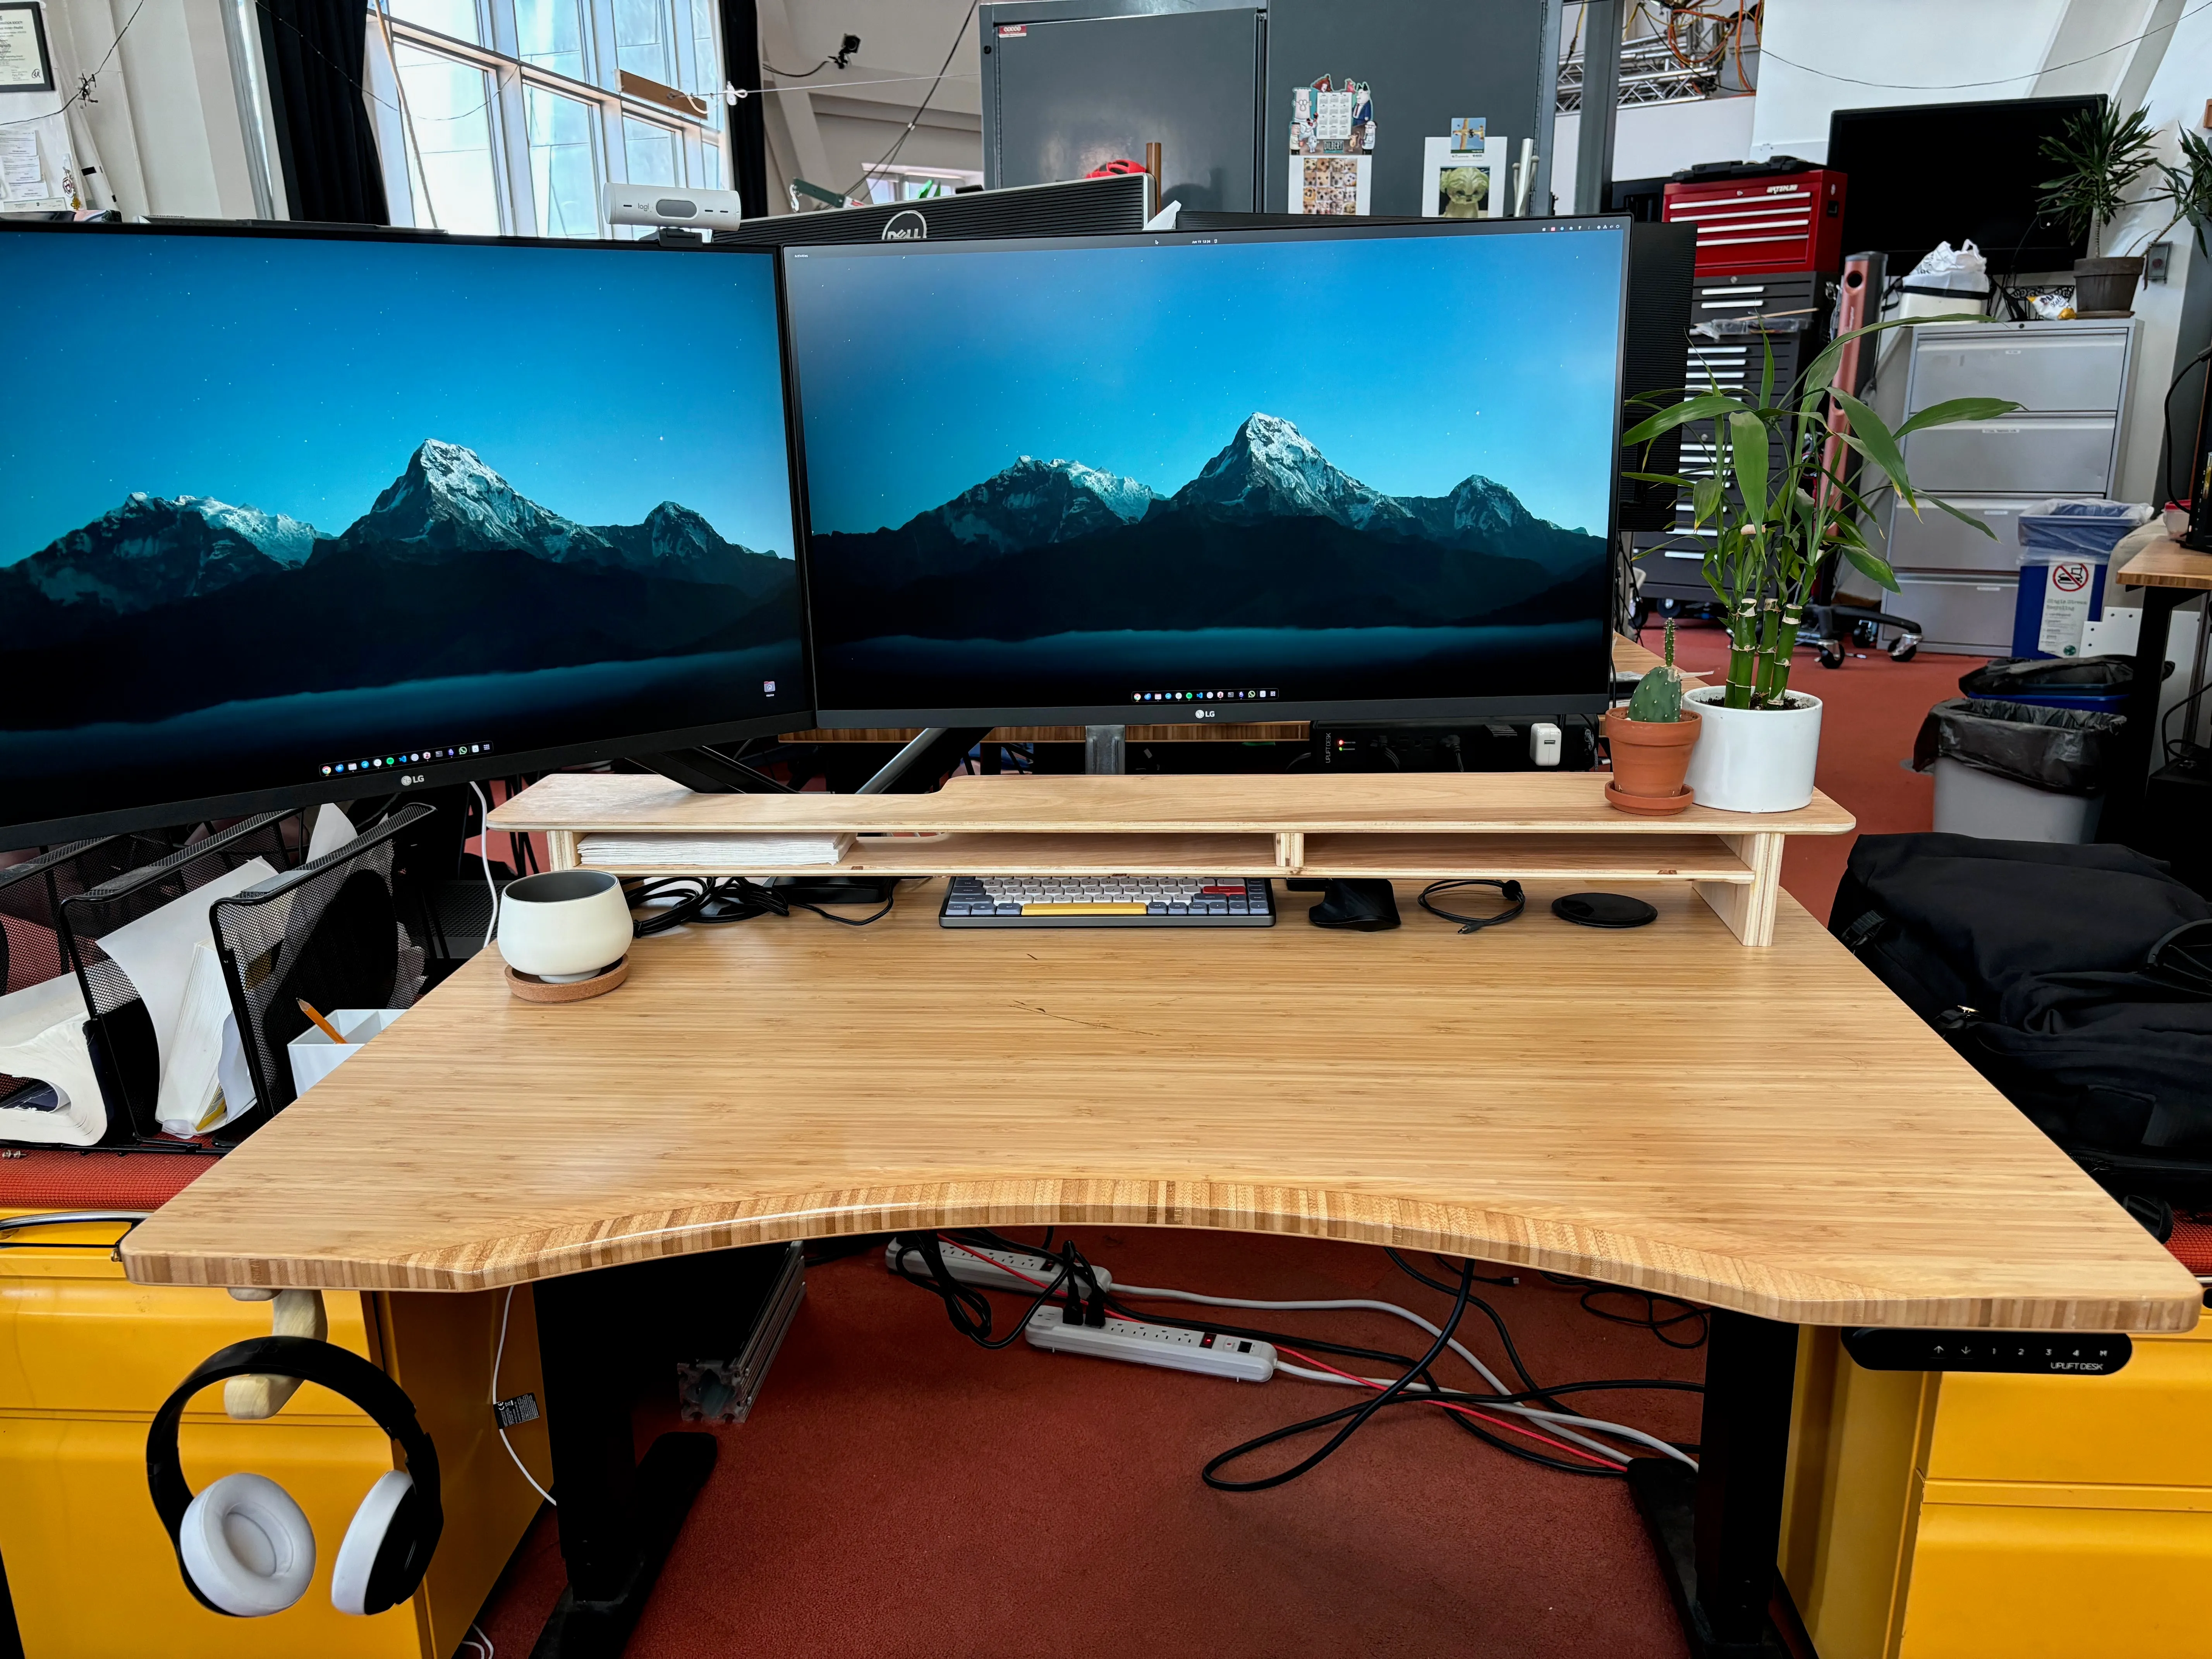
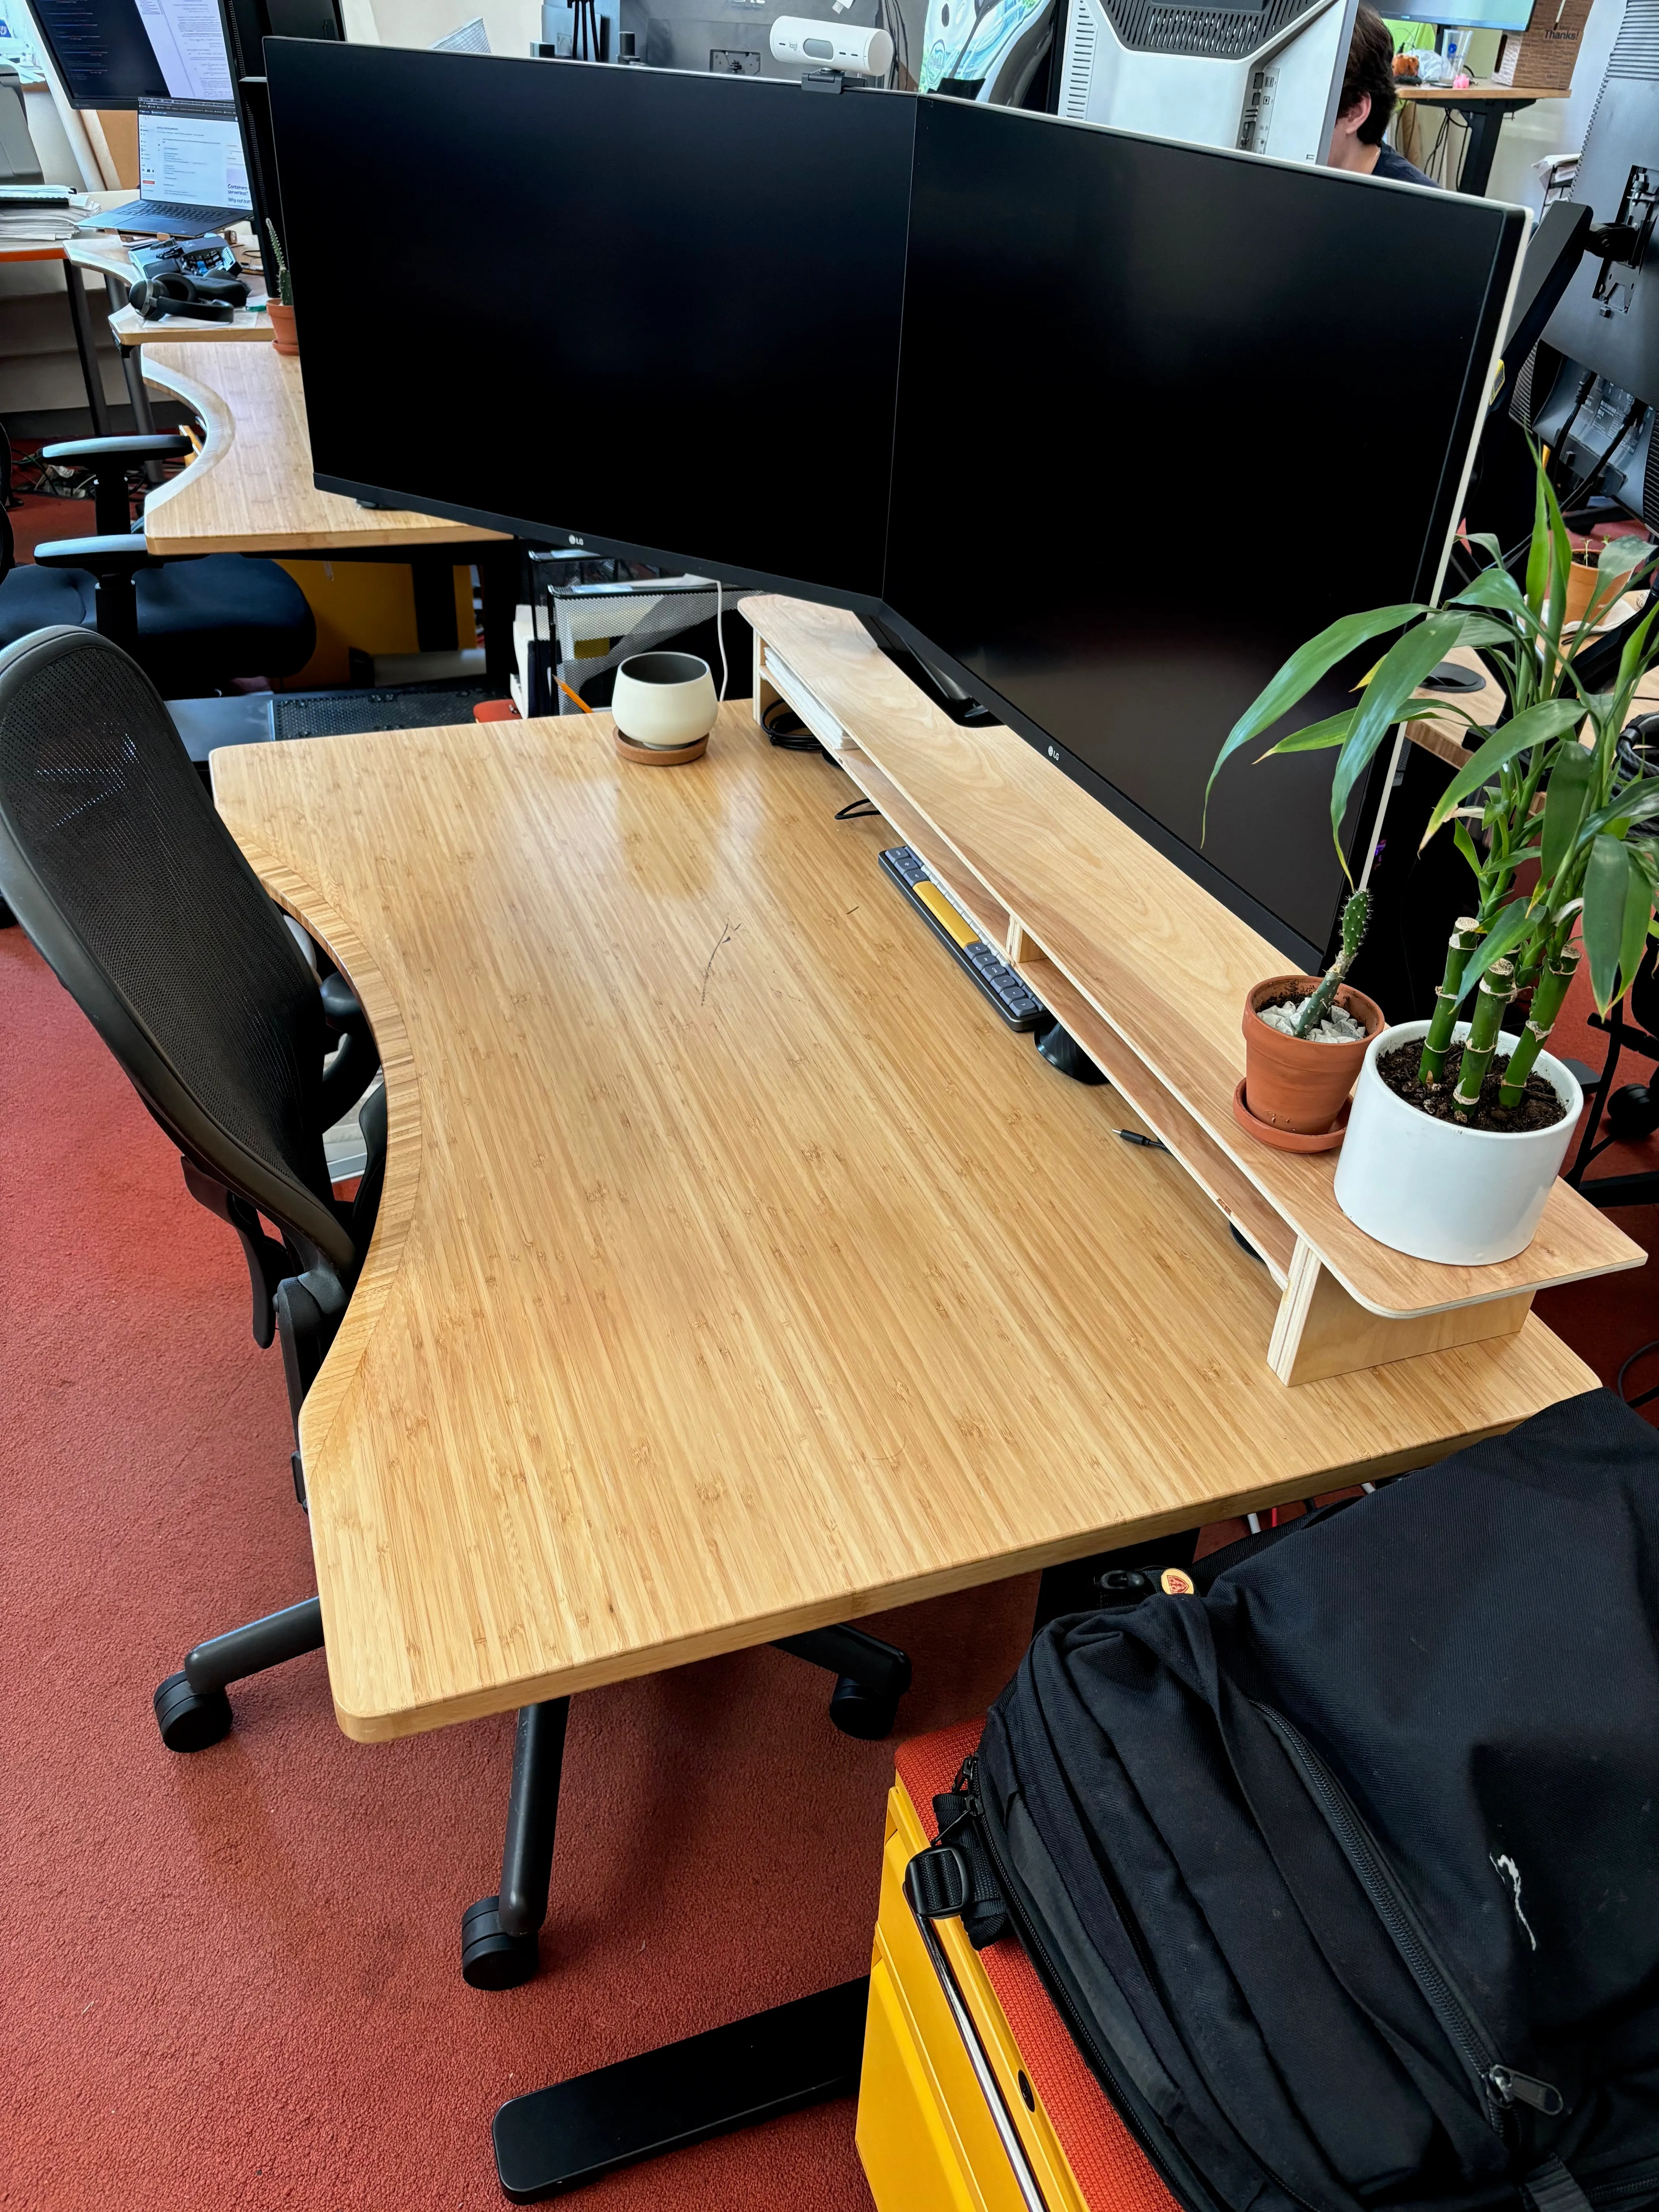
Goal
I want a Grovemade-style desk shelf that will give me some added storage space for small items on my desk and reduce clutter by giving everything a home.

Design requirements
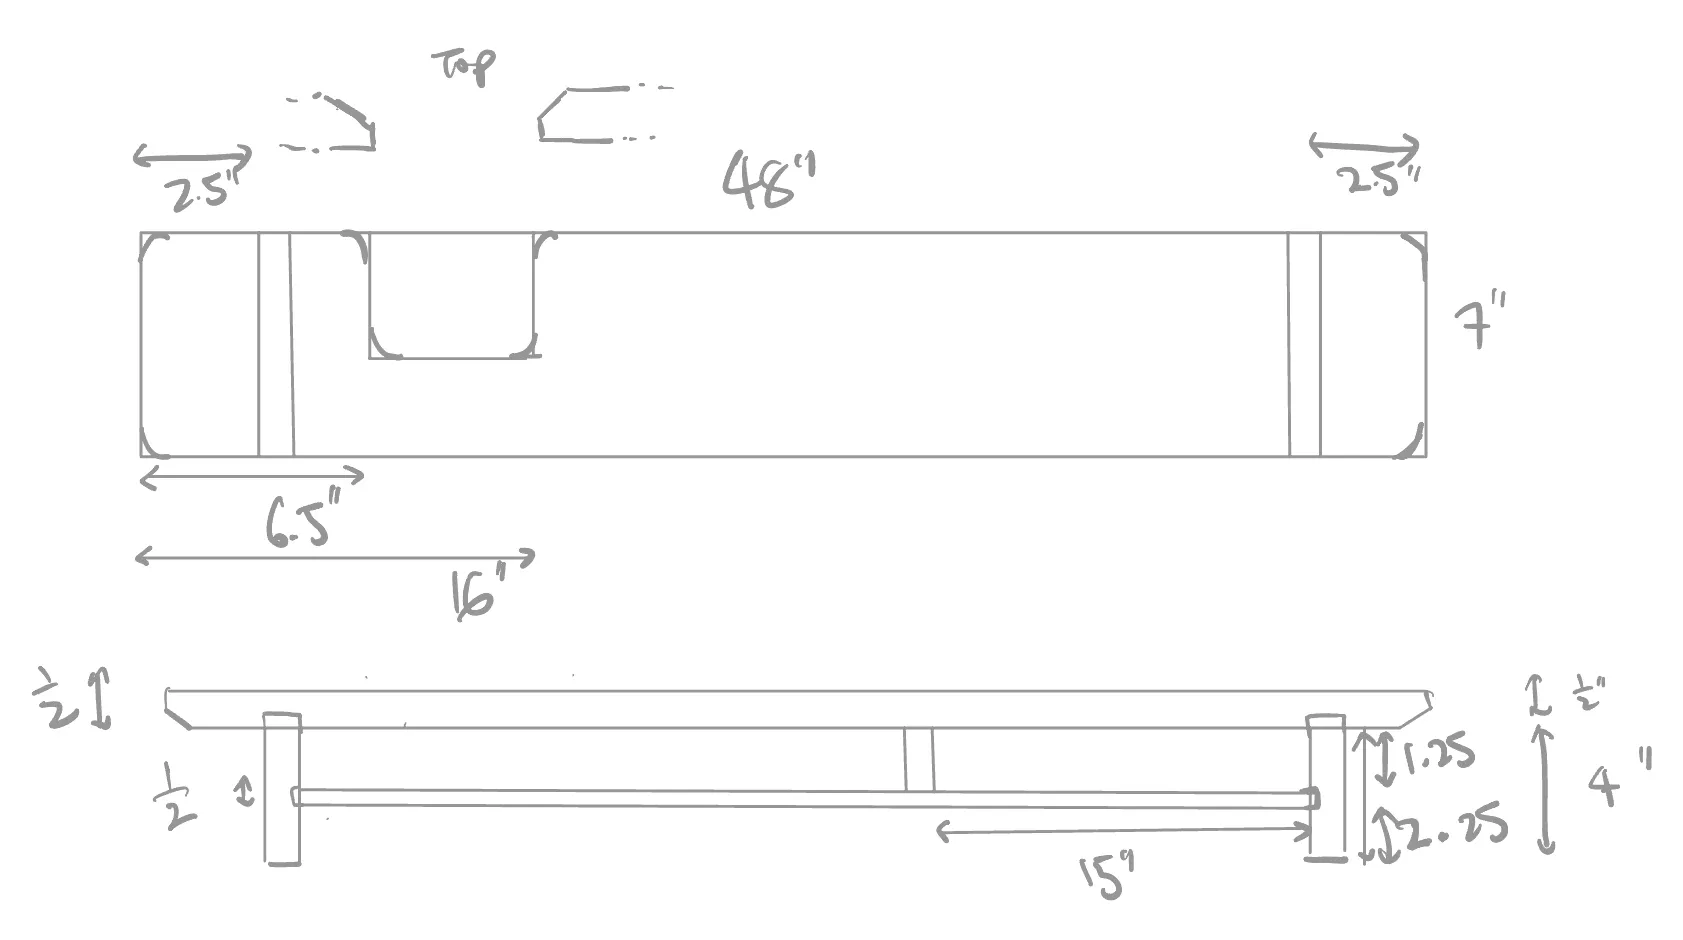
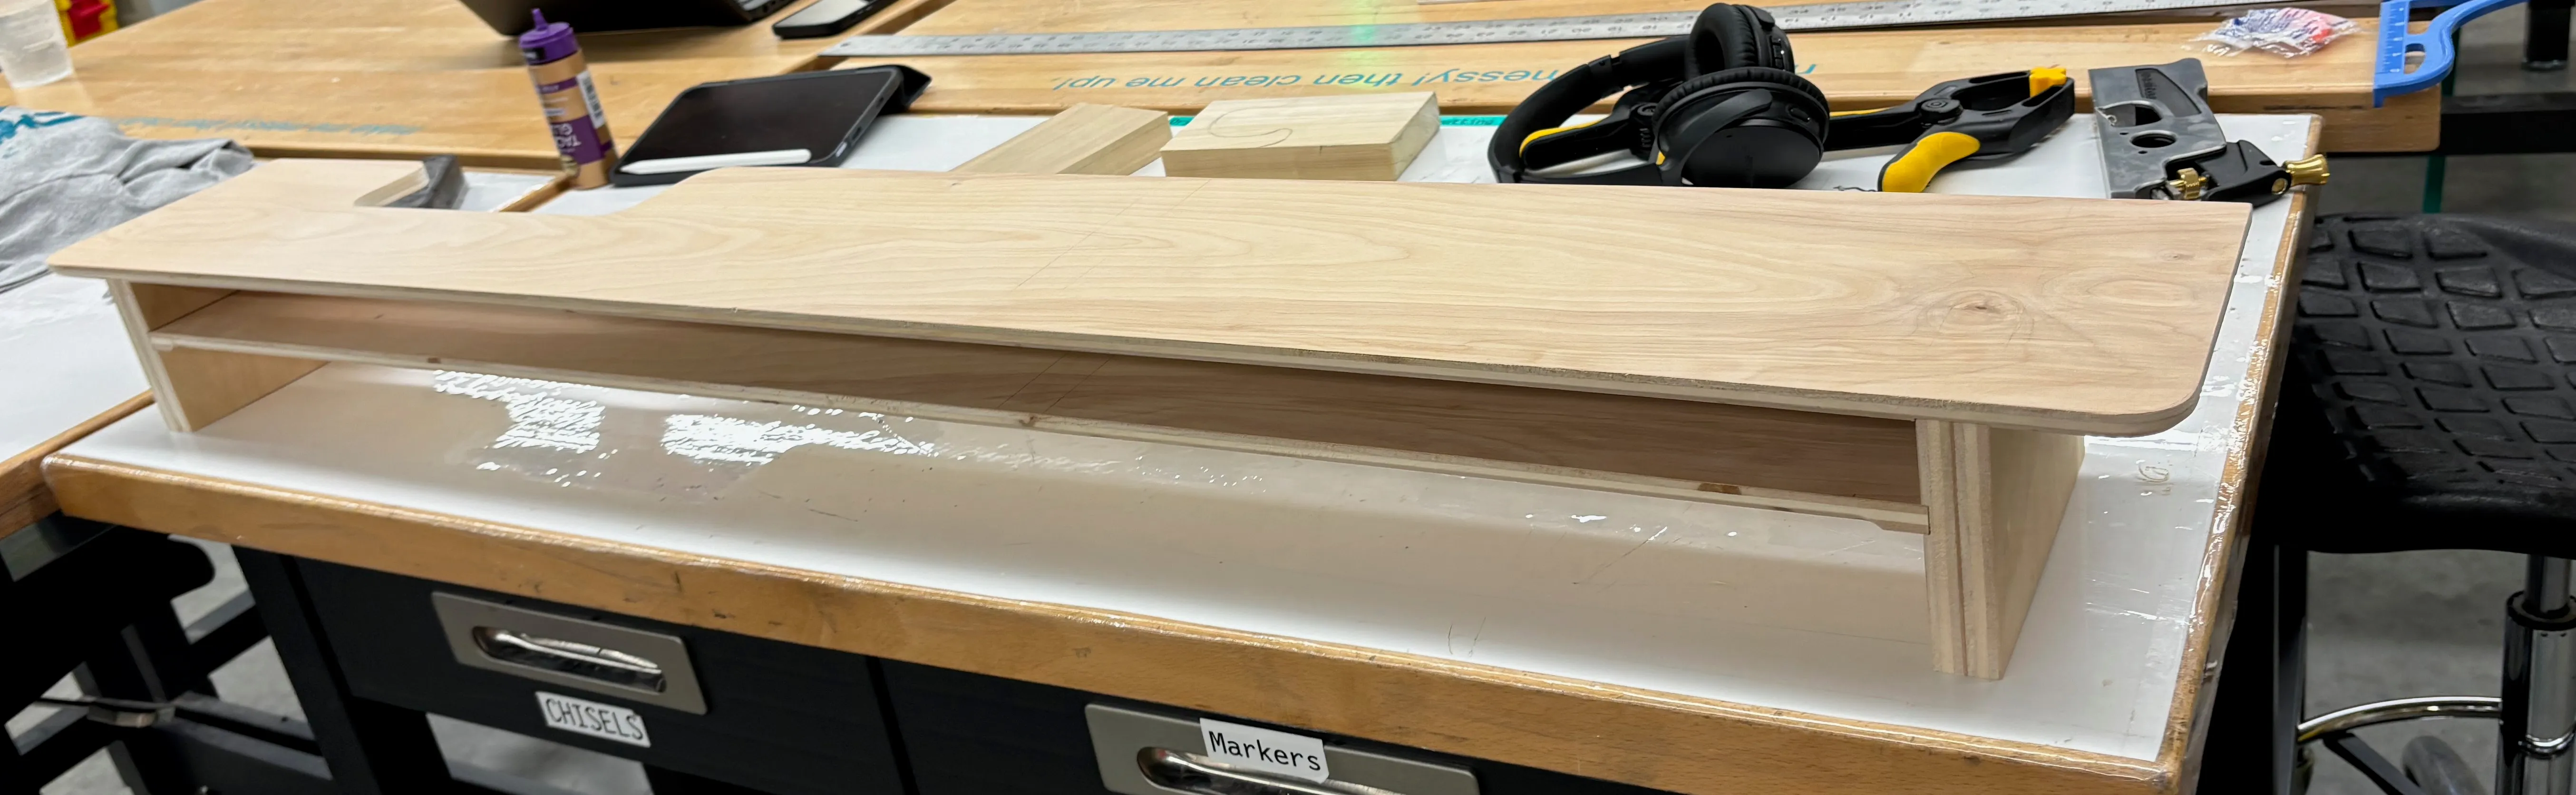
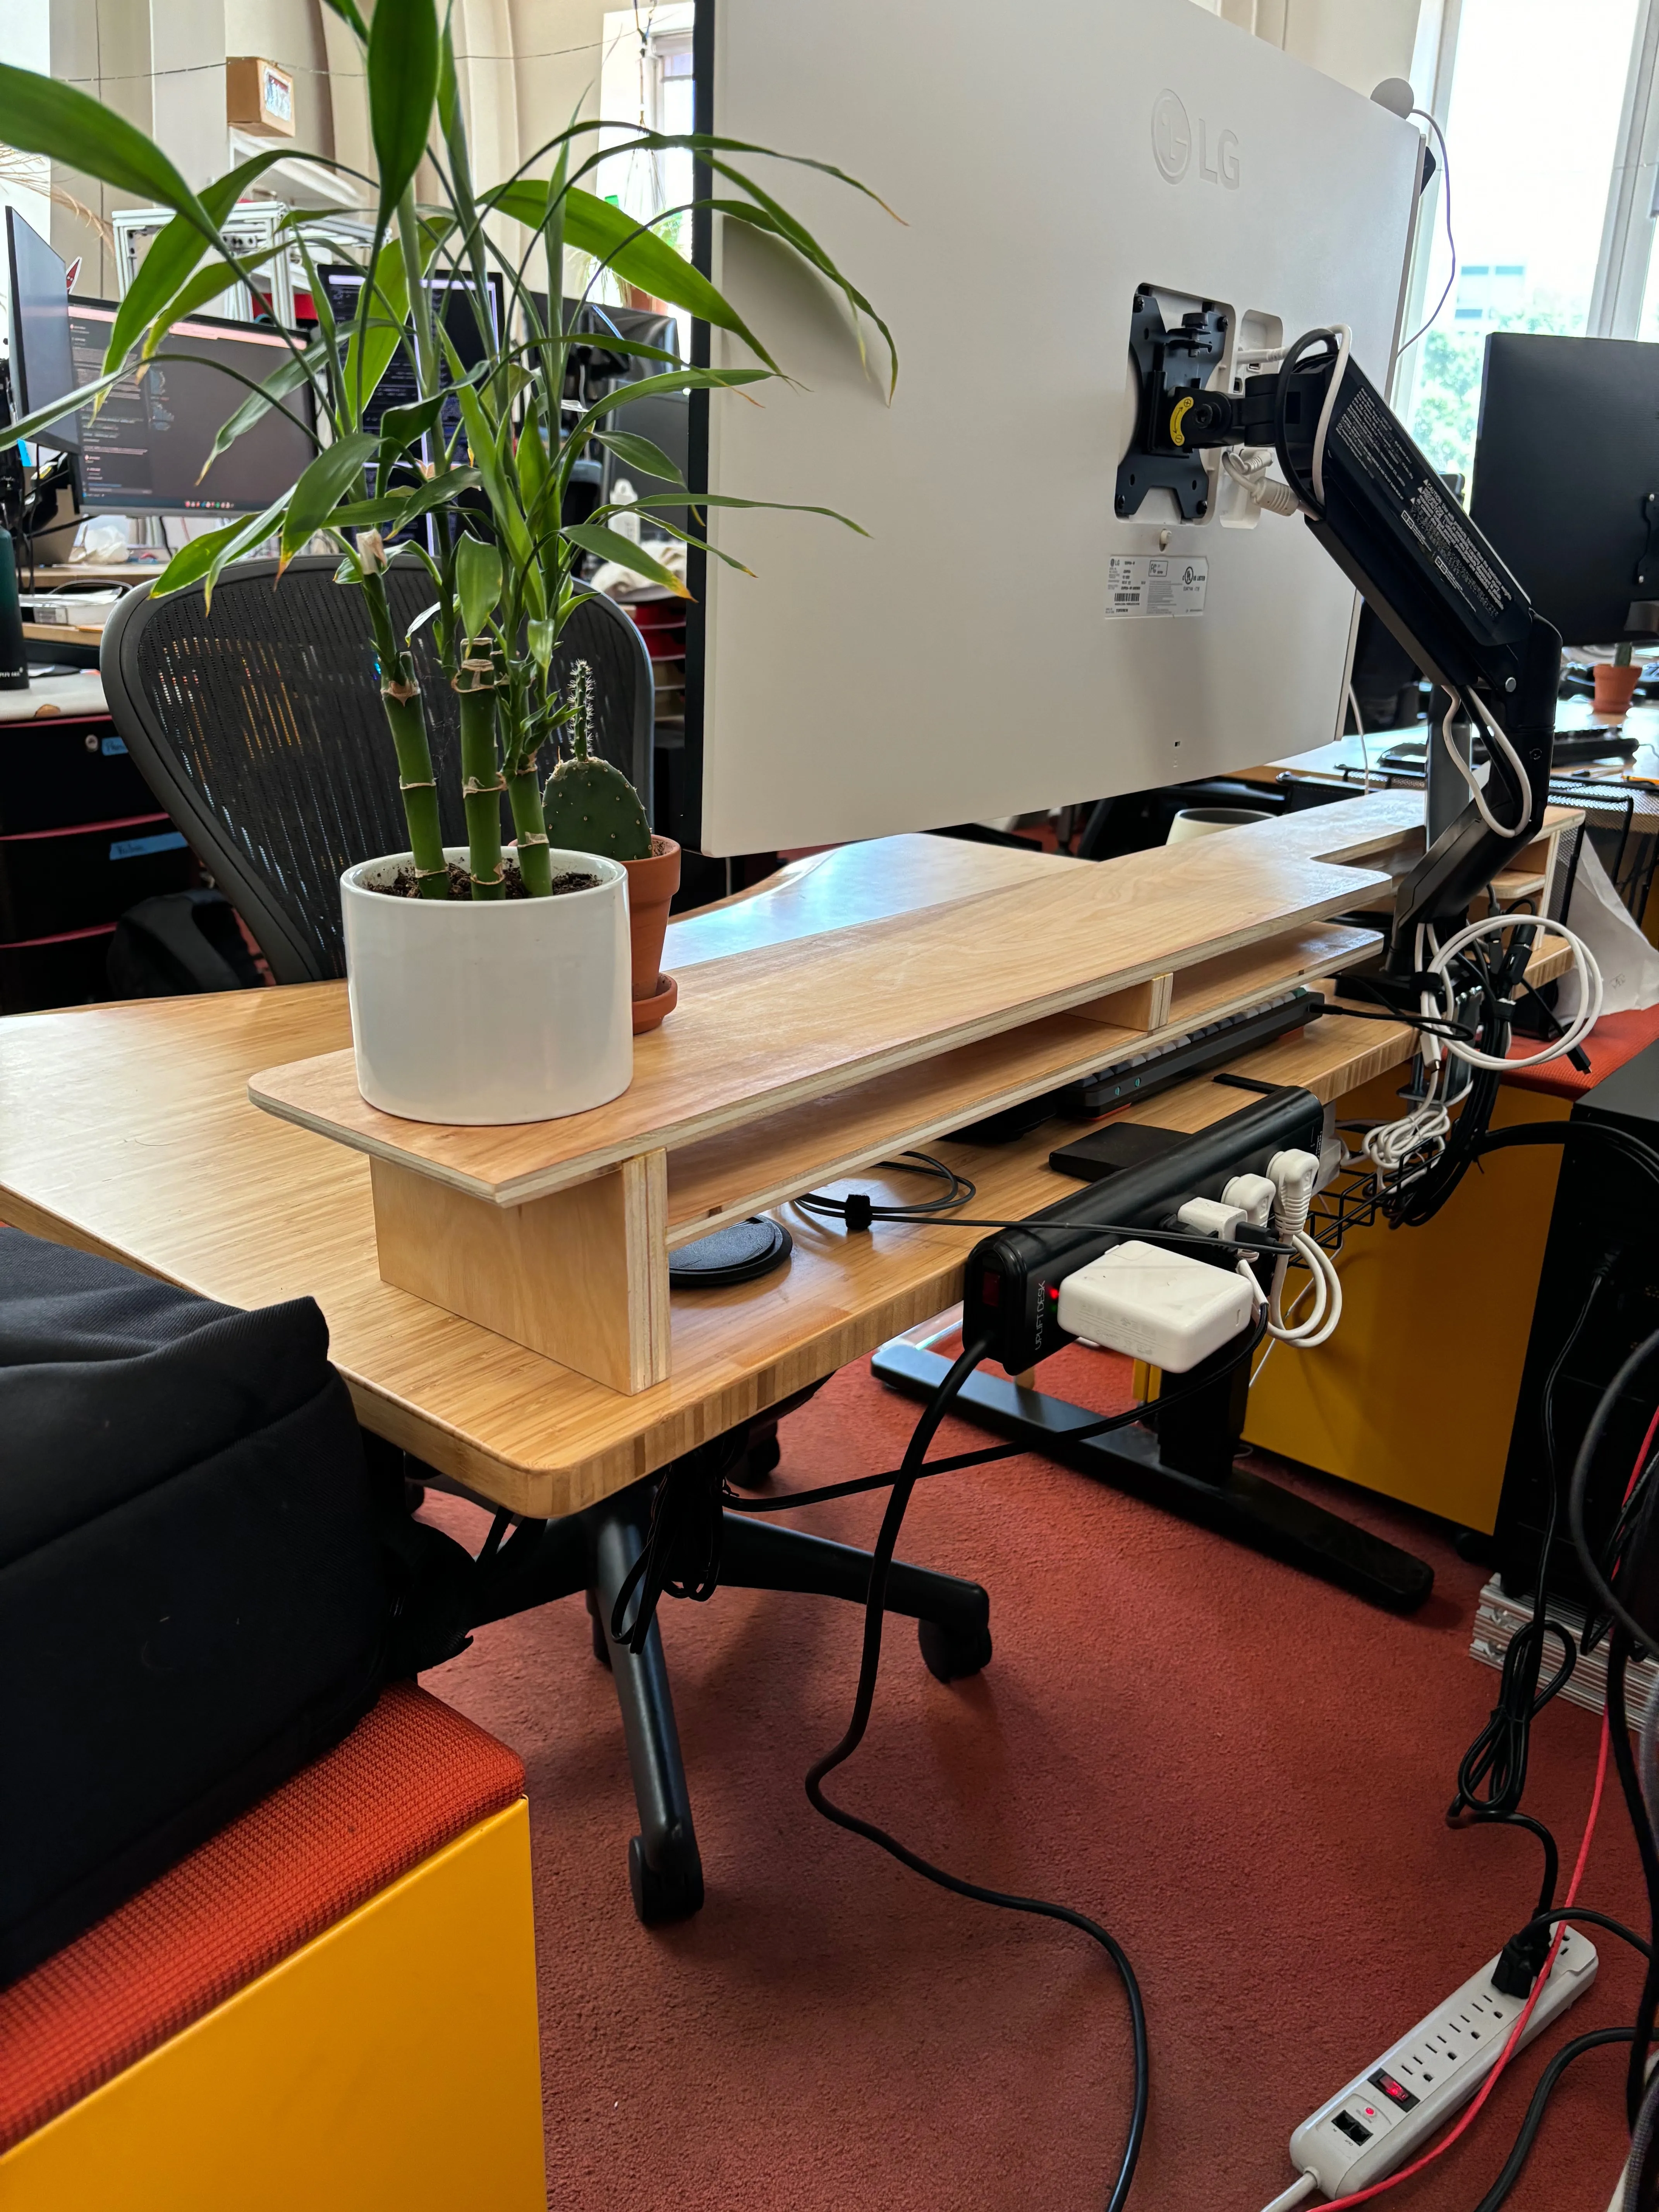
Desk shelf
- Bottom shelf should be high enough to allow my keyboard and mouse to slide under it.
- Right bottom shelf width should fit my laptop.
- Have a cutout for my monitor arms, so the shelf can sit flush with the back of the desk.
- Top shelf should be low enough that items can be put on it and still fit under the monitor.
I originally planned to put low small planter boxes on the top shelf below the monitor, and even bought two of them from HMart for $5 each, but they ended up not having enough breathing room above them, so I decided to scrap that idea.
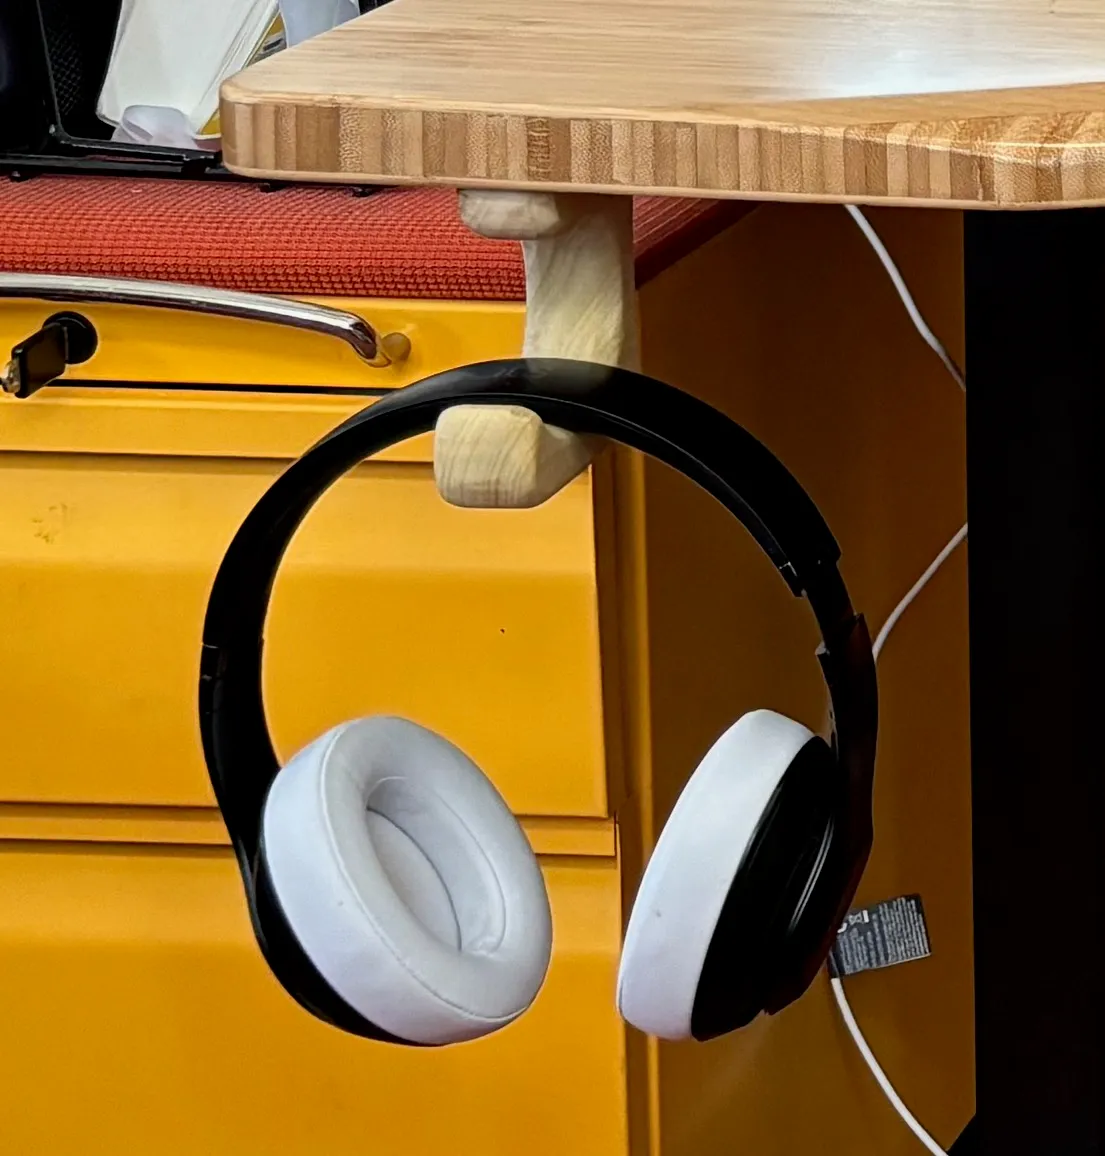
Headphone hook
- Make it out of scrap material.
- Nice to touch.
- Easy to install.
Drawings
Process
Desk shelf
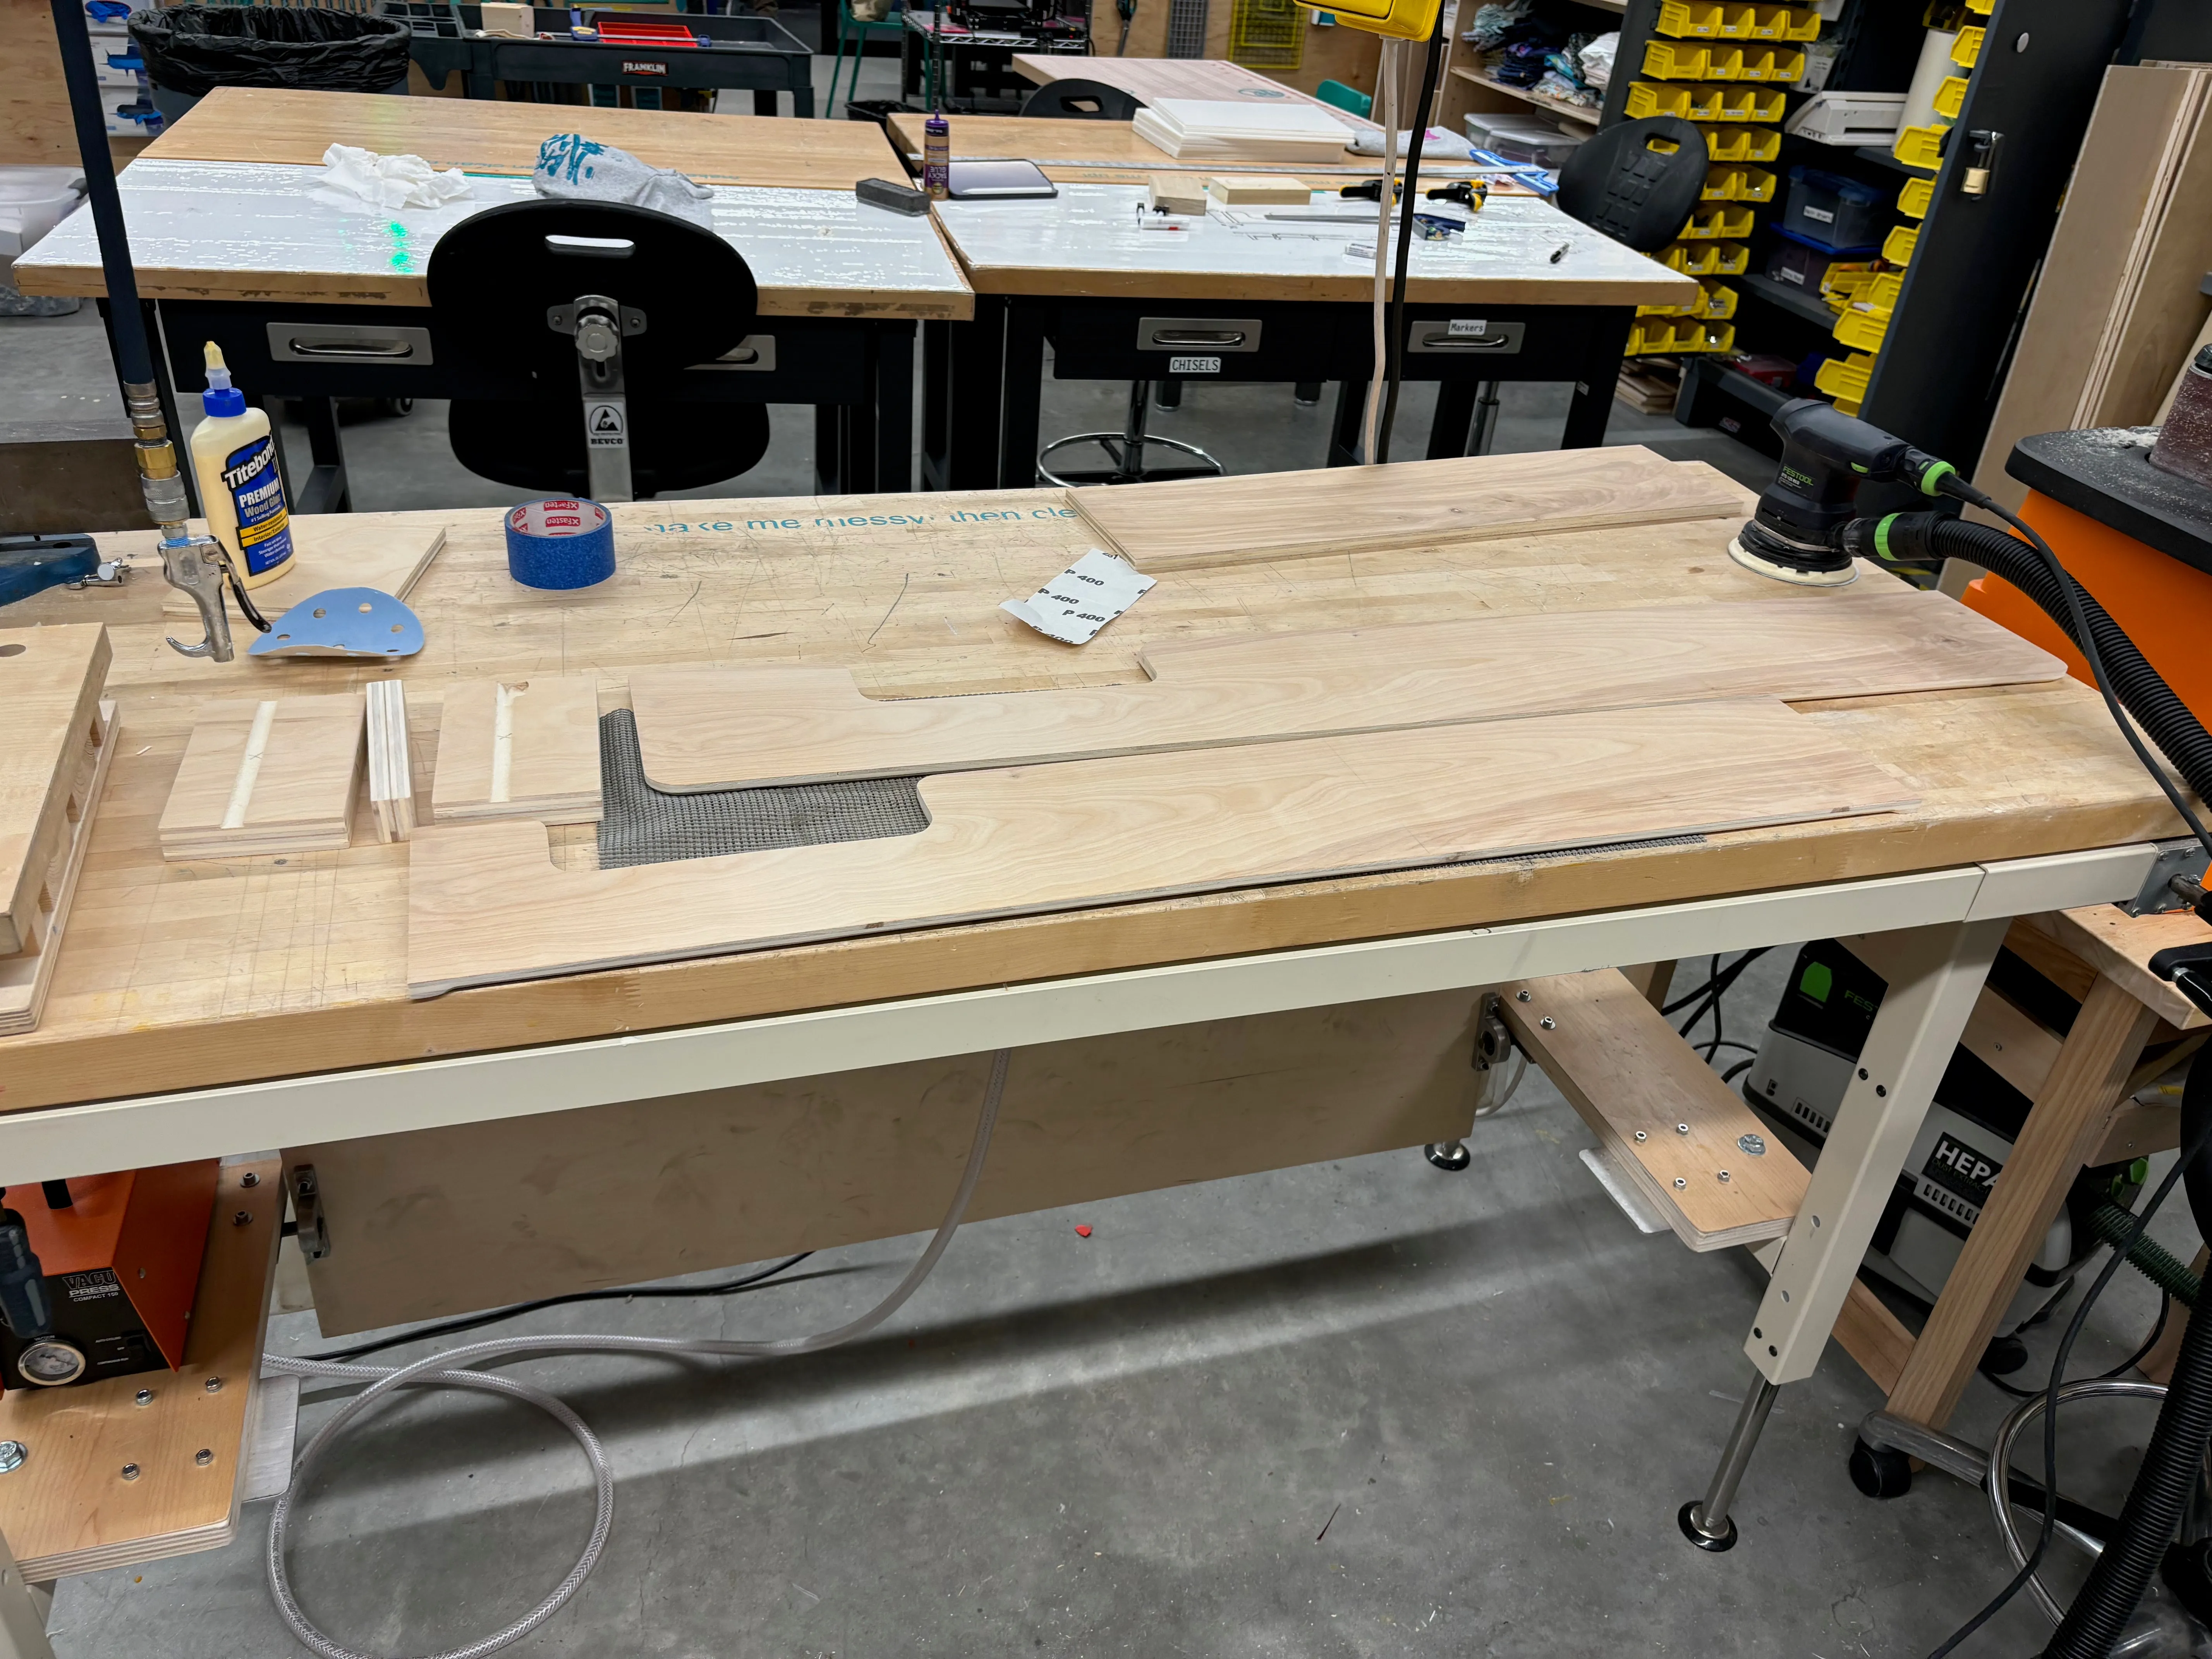
- Figure out the cut list.
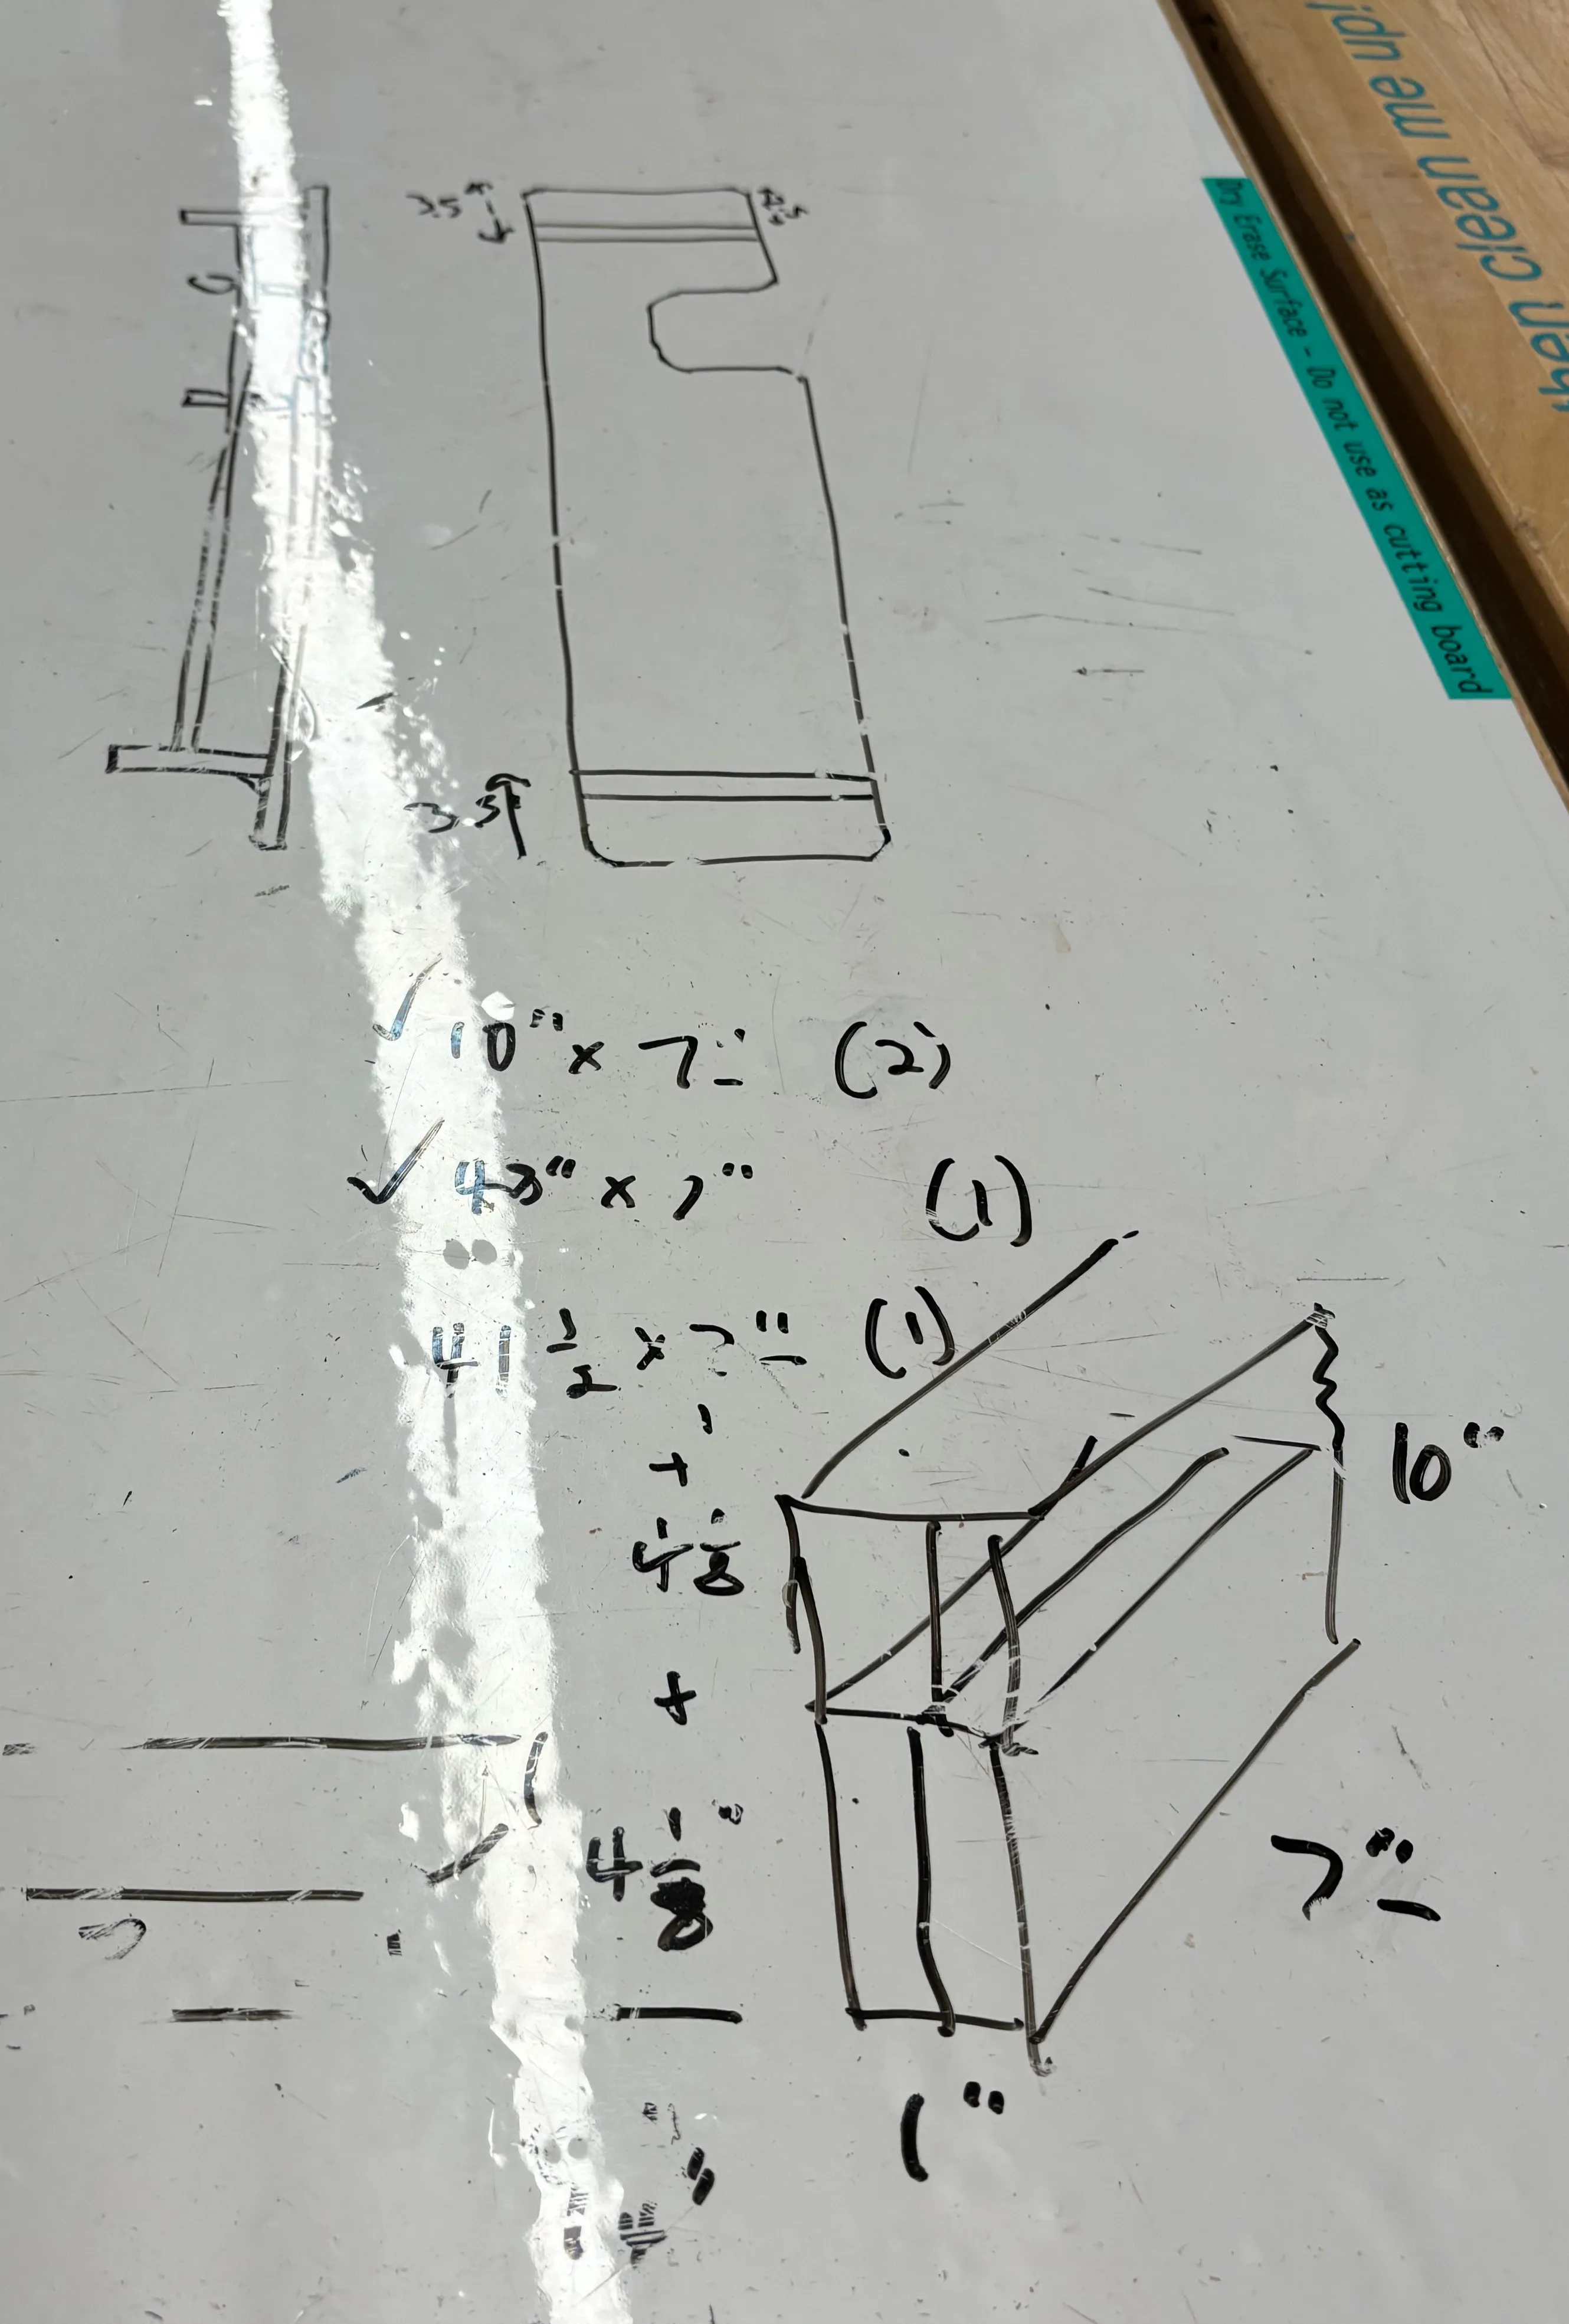
- Cut out rectangles on the table saw
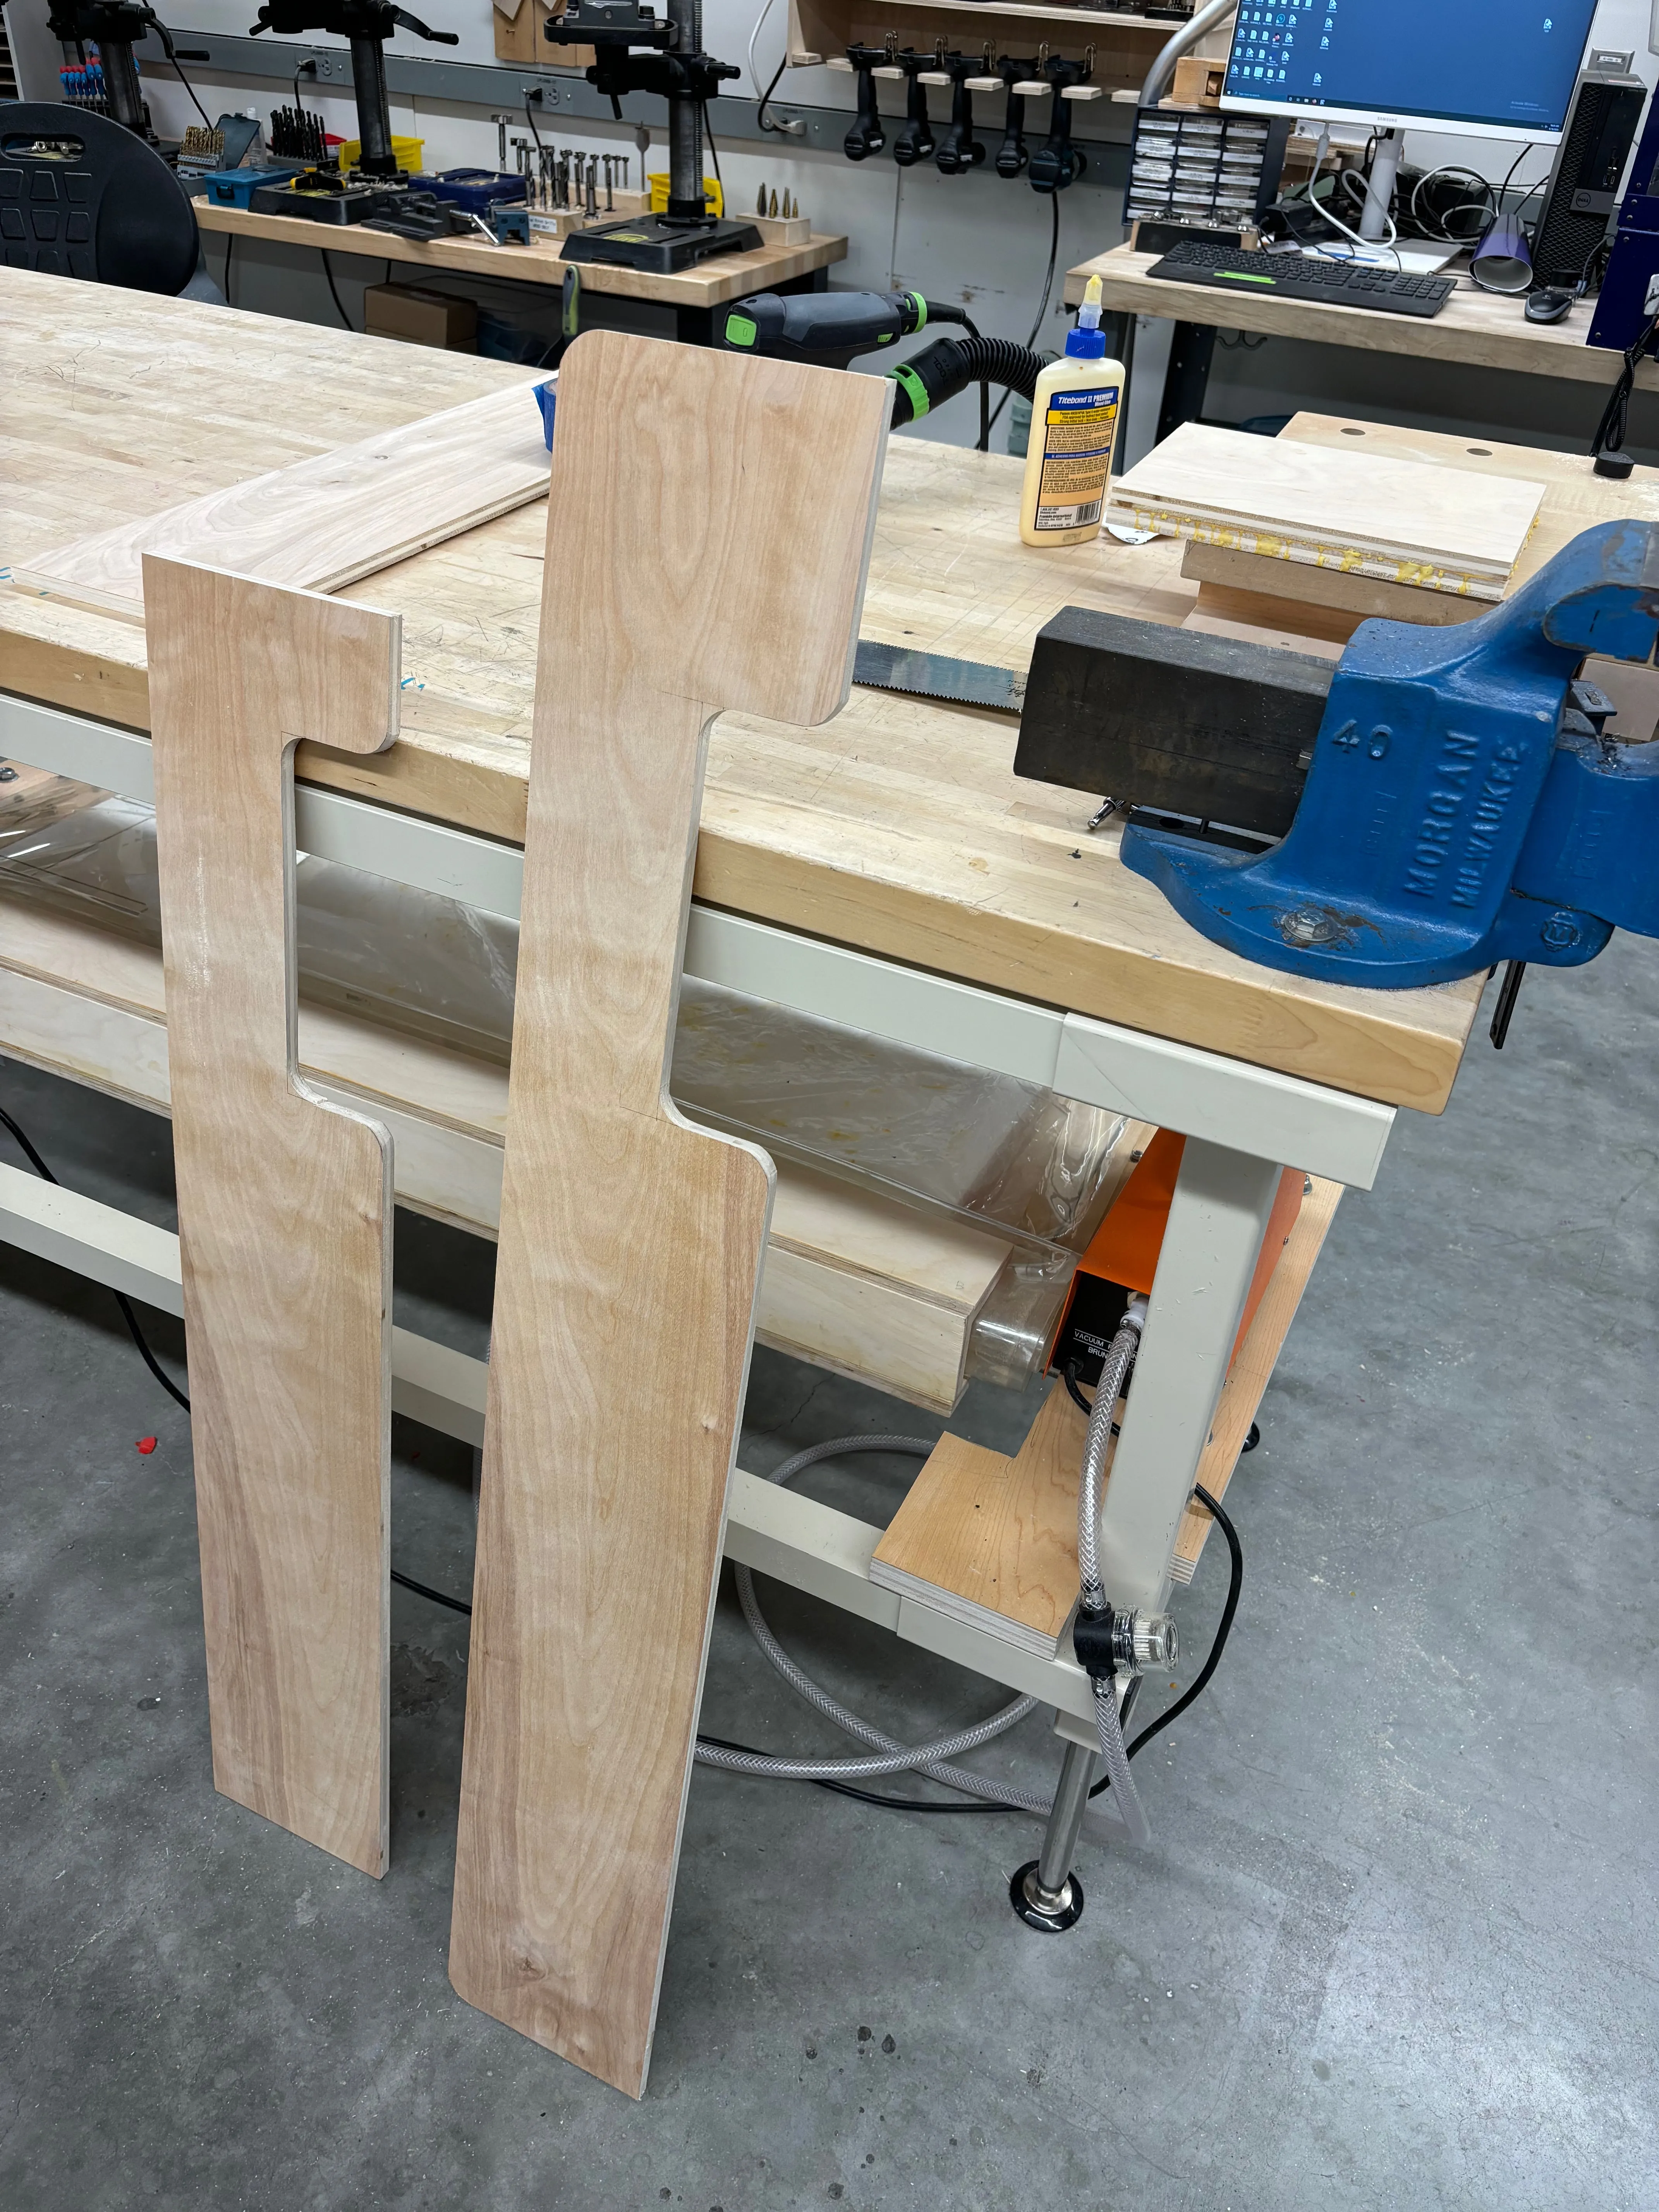
- Glue 1/2” panels together to create 1” plywood for legs.
- Cut out leg pieces. Make sure the glue is dry before using table saw, or you’ll trip the SawStop.
- Cut out cut-outs on the bandsaw then use the orbital sander to clean up the cuts.
- Use router table to add chamfers to bottom edges. Note that for the middle shelf I only started the chamfer an inch in from the edge, so it won’t conflict with the dados on the legs that it slides into.
- Test fit parts.
- Finish-sand parts with the orbital sander. (Rough sanding was done with 120 grit sandpaper, and finish sanding was done with 220.)
- Apply pre-finish to all parts (I’m using wipe-on poly). Need to remember not to apply finish on the sections that you are going to glue.
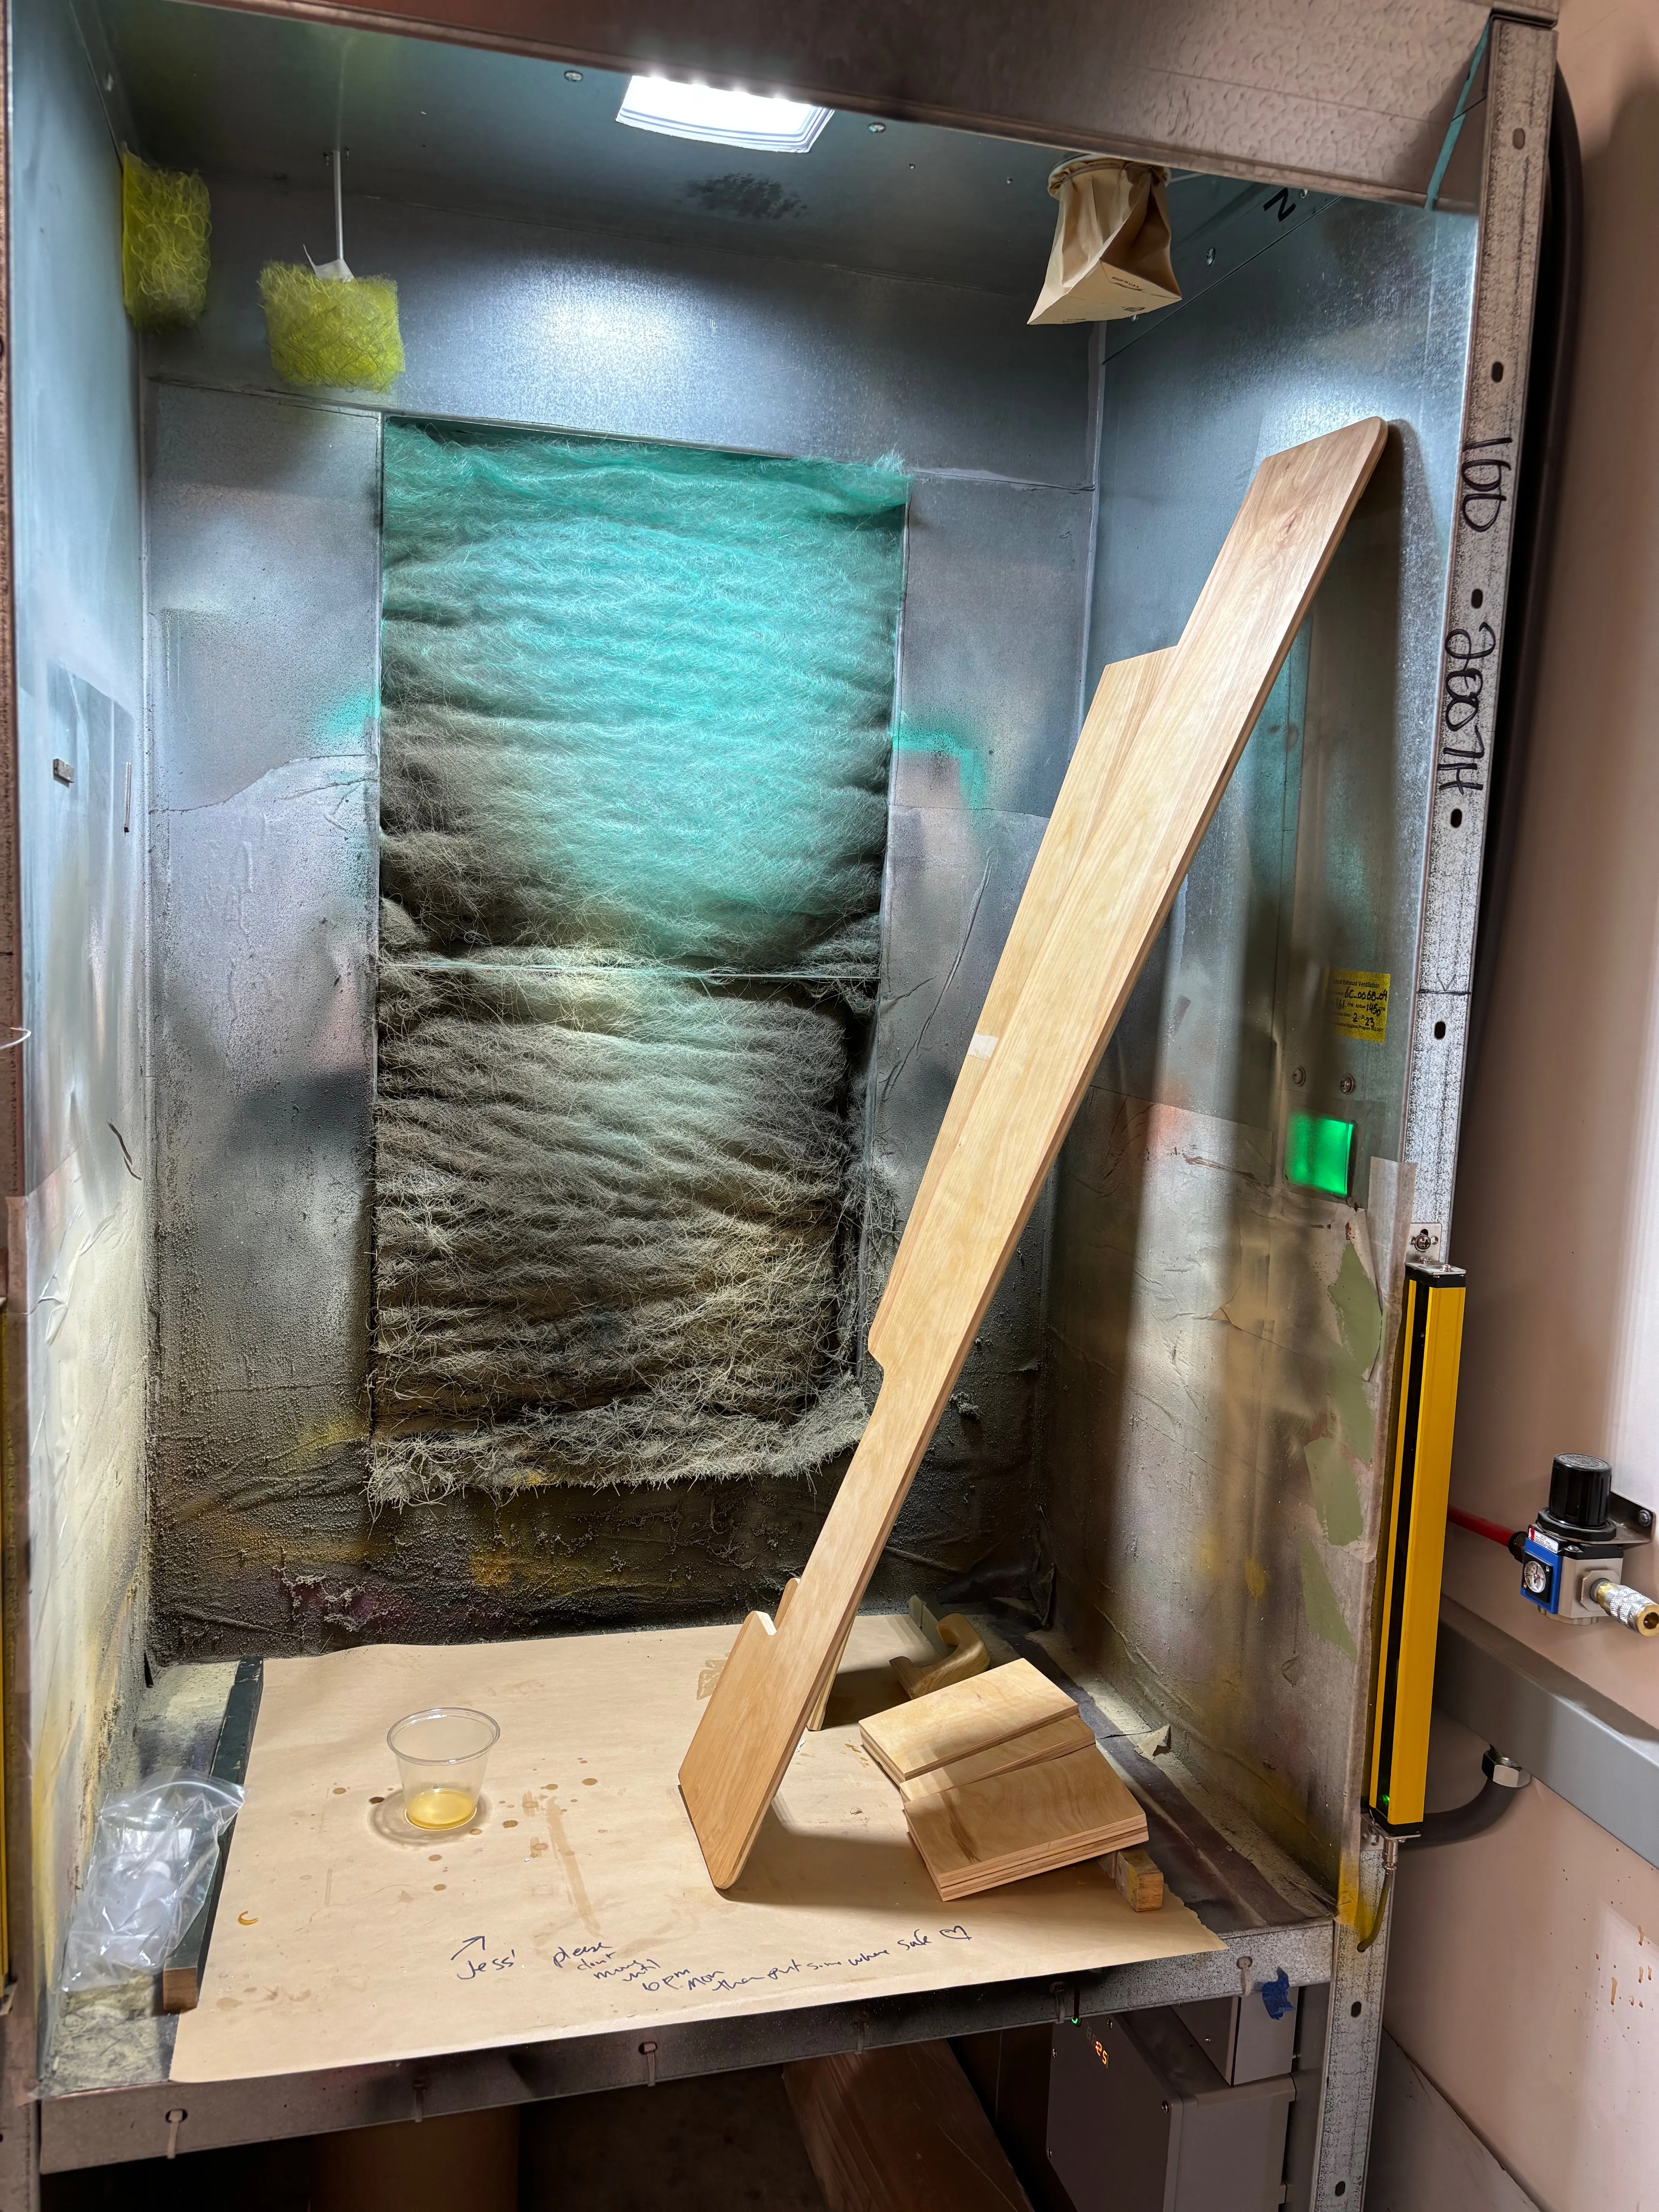
- Buff out parts to knock down the grain that was raised by the finish.
- Glue up parts.
Headphone hook
- Find an appropriately sized piece of scrap wood.
- Draw curves in pencil.
- Drill holes while the block is still rectangular. Drilled a larger hole through the bottom that will allow the shaft of the screwdriver to reach through the piece and screw in the screw to the top piece.
- Cut out shape on the bandsaw.
- Rough sand.
- Round over edges on the router table. The piece at this point was kind of small, so I screwed it to a larger piece before routing.
- Finish sand.
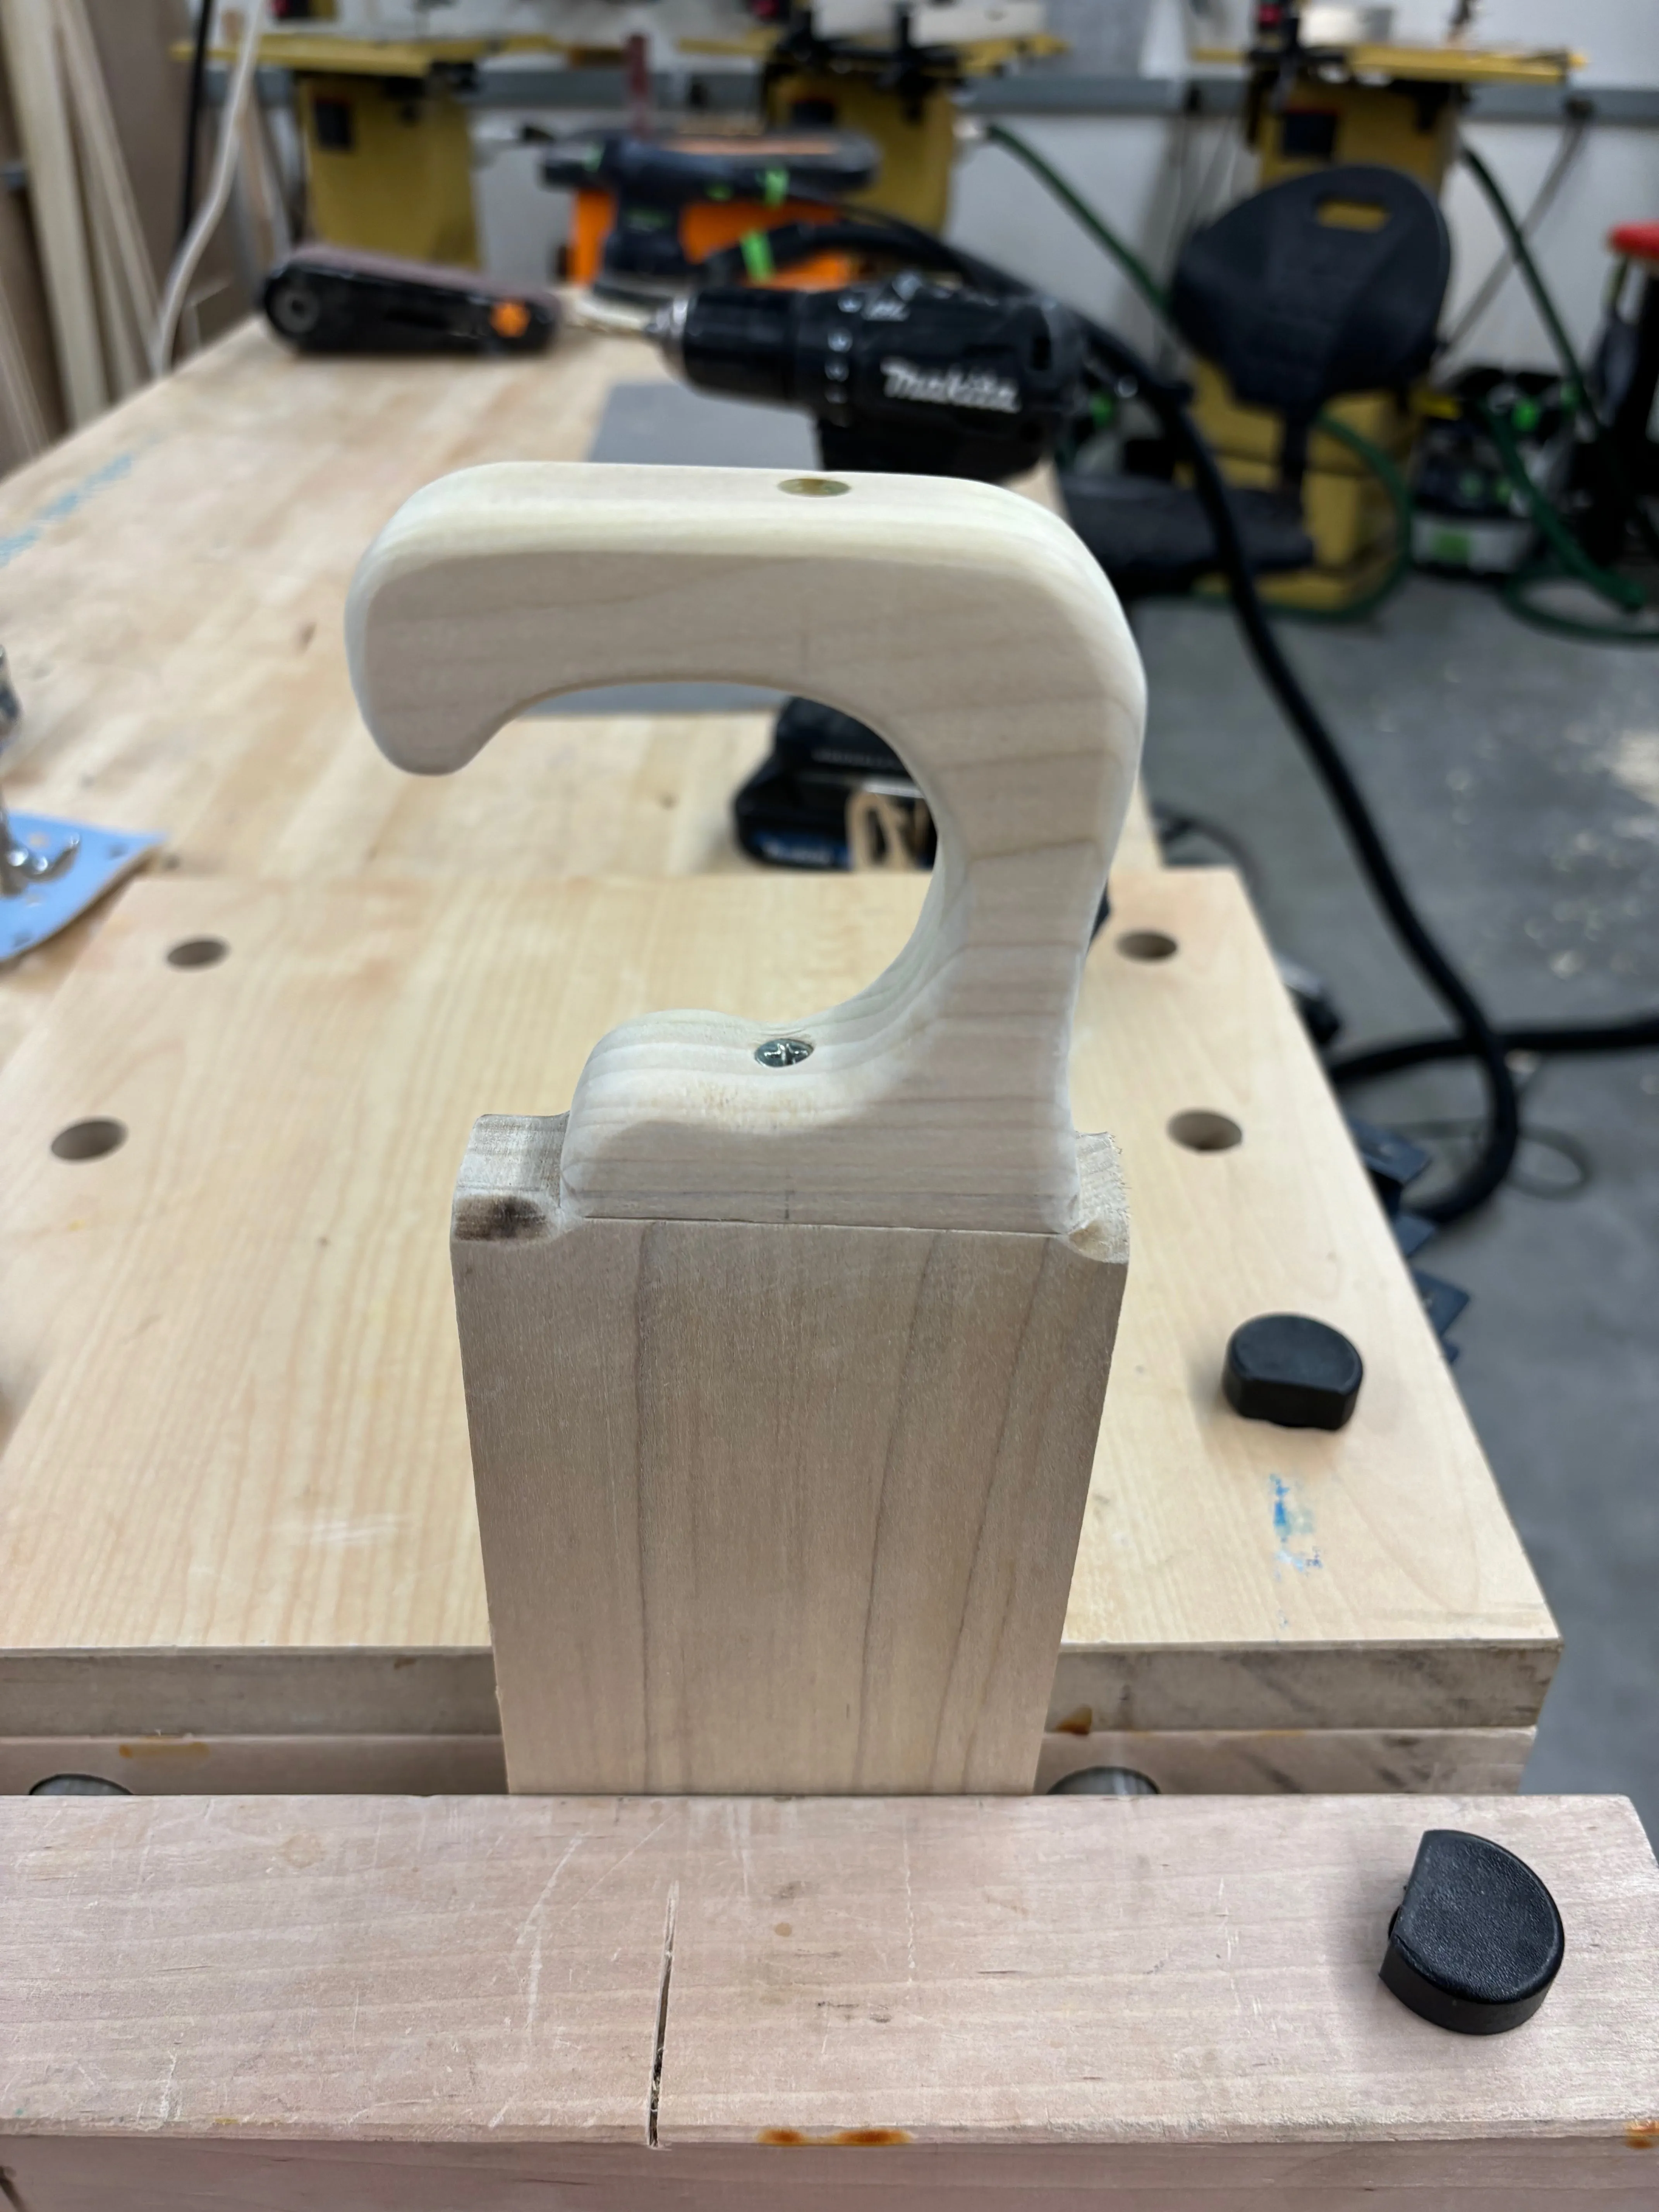
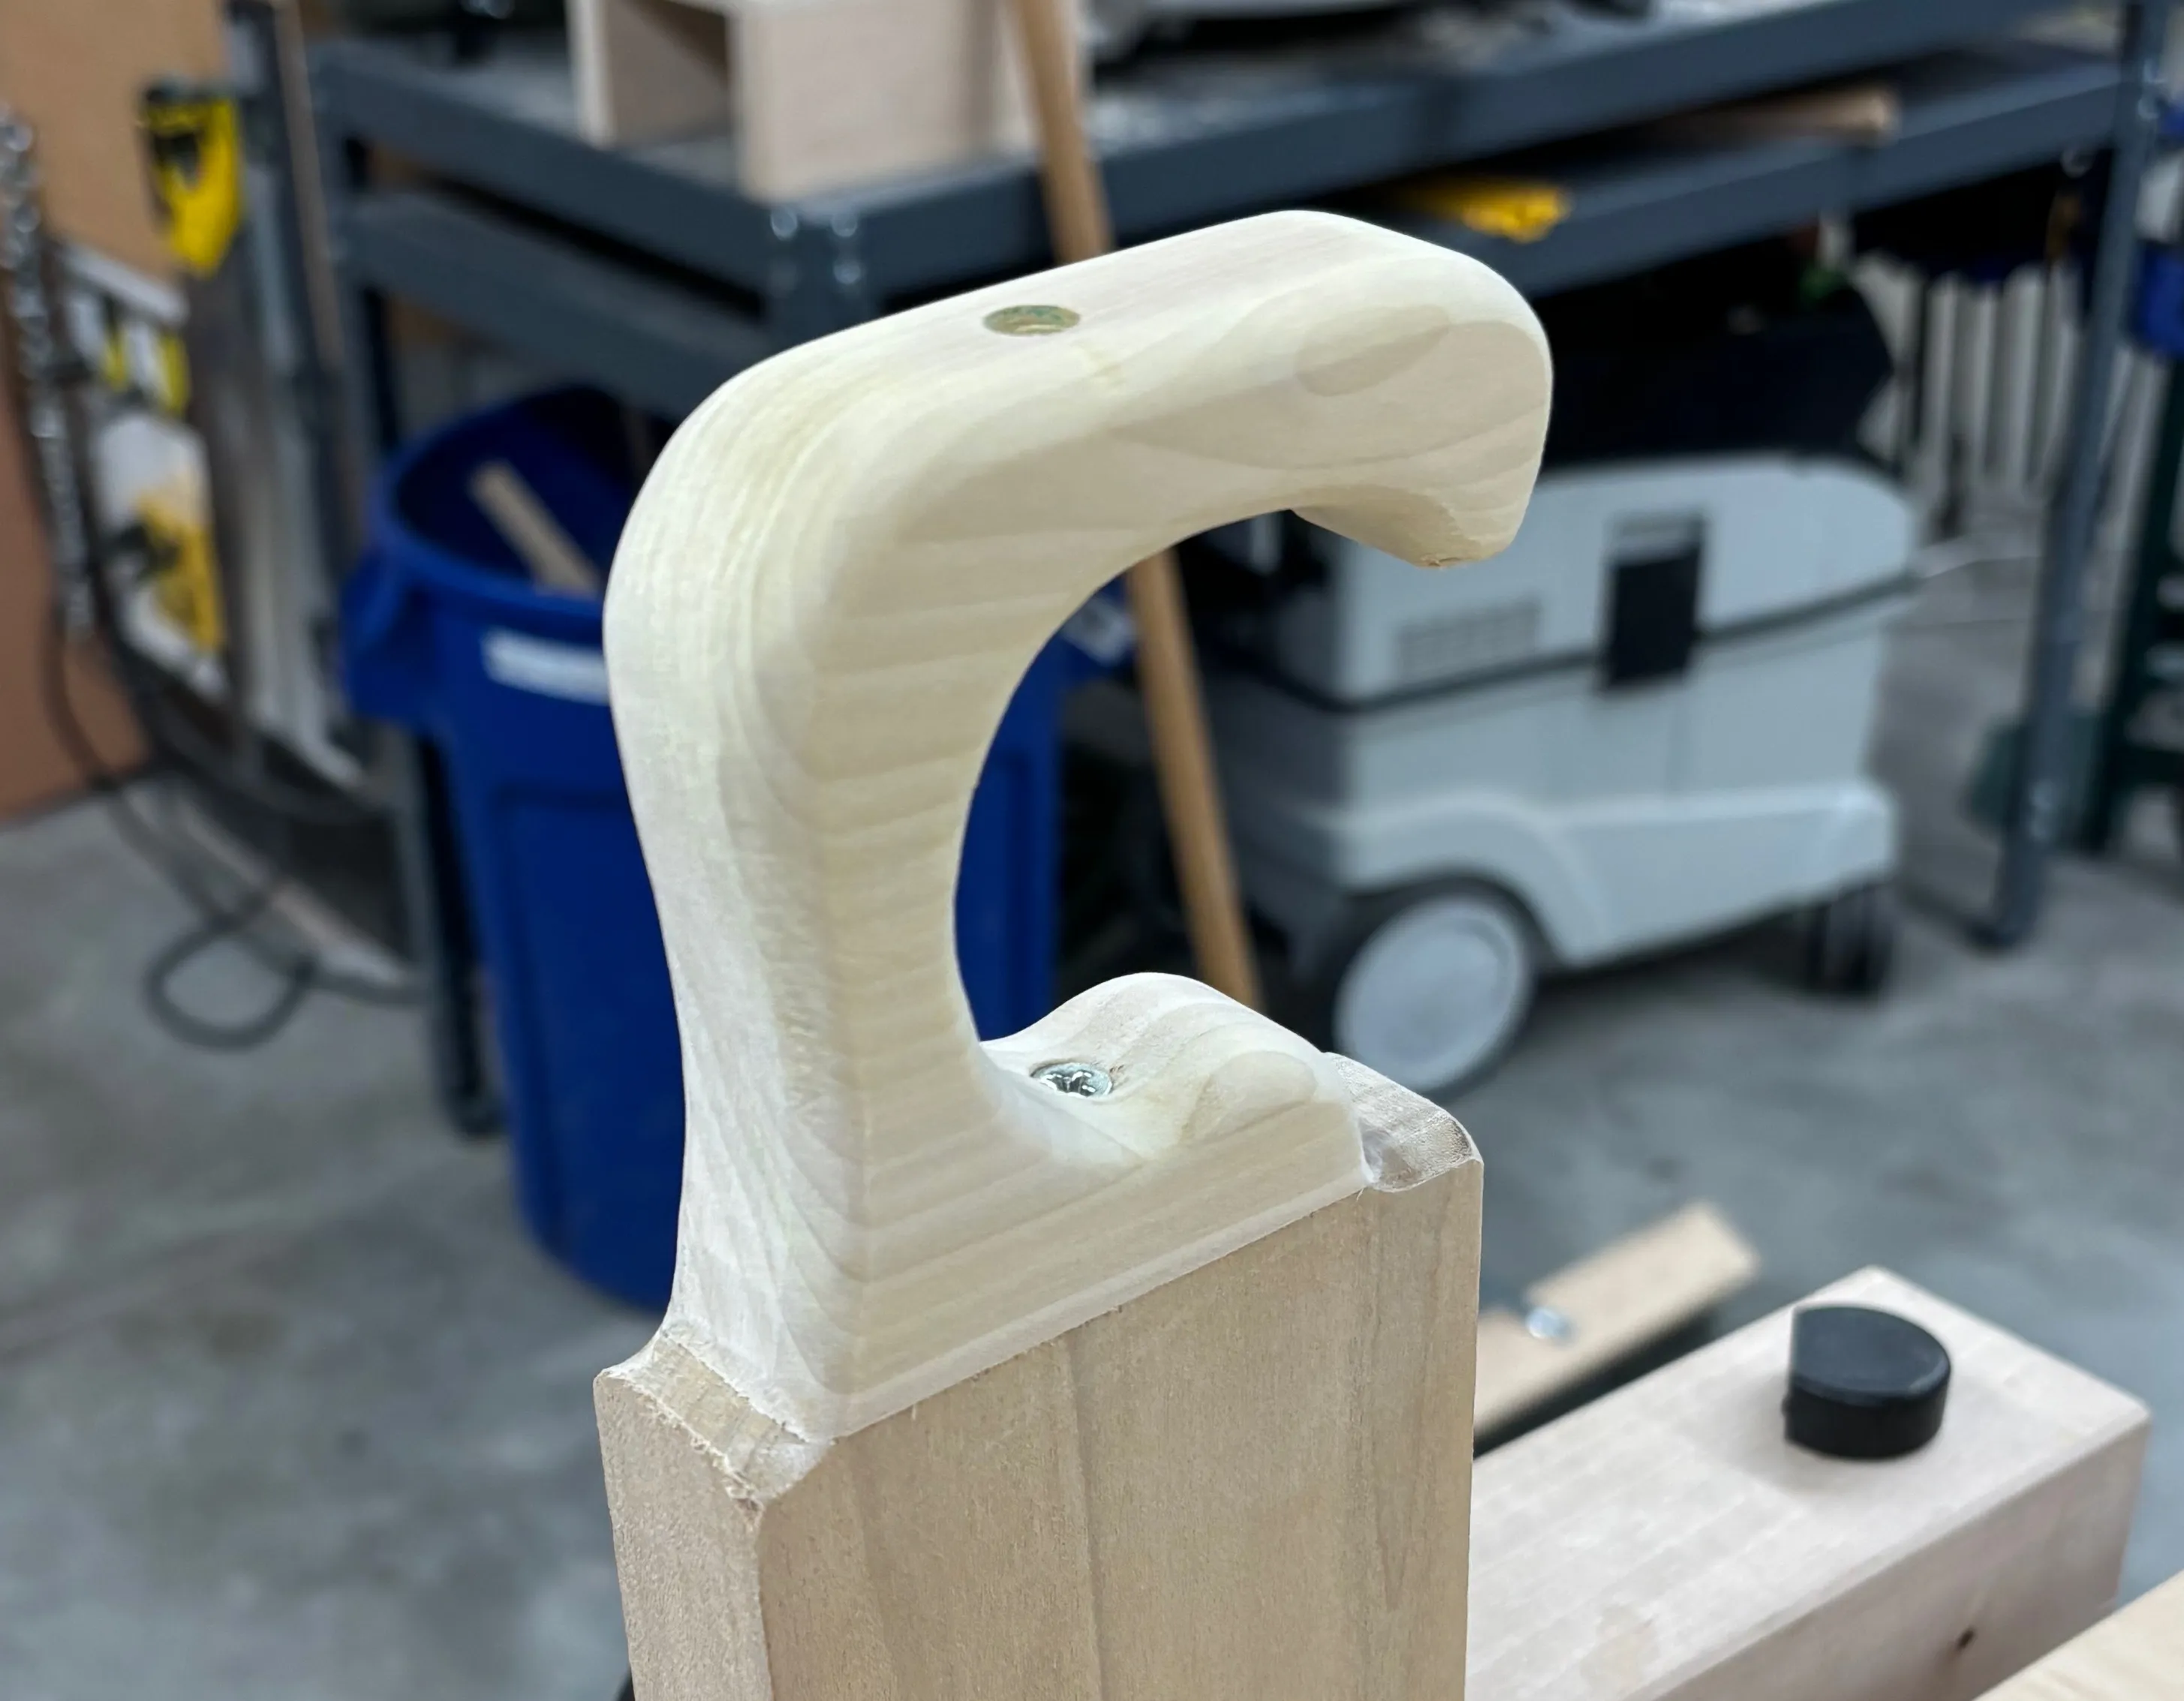
- Apply finish.
- Buff out finish.
Final product
Close up of the headphone hook.
Conclusion
Overall, very satisfied with how things turned out :) The color of the shelf and hook match the table top really well. Also, the shelf used a single 4’x2’ piece of 1/2” plywood ($22 bought from Metropolis) with very little left over. I really like the edge details. Was slightly concerned about the strength, given the long span and the cutout, but especially since the monitor isn’t sitting on it, it ended up being plenty strong enough. We’ll see if it sags over time.