Context
The building manager had been complaining about us leaving our shoes outside our front door in the front stairwell. We have a couple of shoe racks by our backdoor in our little “mud room” but nothing by our front door because there isn’t a lot of space to put one. We could have bought something from Ikea or Facebook Marketplace, but we had quite a specific idea of features we wanted, so it would have been hard to find something that met all the requirements and fit our space exactly.
Requirements
- Be shallow, so it doesn’t take up too much space in the corridor
- Prevent dirt and water from dripping onto shoes below
- Be able to store shoes of various sizes/heights
- Have a surface for keys/letters
- Single step operation to put shoes away (or we wouldn’t do it)
- Good airflow for drying wet shoes
- Able to easily vacuum under the rack
- Have each shelf be easy to clean
Design
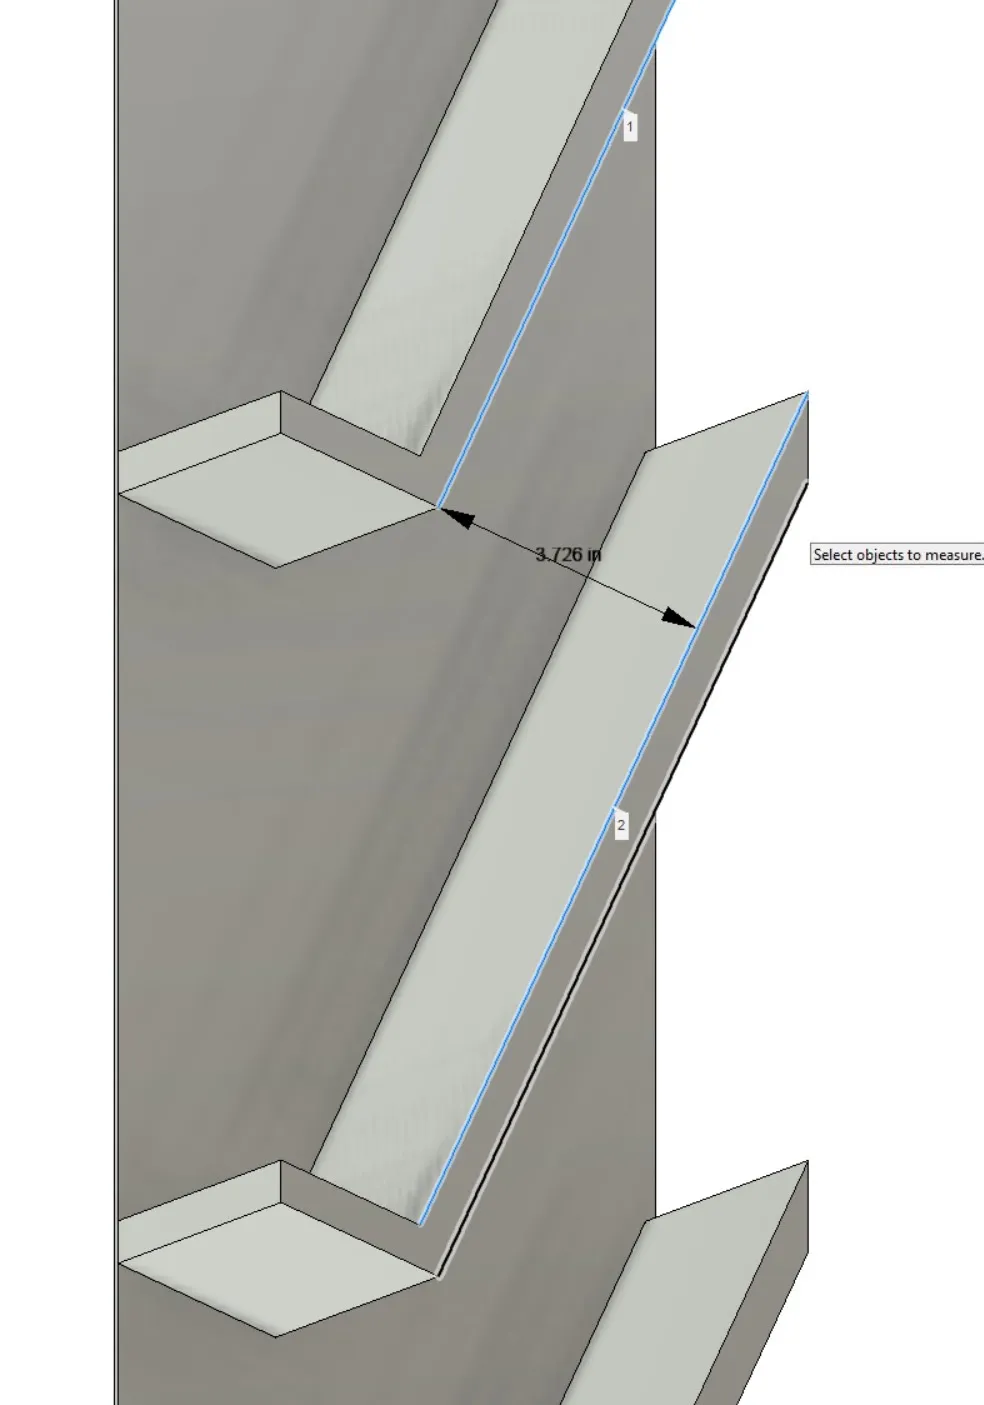
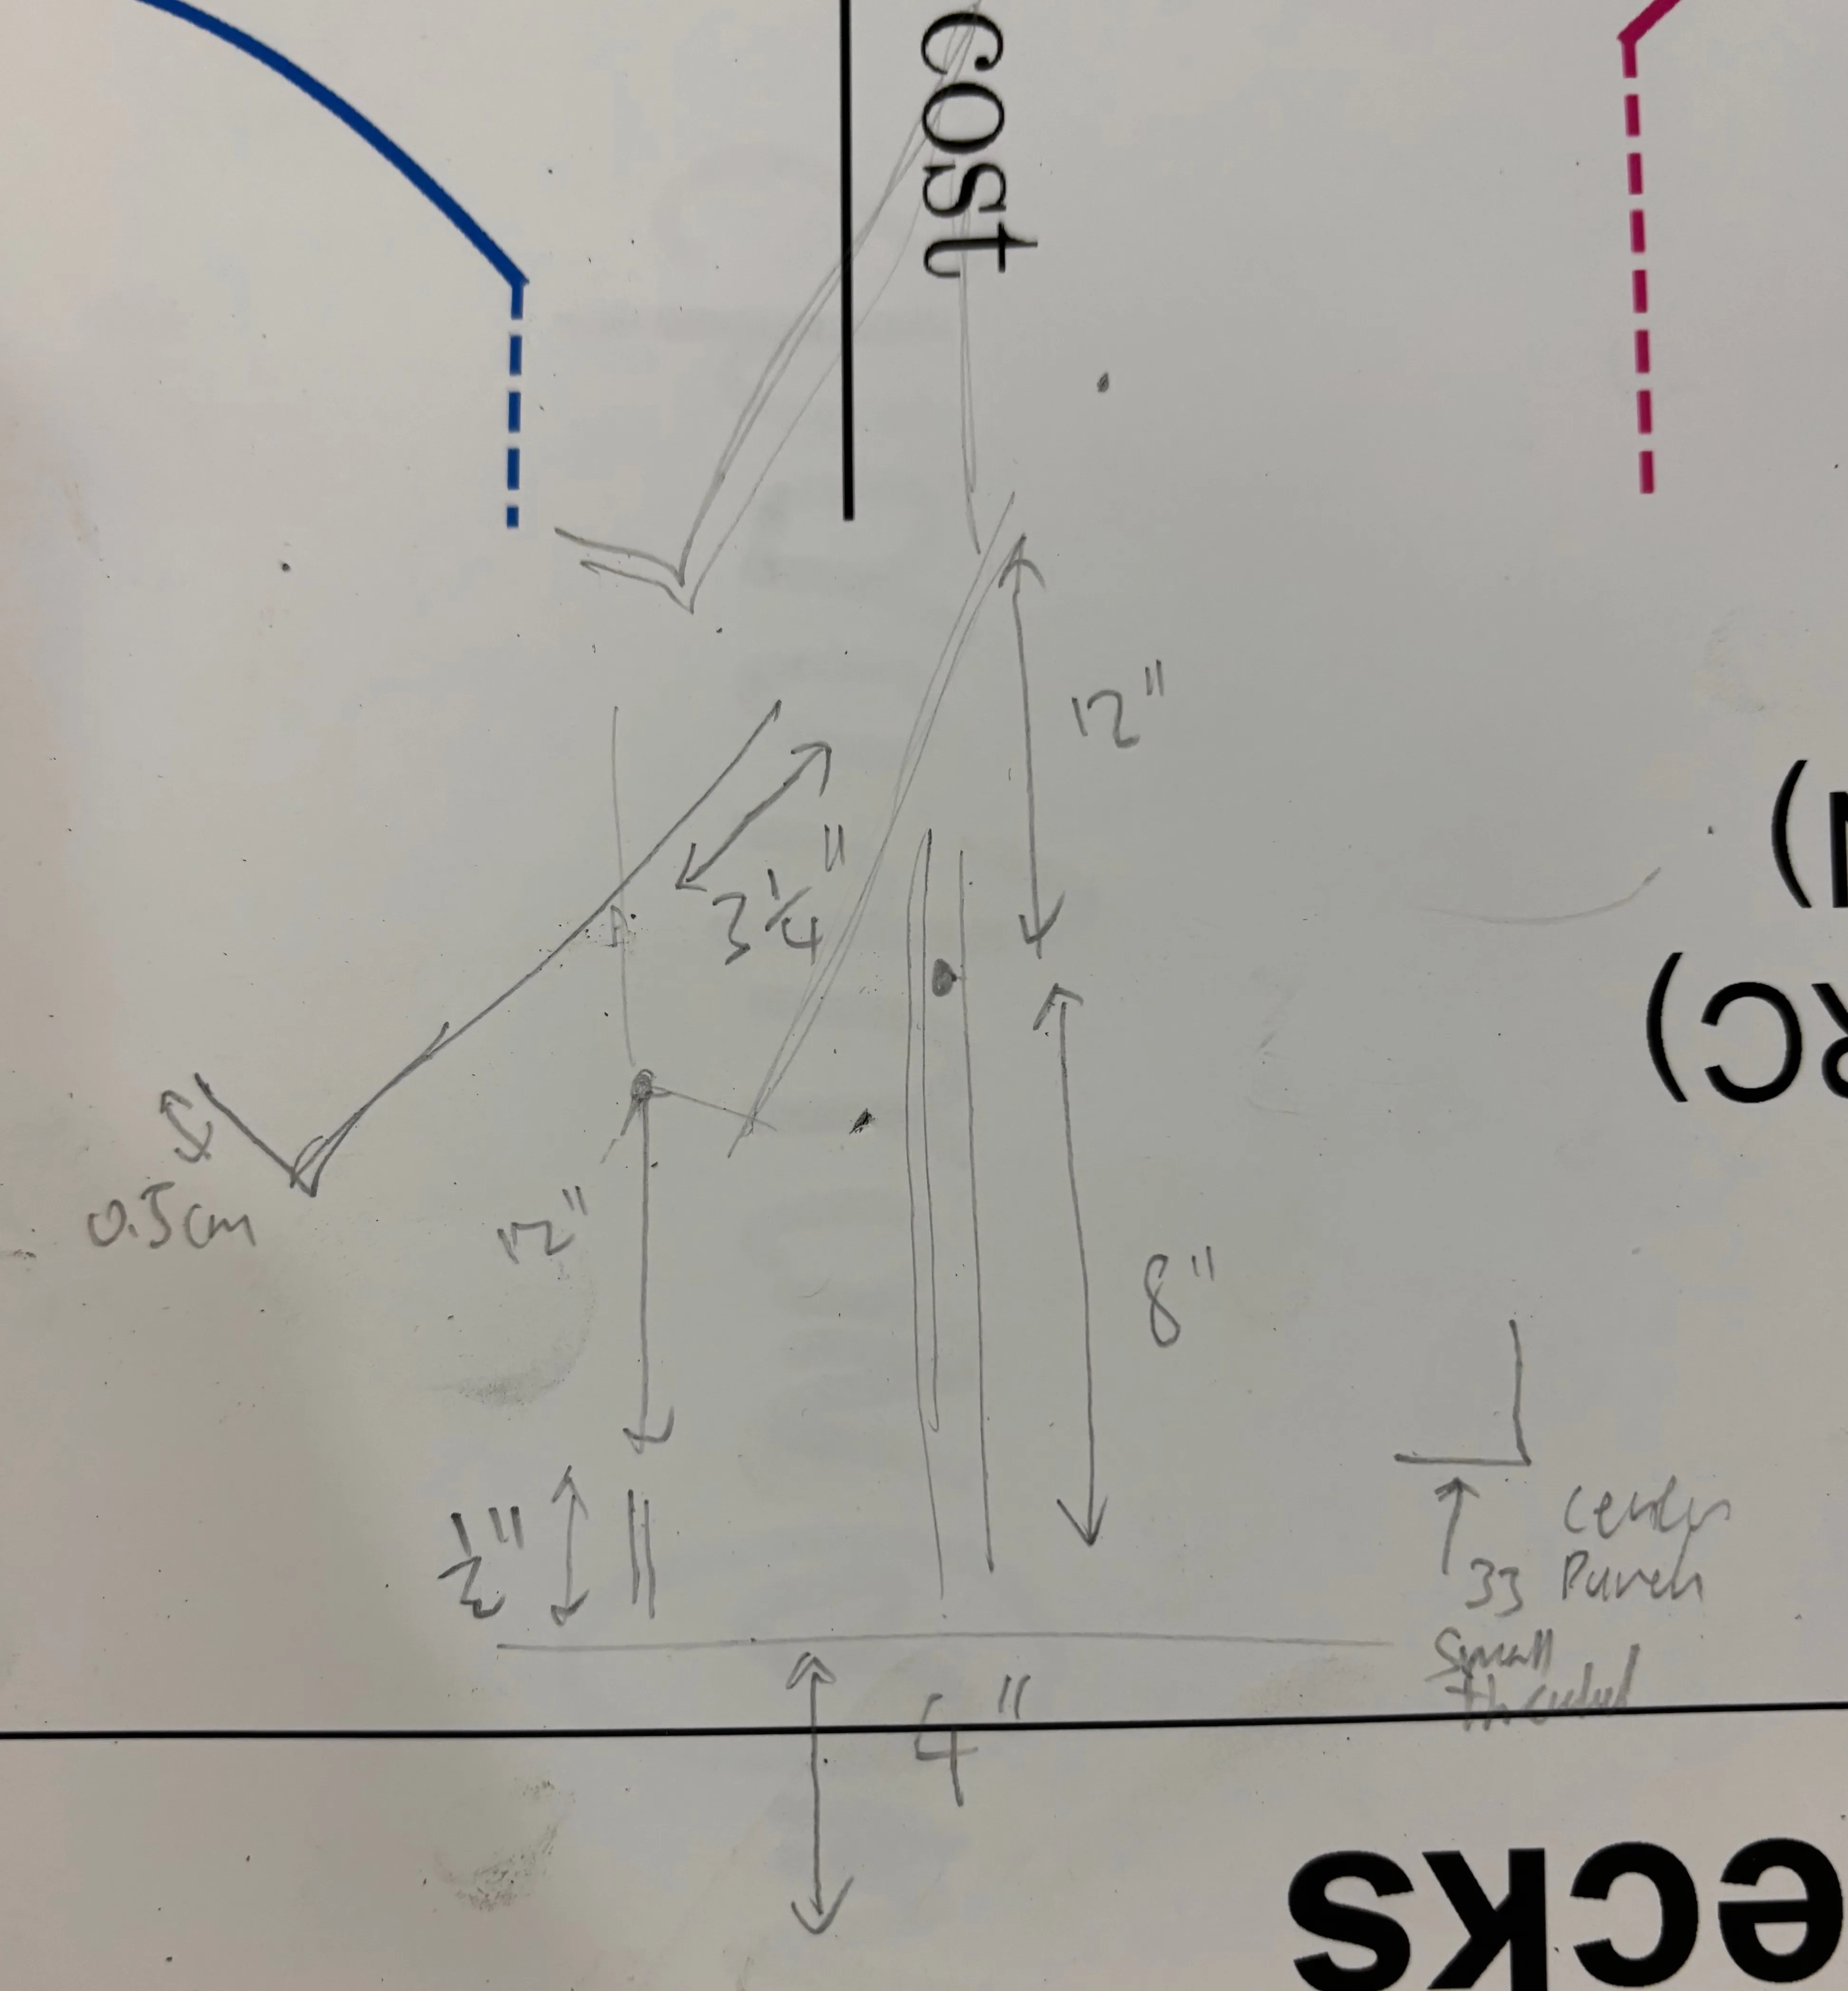
After playing around in CAD for a few hours this is what I came up with:
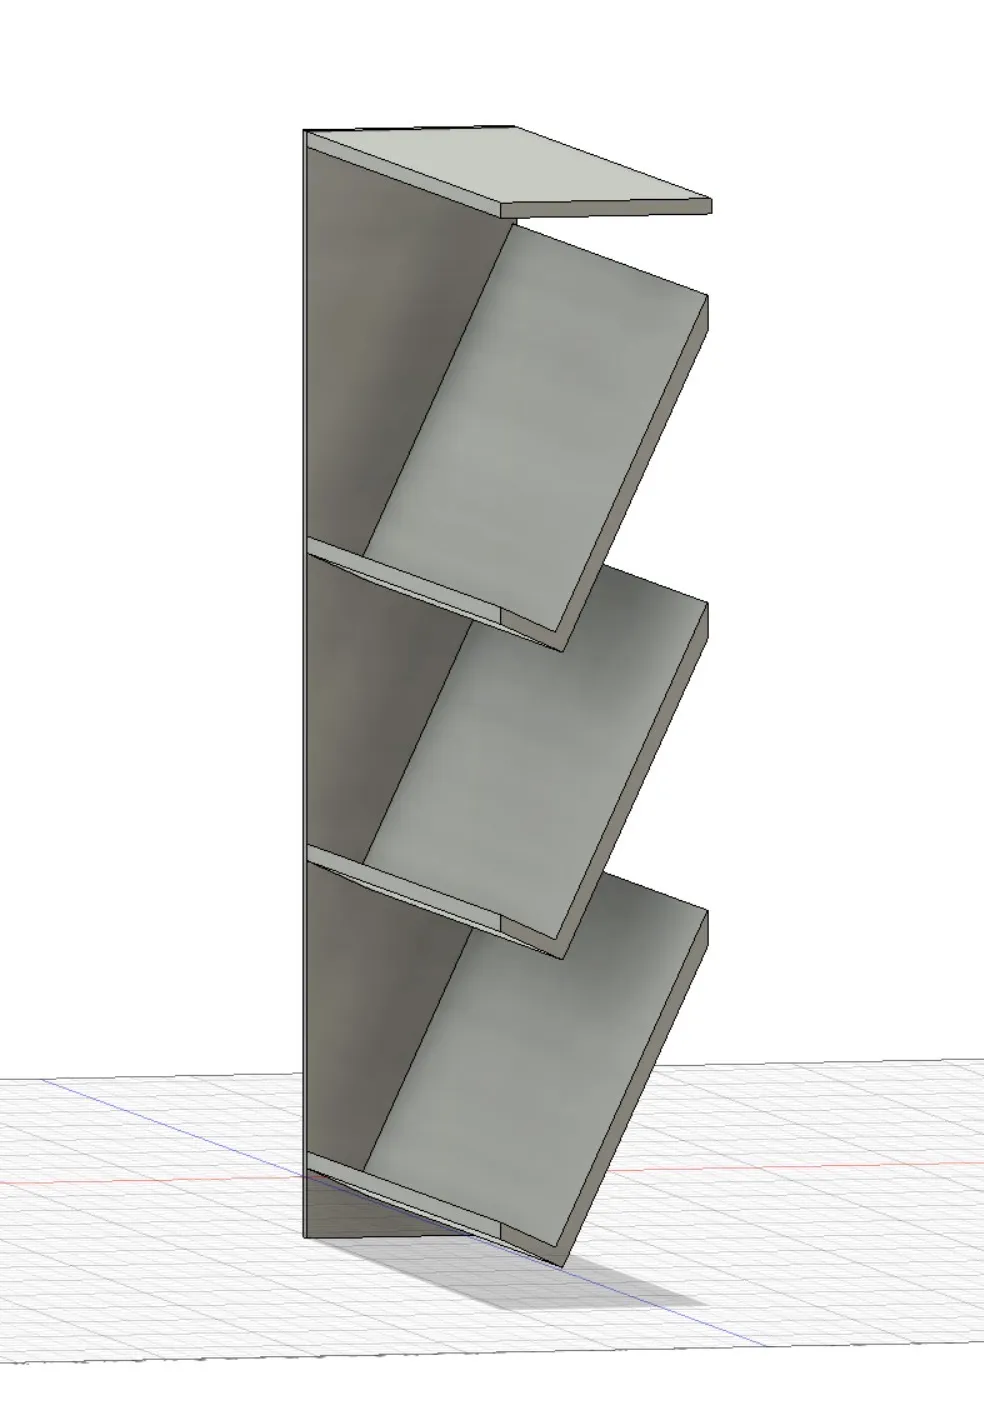
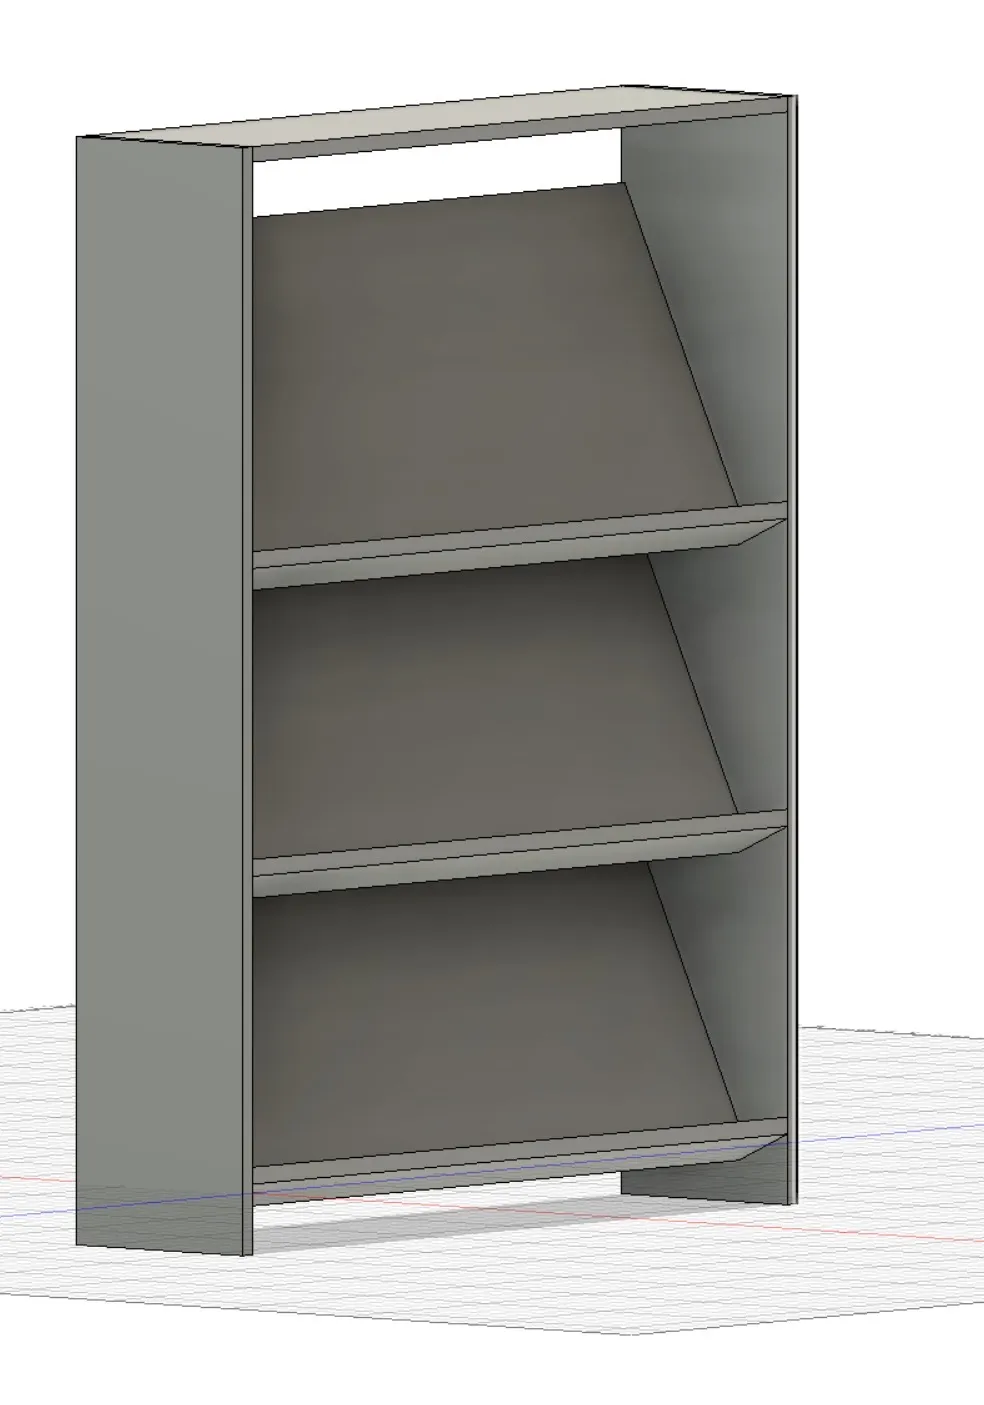
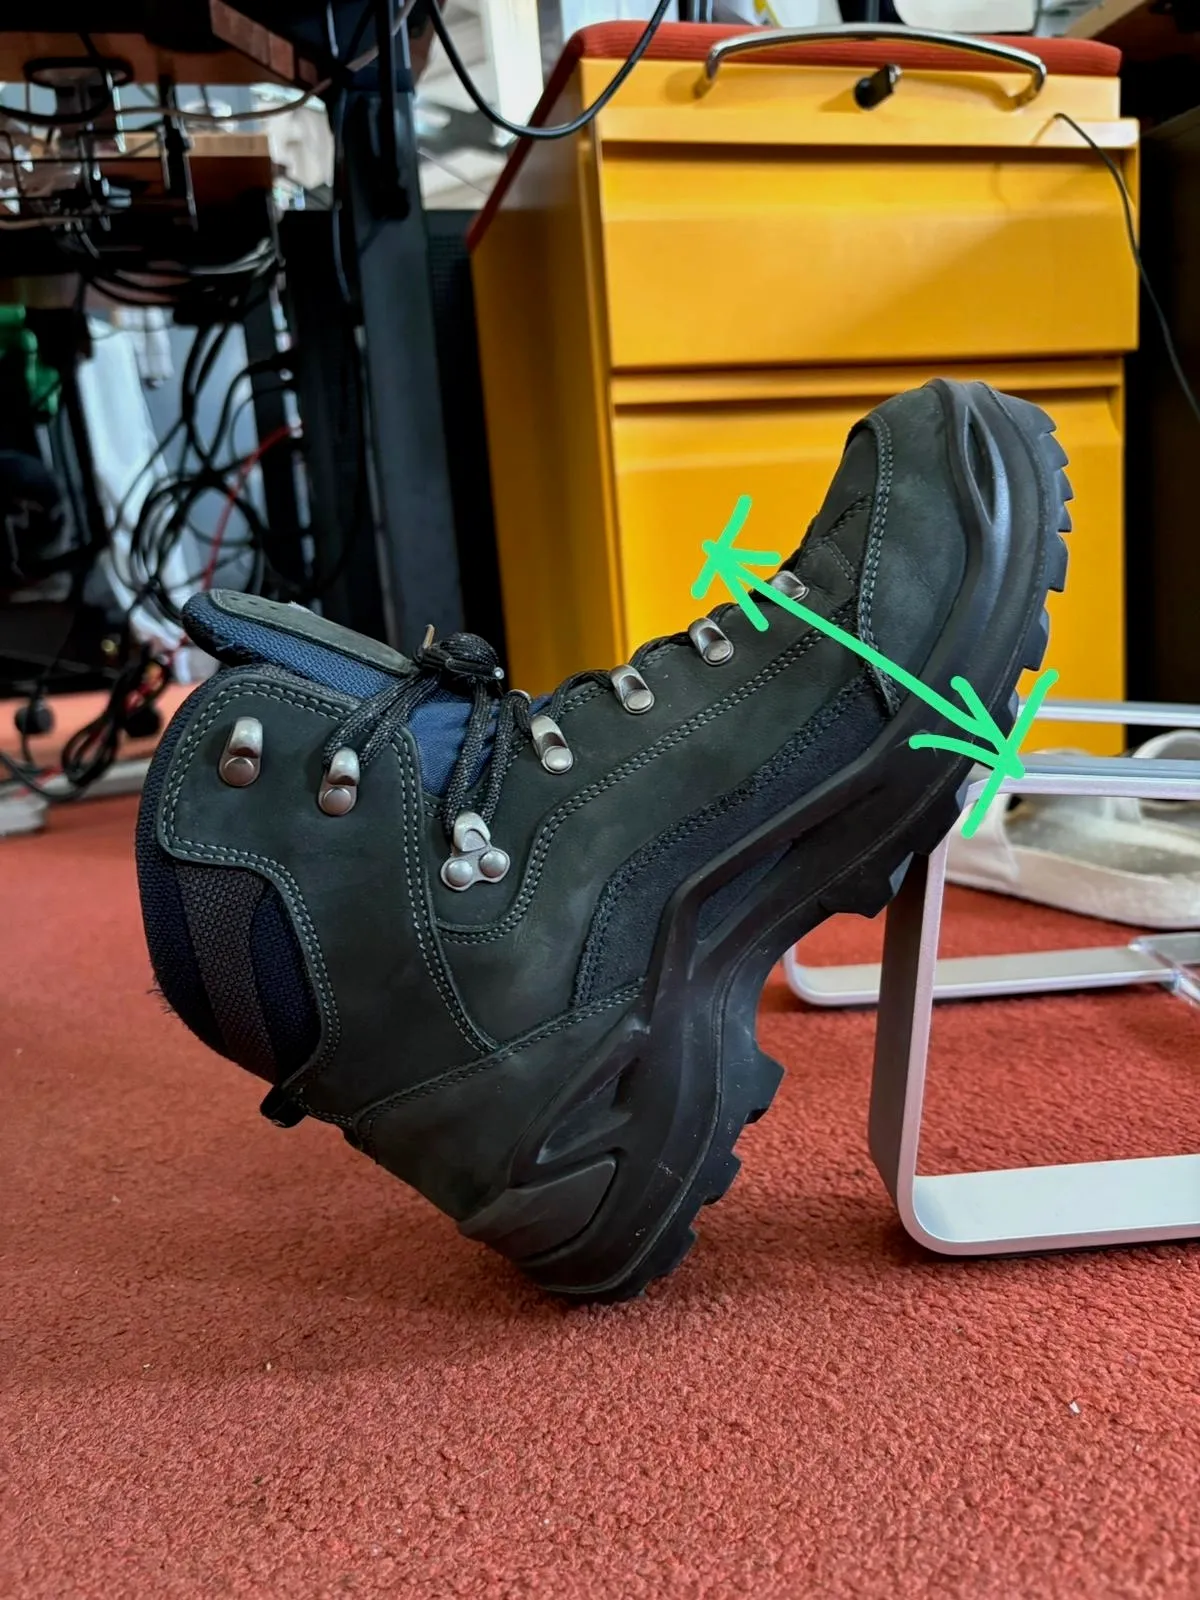
The shoes point up, soles toward the wall to accommodate boots which have a tall heel/shaft. At first, I was designing it the other way, but that would require a lot more vertical space between the shelves.
This way the heels stick out which does eat into the corridor space more, but hopefully in a way that doesn’t feel too “in the way” and is more dynamic/flexible — only taking up exactly the extra space it needs rather than the whole rack being taller and deeper which would take up more space for every pair of footwear, even those that don’t need it.
Another important reason for shallowness is that the door to the small room is perpendicular to it and any amount that it extends past the door frame actively reduces the amount of space you have to walk through the door.
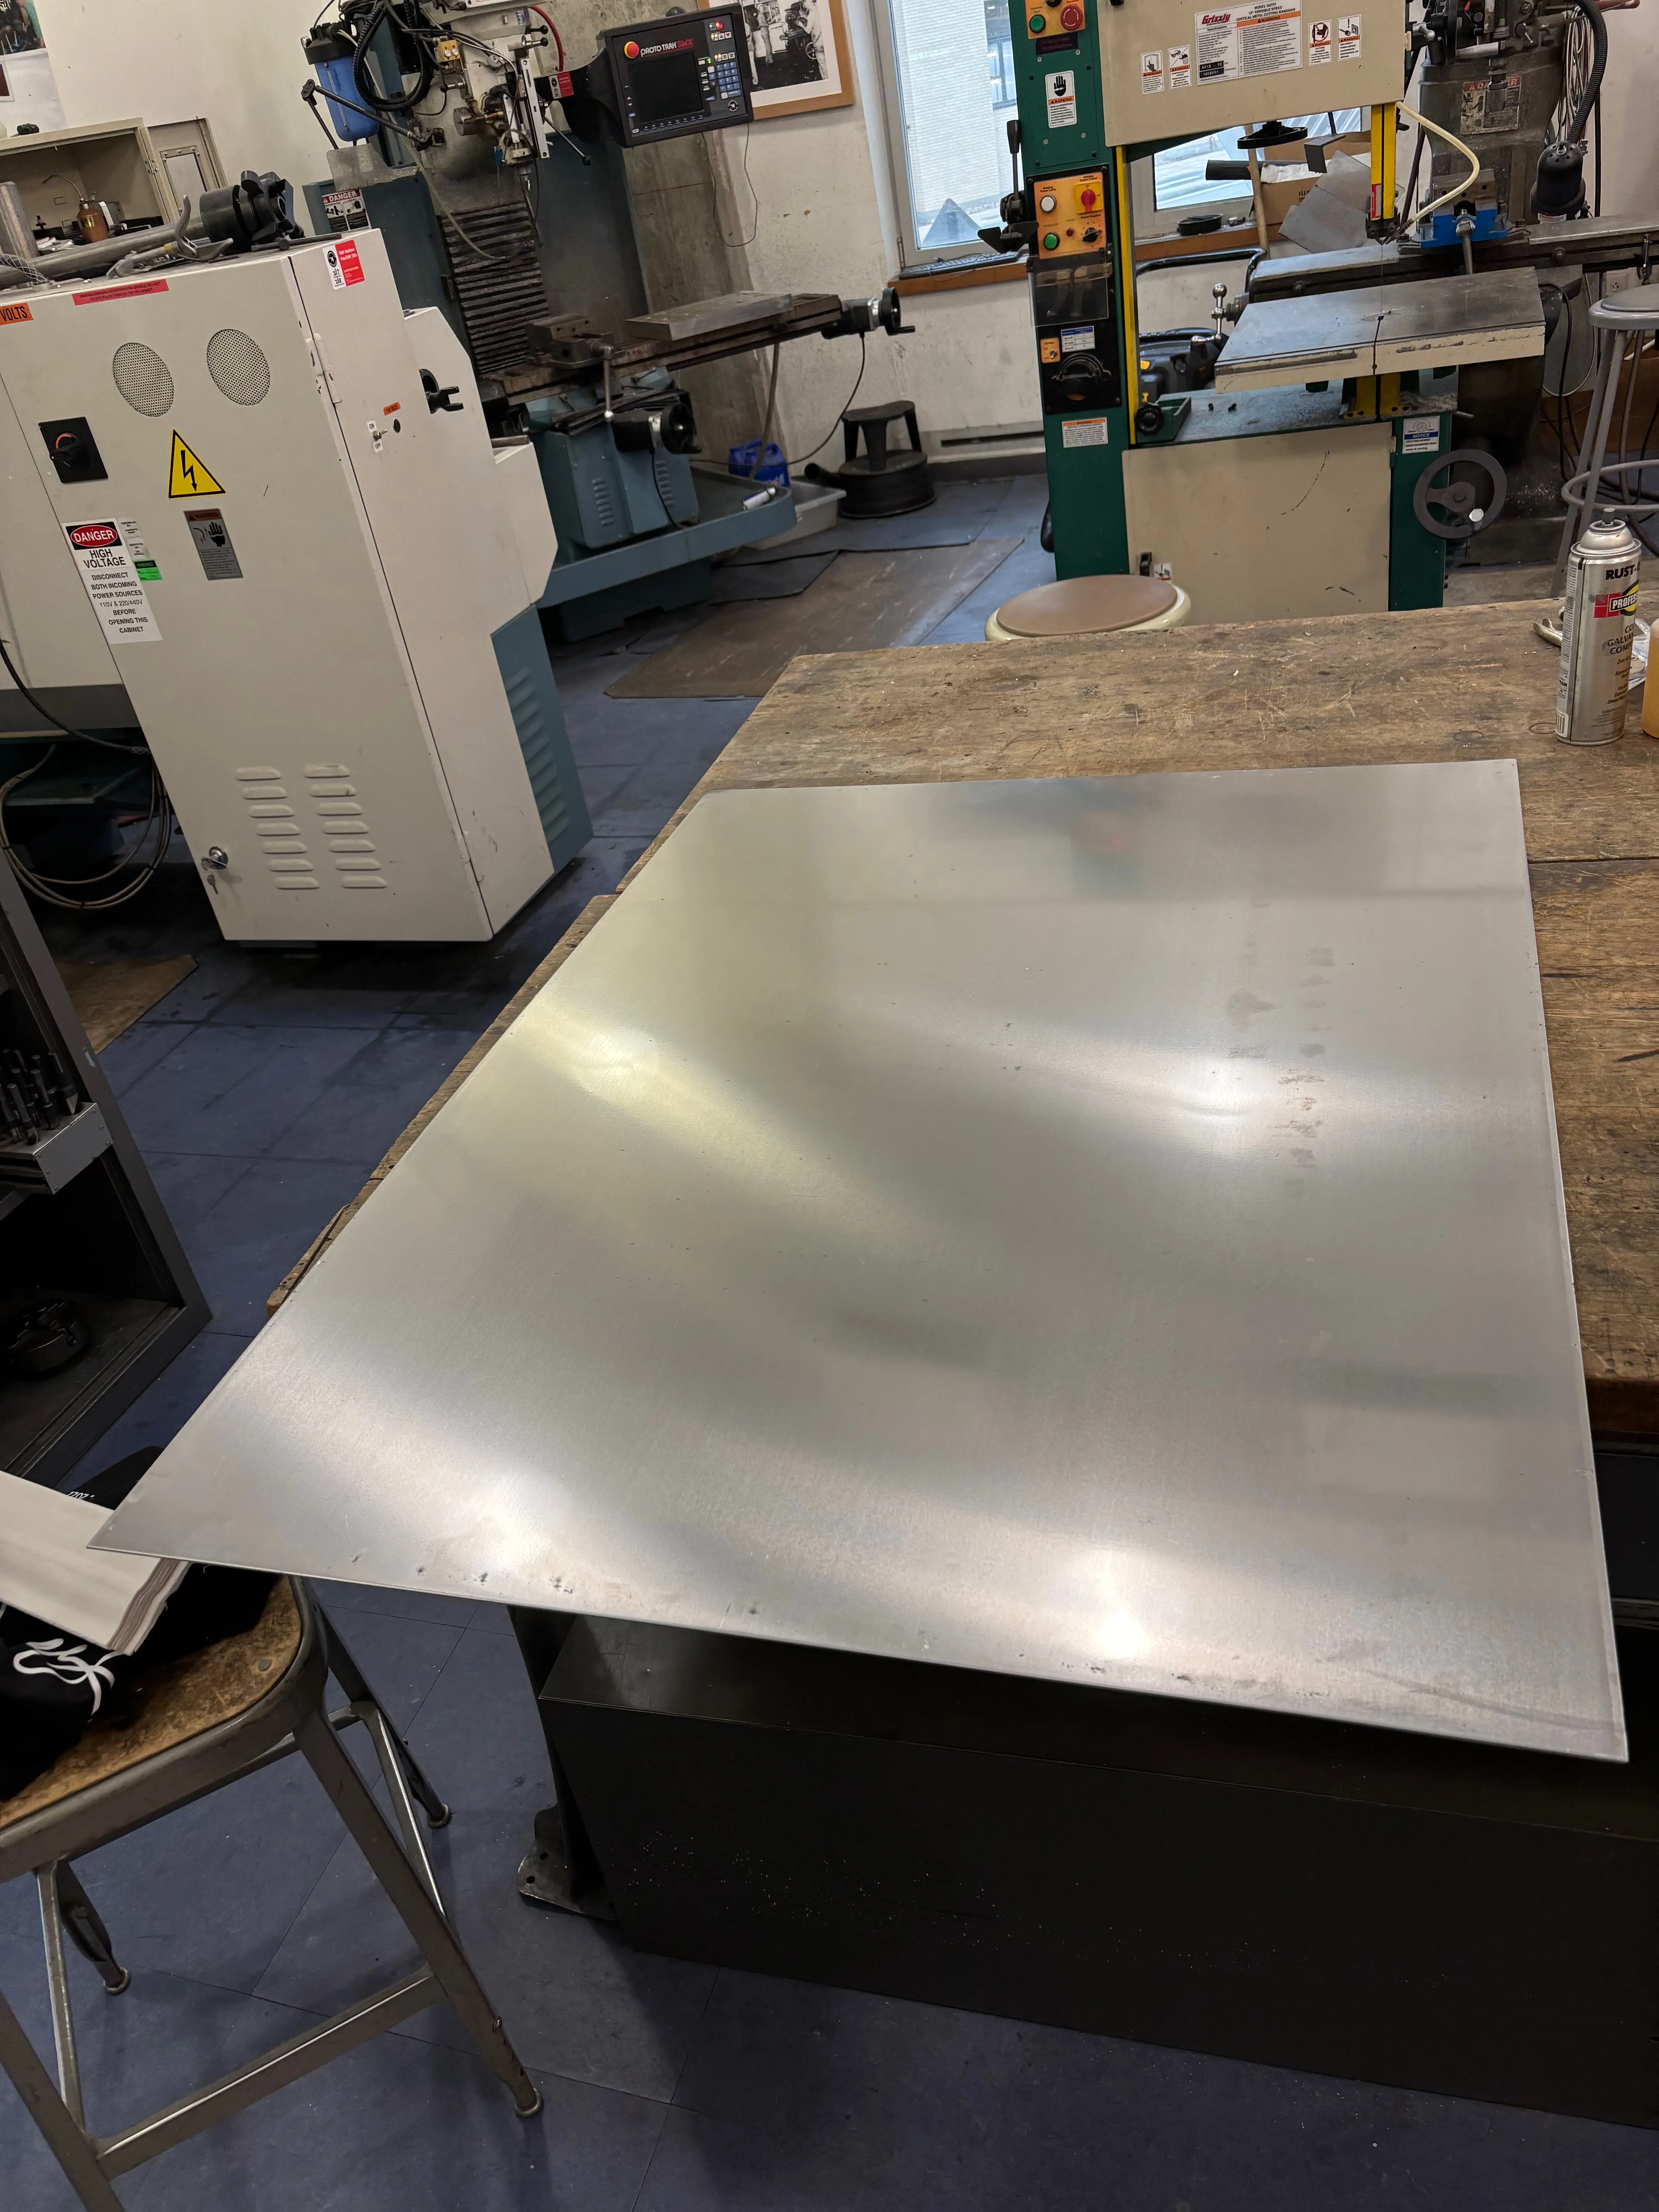
Originally I planned to make everything in plywood (applying methods similar to the desk shelf) but there weren’t large scrap pieces of plywood at the time and buying the material would have cost around $60. There were, however, large sheets of aluminum I could use (for free), and I was in my sheet metal phase, and I figured it would be easier to clean/be more durable especially with all the salt and wetness of winter, so I went with aluminum instead.
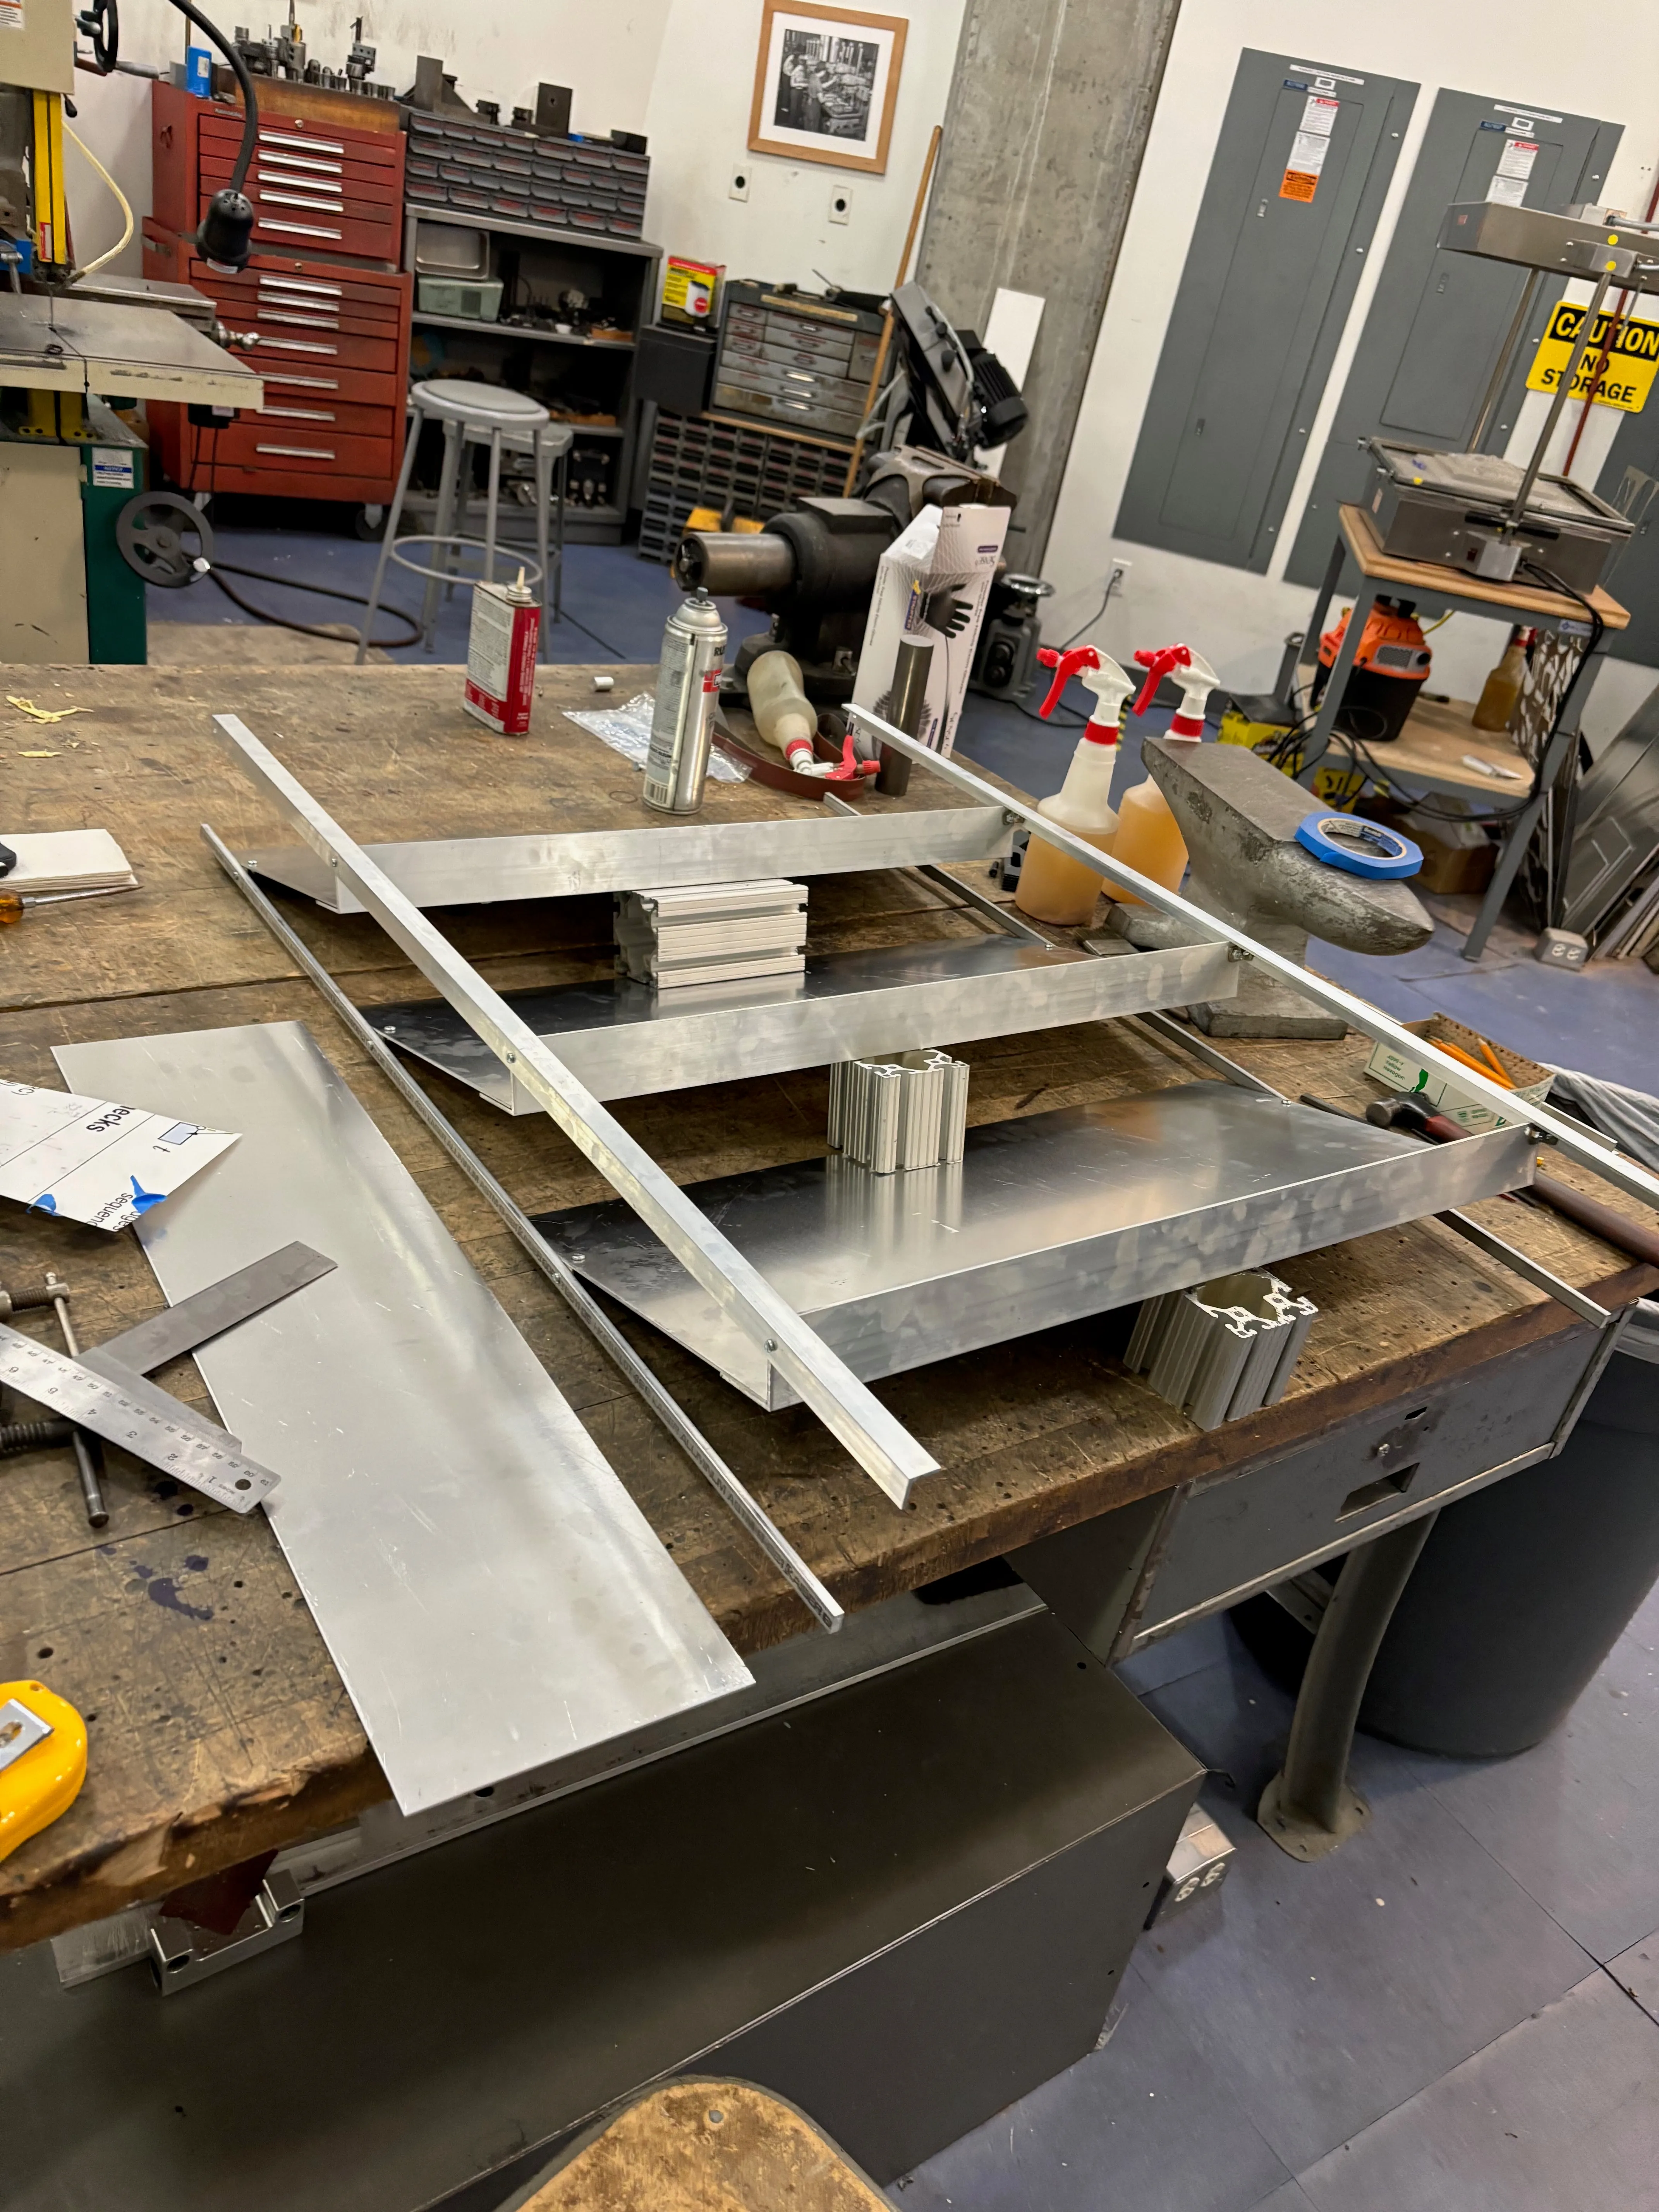
Build
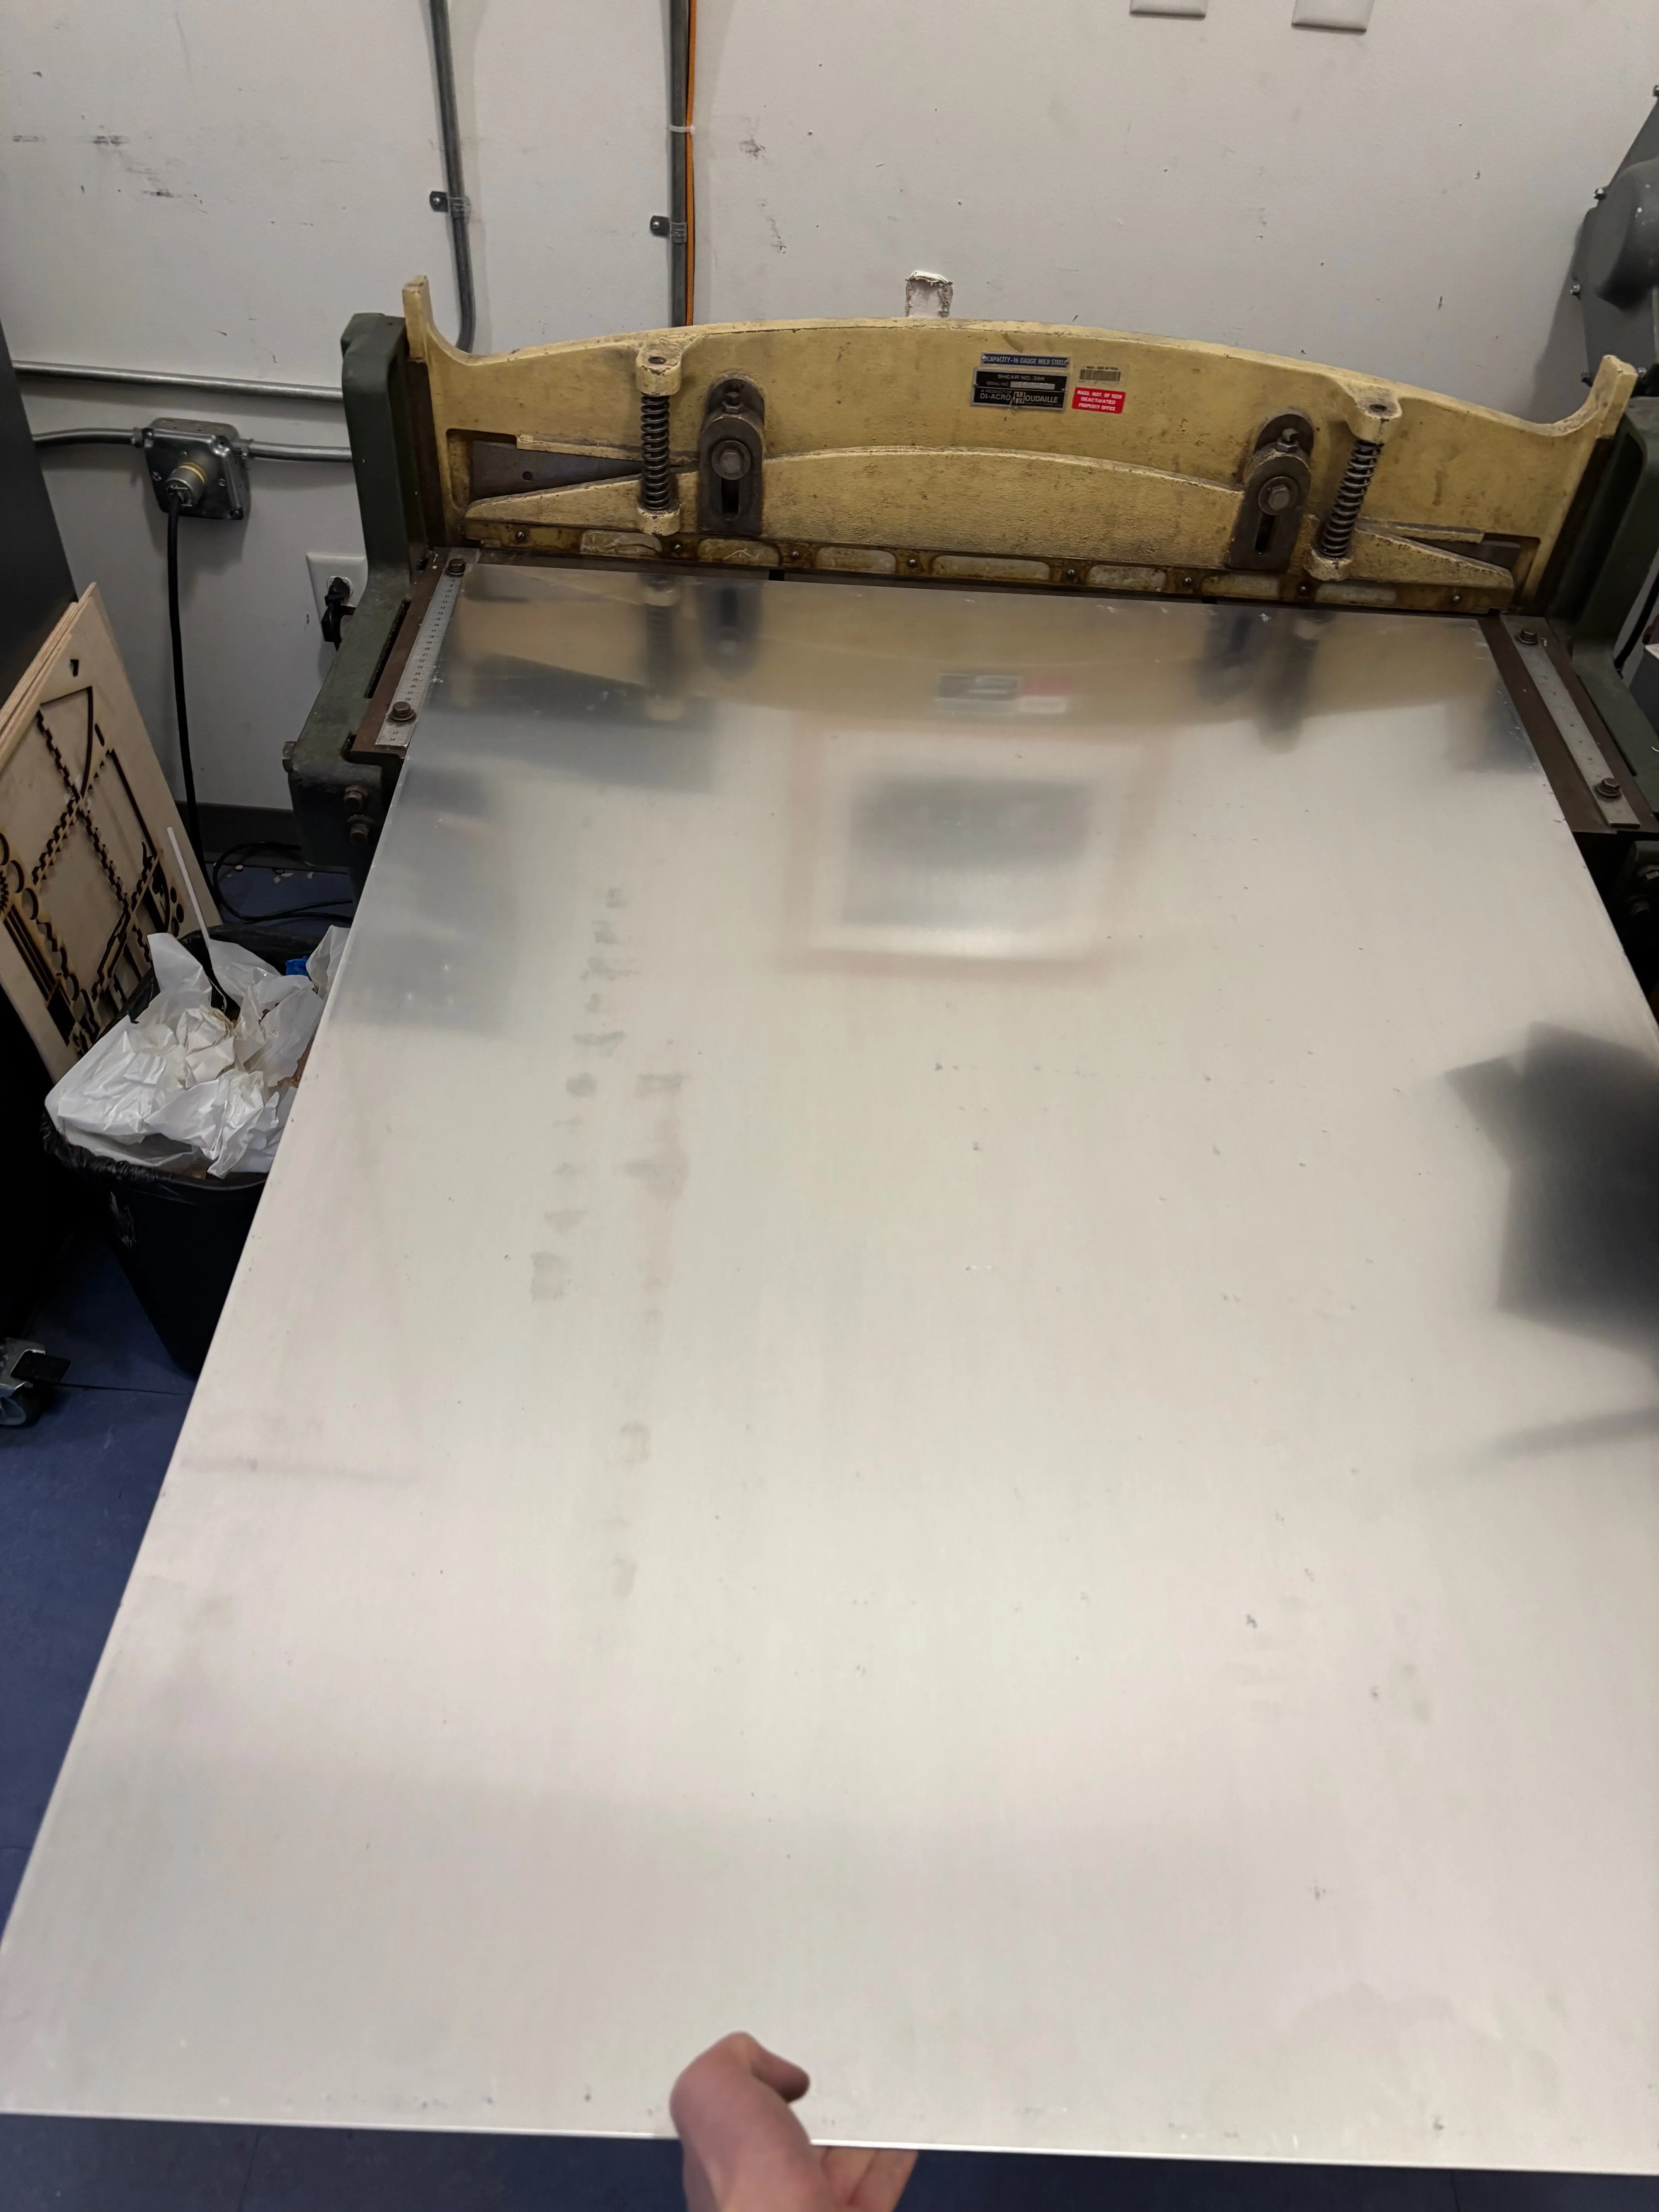
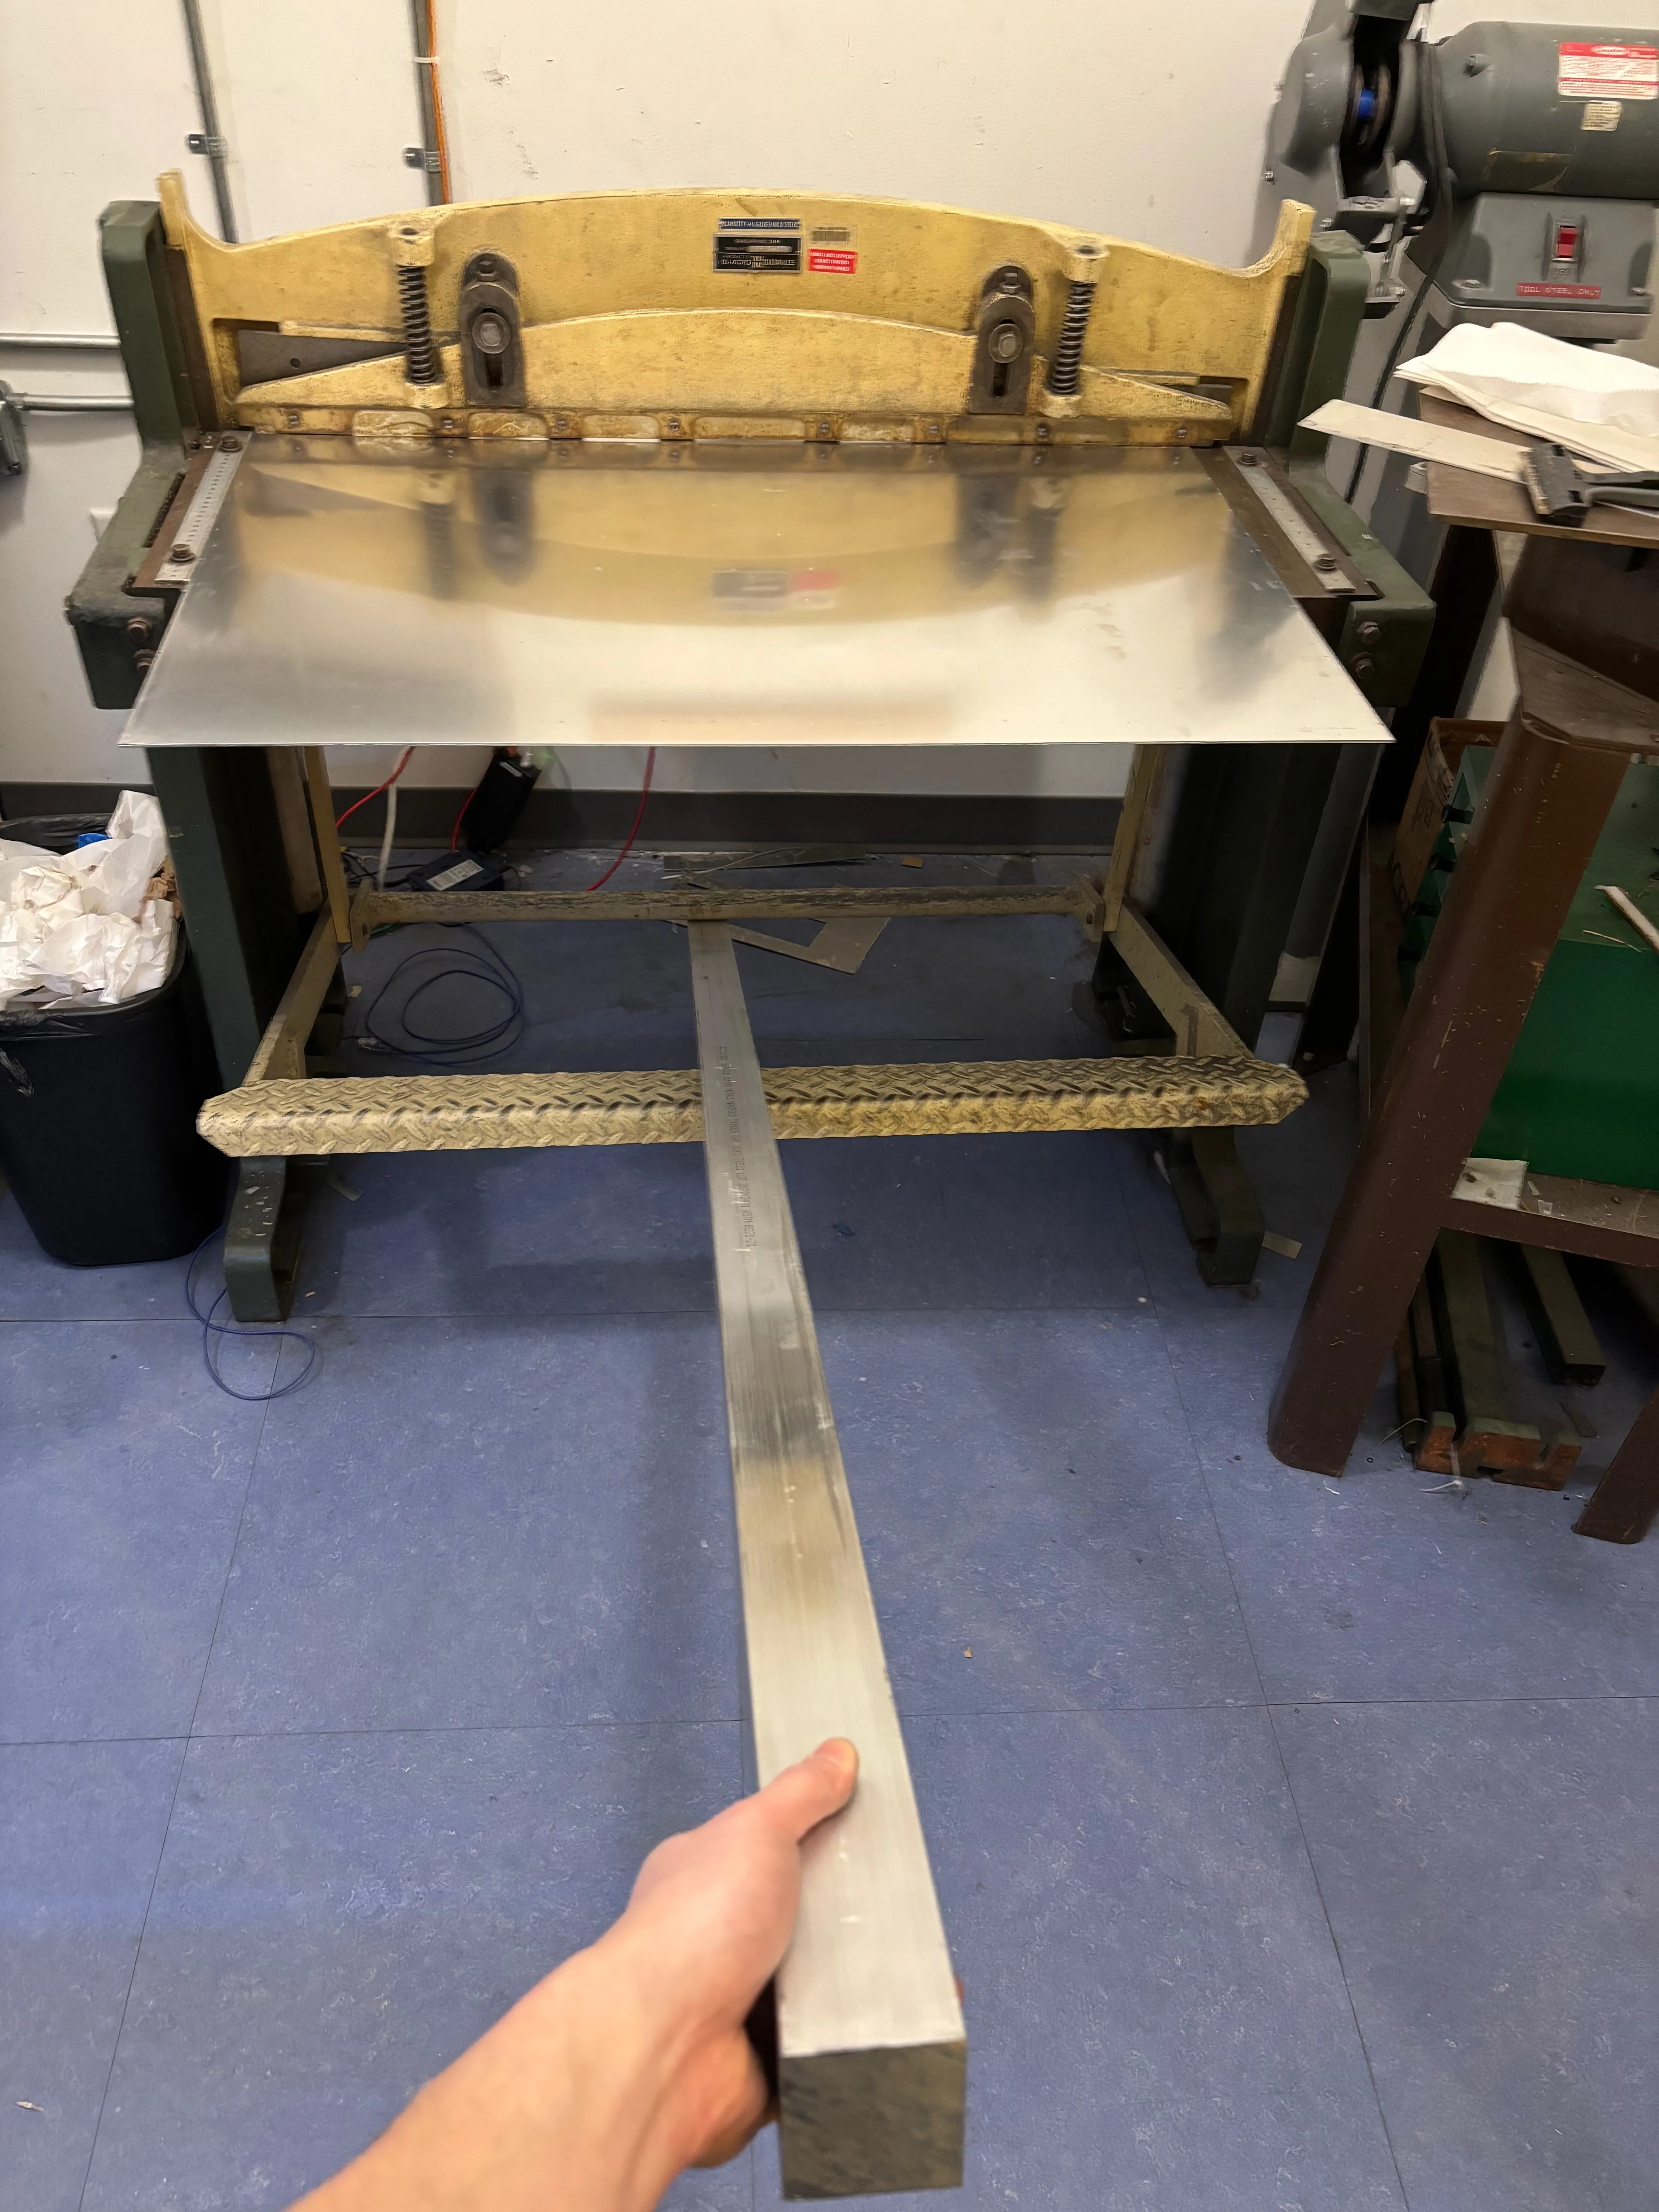
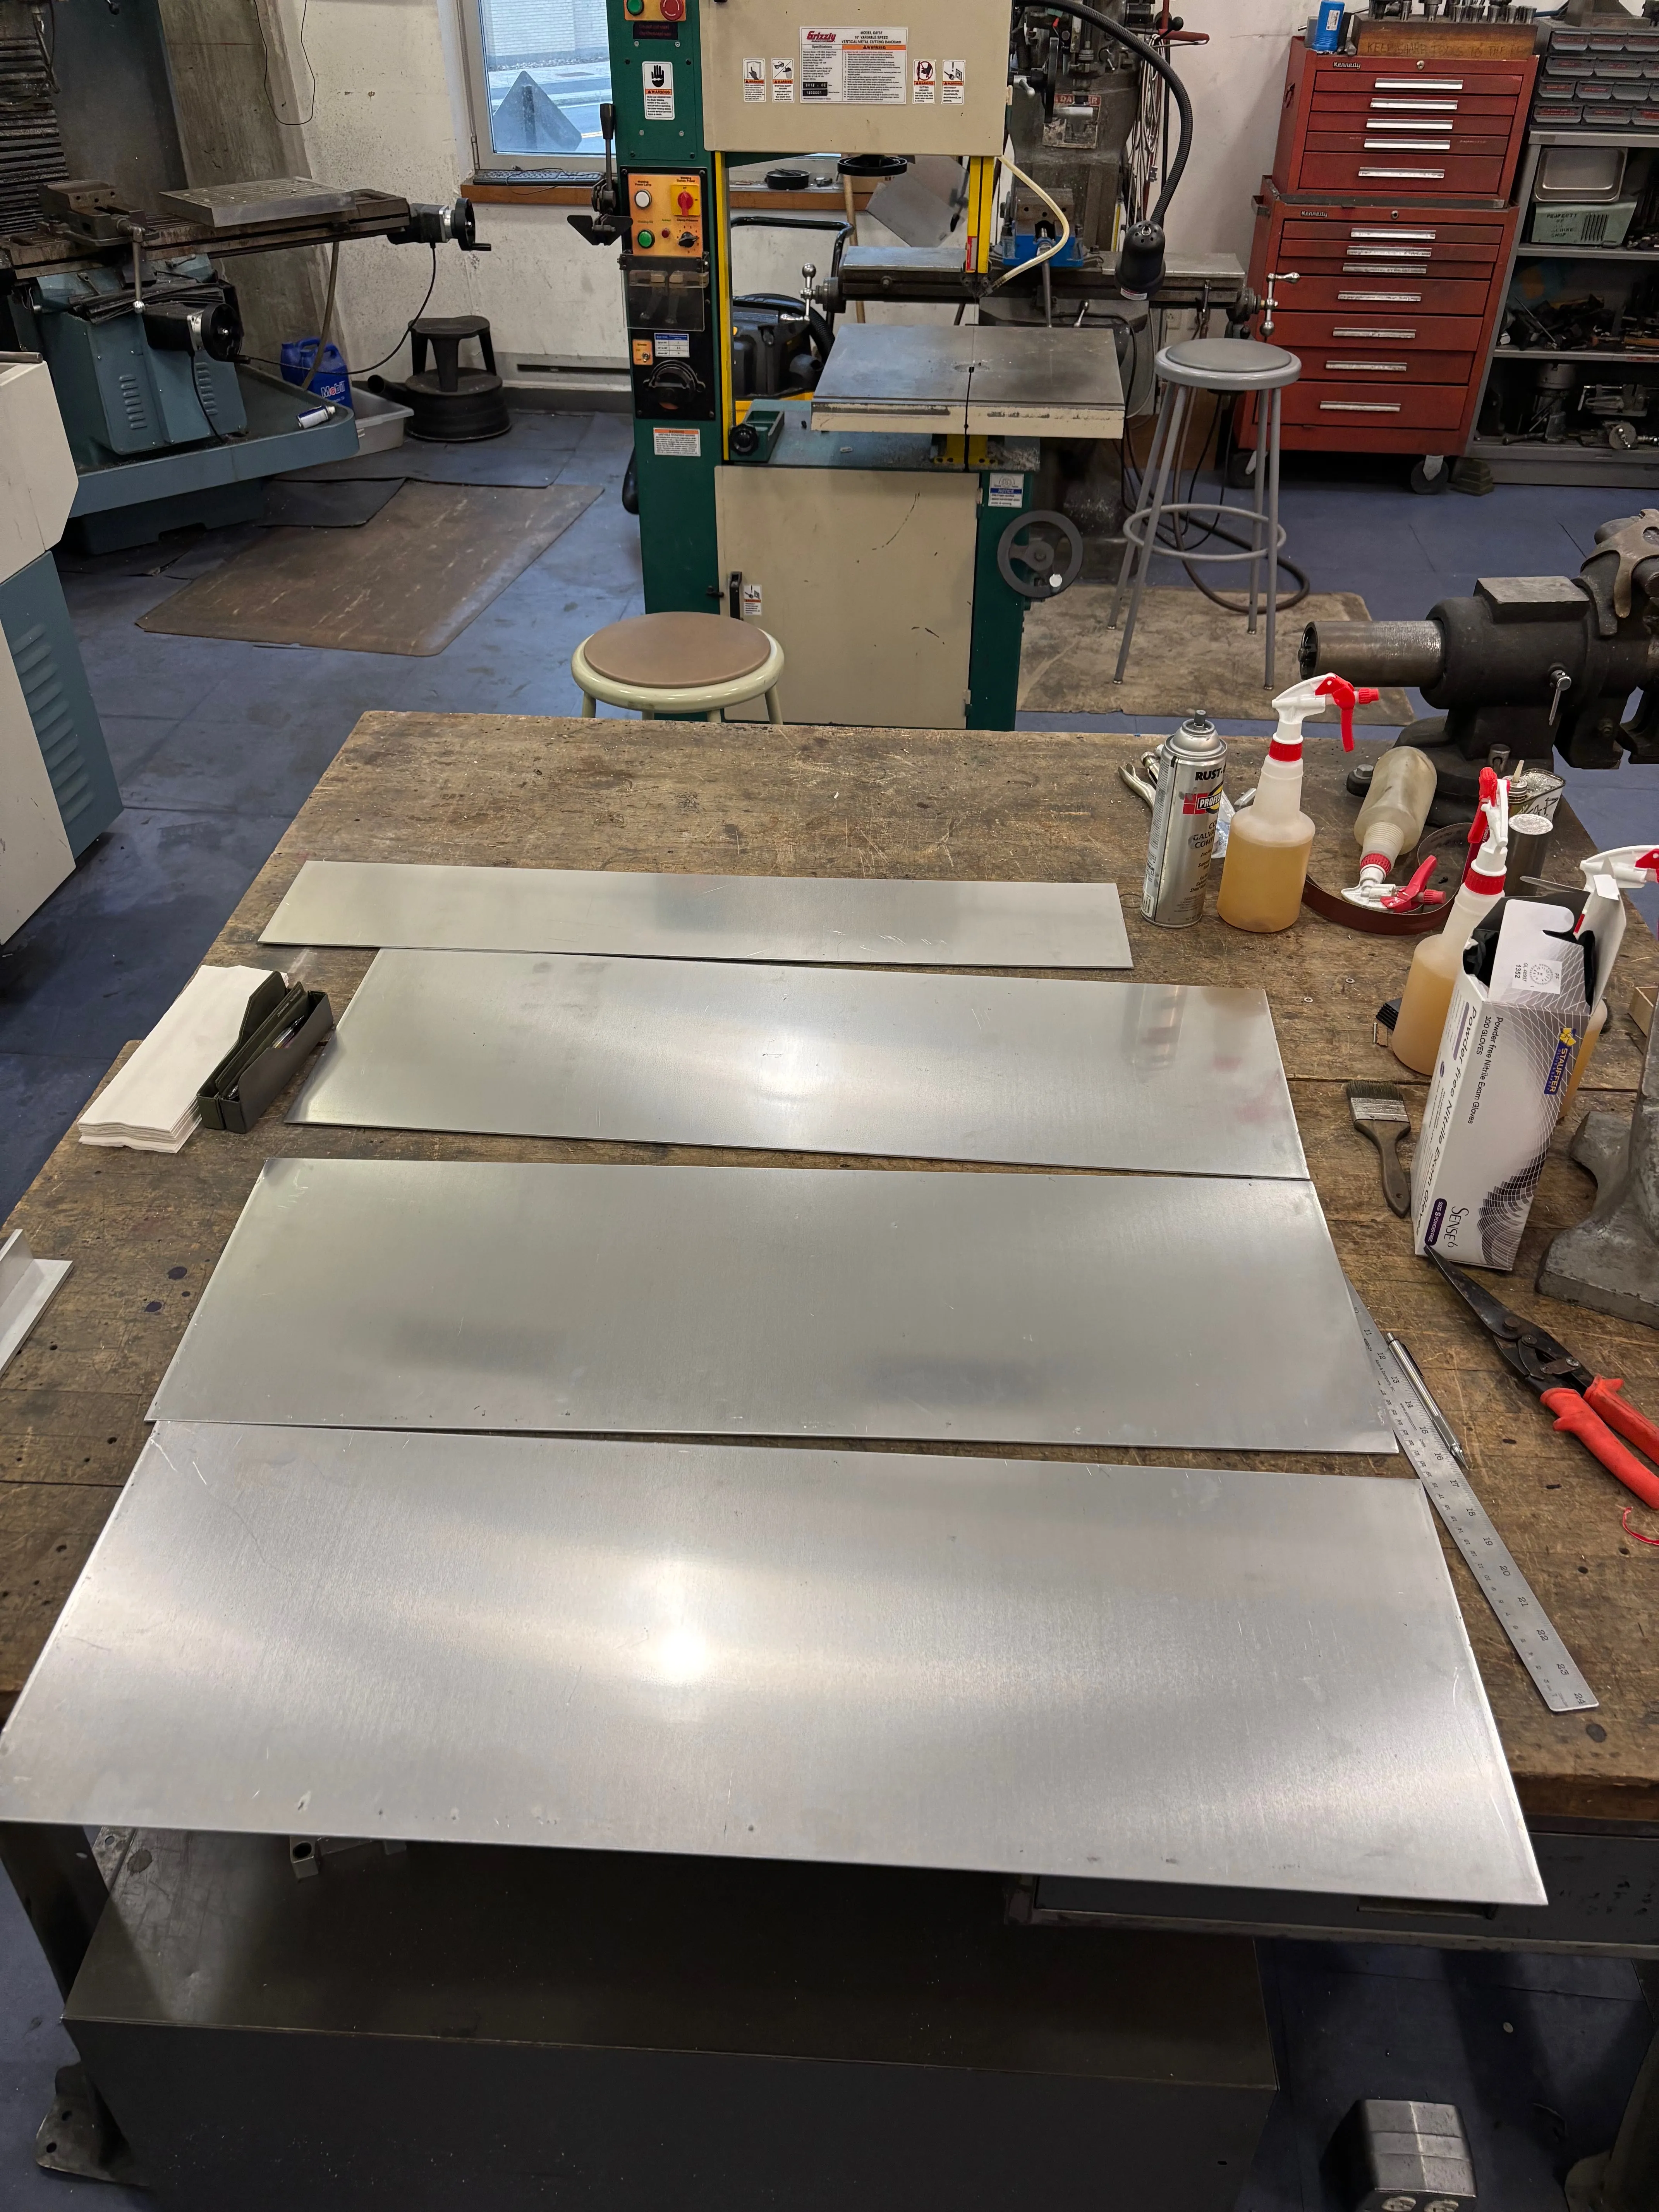
Step 1 was to cut the pieces for each shelf using the sheet metal shear. Fortunately it was just large enough (width-wise) but pressing down on the foot pedal didn’t provide enough force to make the cut, so I used thick aluminum square stock as a cheater bar and that did the trick. Hopefully this wasn’t too bad for the machine… (or the square stock)
Unfortunately, the sheet metal brake wasn’t wide enough to bend the entire width of the shelf to make the lip, so I used 2-inch (outer-diameter) angle iron and bolted it to each shelf instead. I used the shoes I was wearing to check what height I needed for the lip to stop the shoes from slipping off — it was higher than I expected because the heel kind of curves up.
Changing the material had changed a lot of the dimensions (since there isn’t the same thickness for each shelf) so I was kind of doing much of the measuring/putting together by vibe.
I spent a long time looking for these little angle brackets that would connect each shelf to the legs. I could have made them myself by cutting small aluminum angle and drilling the holes, but that would have taken a really long time, so I was relieved when I found just enough angle brackets of exactly the right size.
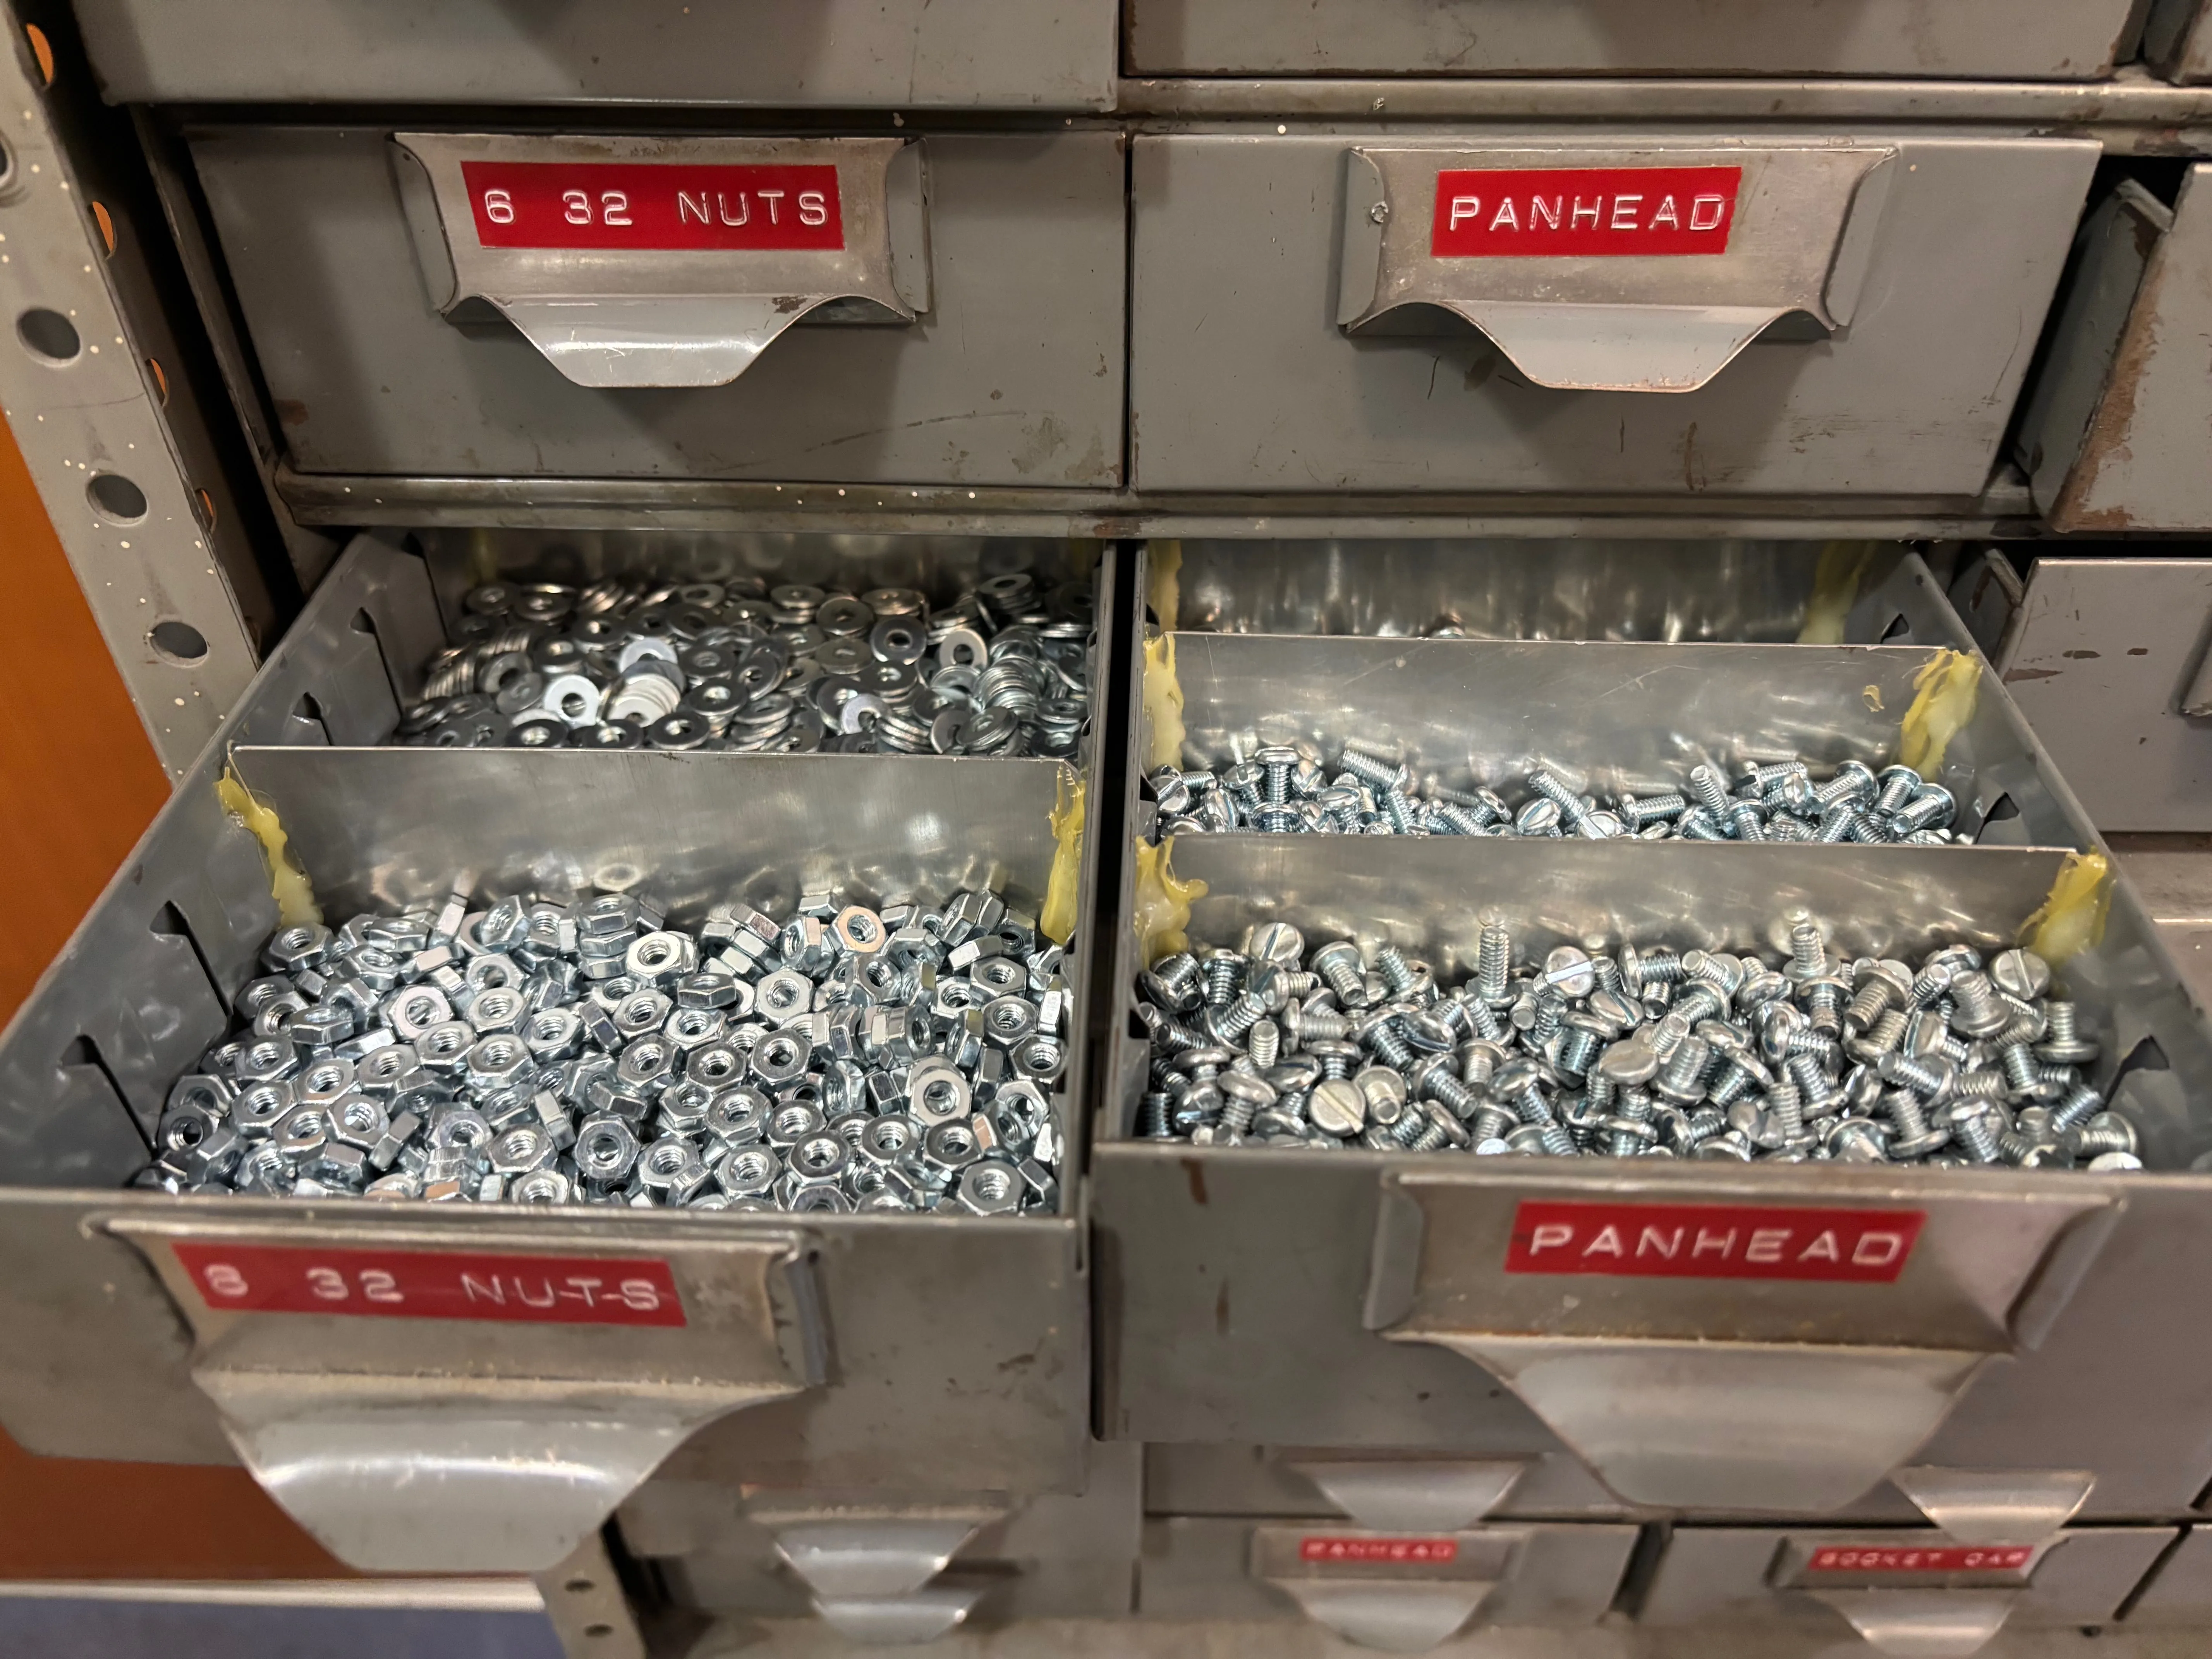
I used 8/32 pan head bolts and washers for all the through-hole connections and 6/32 pan head bolts to bolt the legs to the little angle brackets because one side of the brackets were already threaded. This was super helpful because otherwise I would have had to worry about there being enough space to fit two nuts on the inside of the bracket.

Another thing I realized I needed to consider midway through is how the baseboard sticks out from the wall. To accommodate this, I offset the back legs from the back of the shelves so that the rack could be flush against the wall and I wouldn’t need to make any special cuts at the bottom of the back legs. I used flat bar as the back legs since they wouldn’t be able to wrap around the back of the shelves.
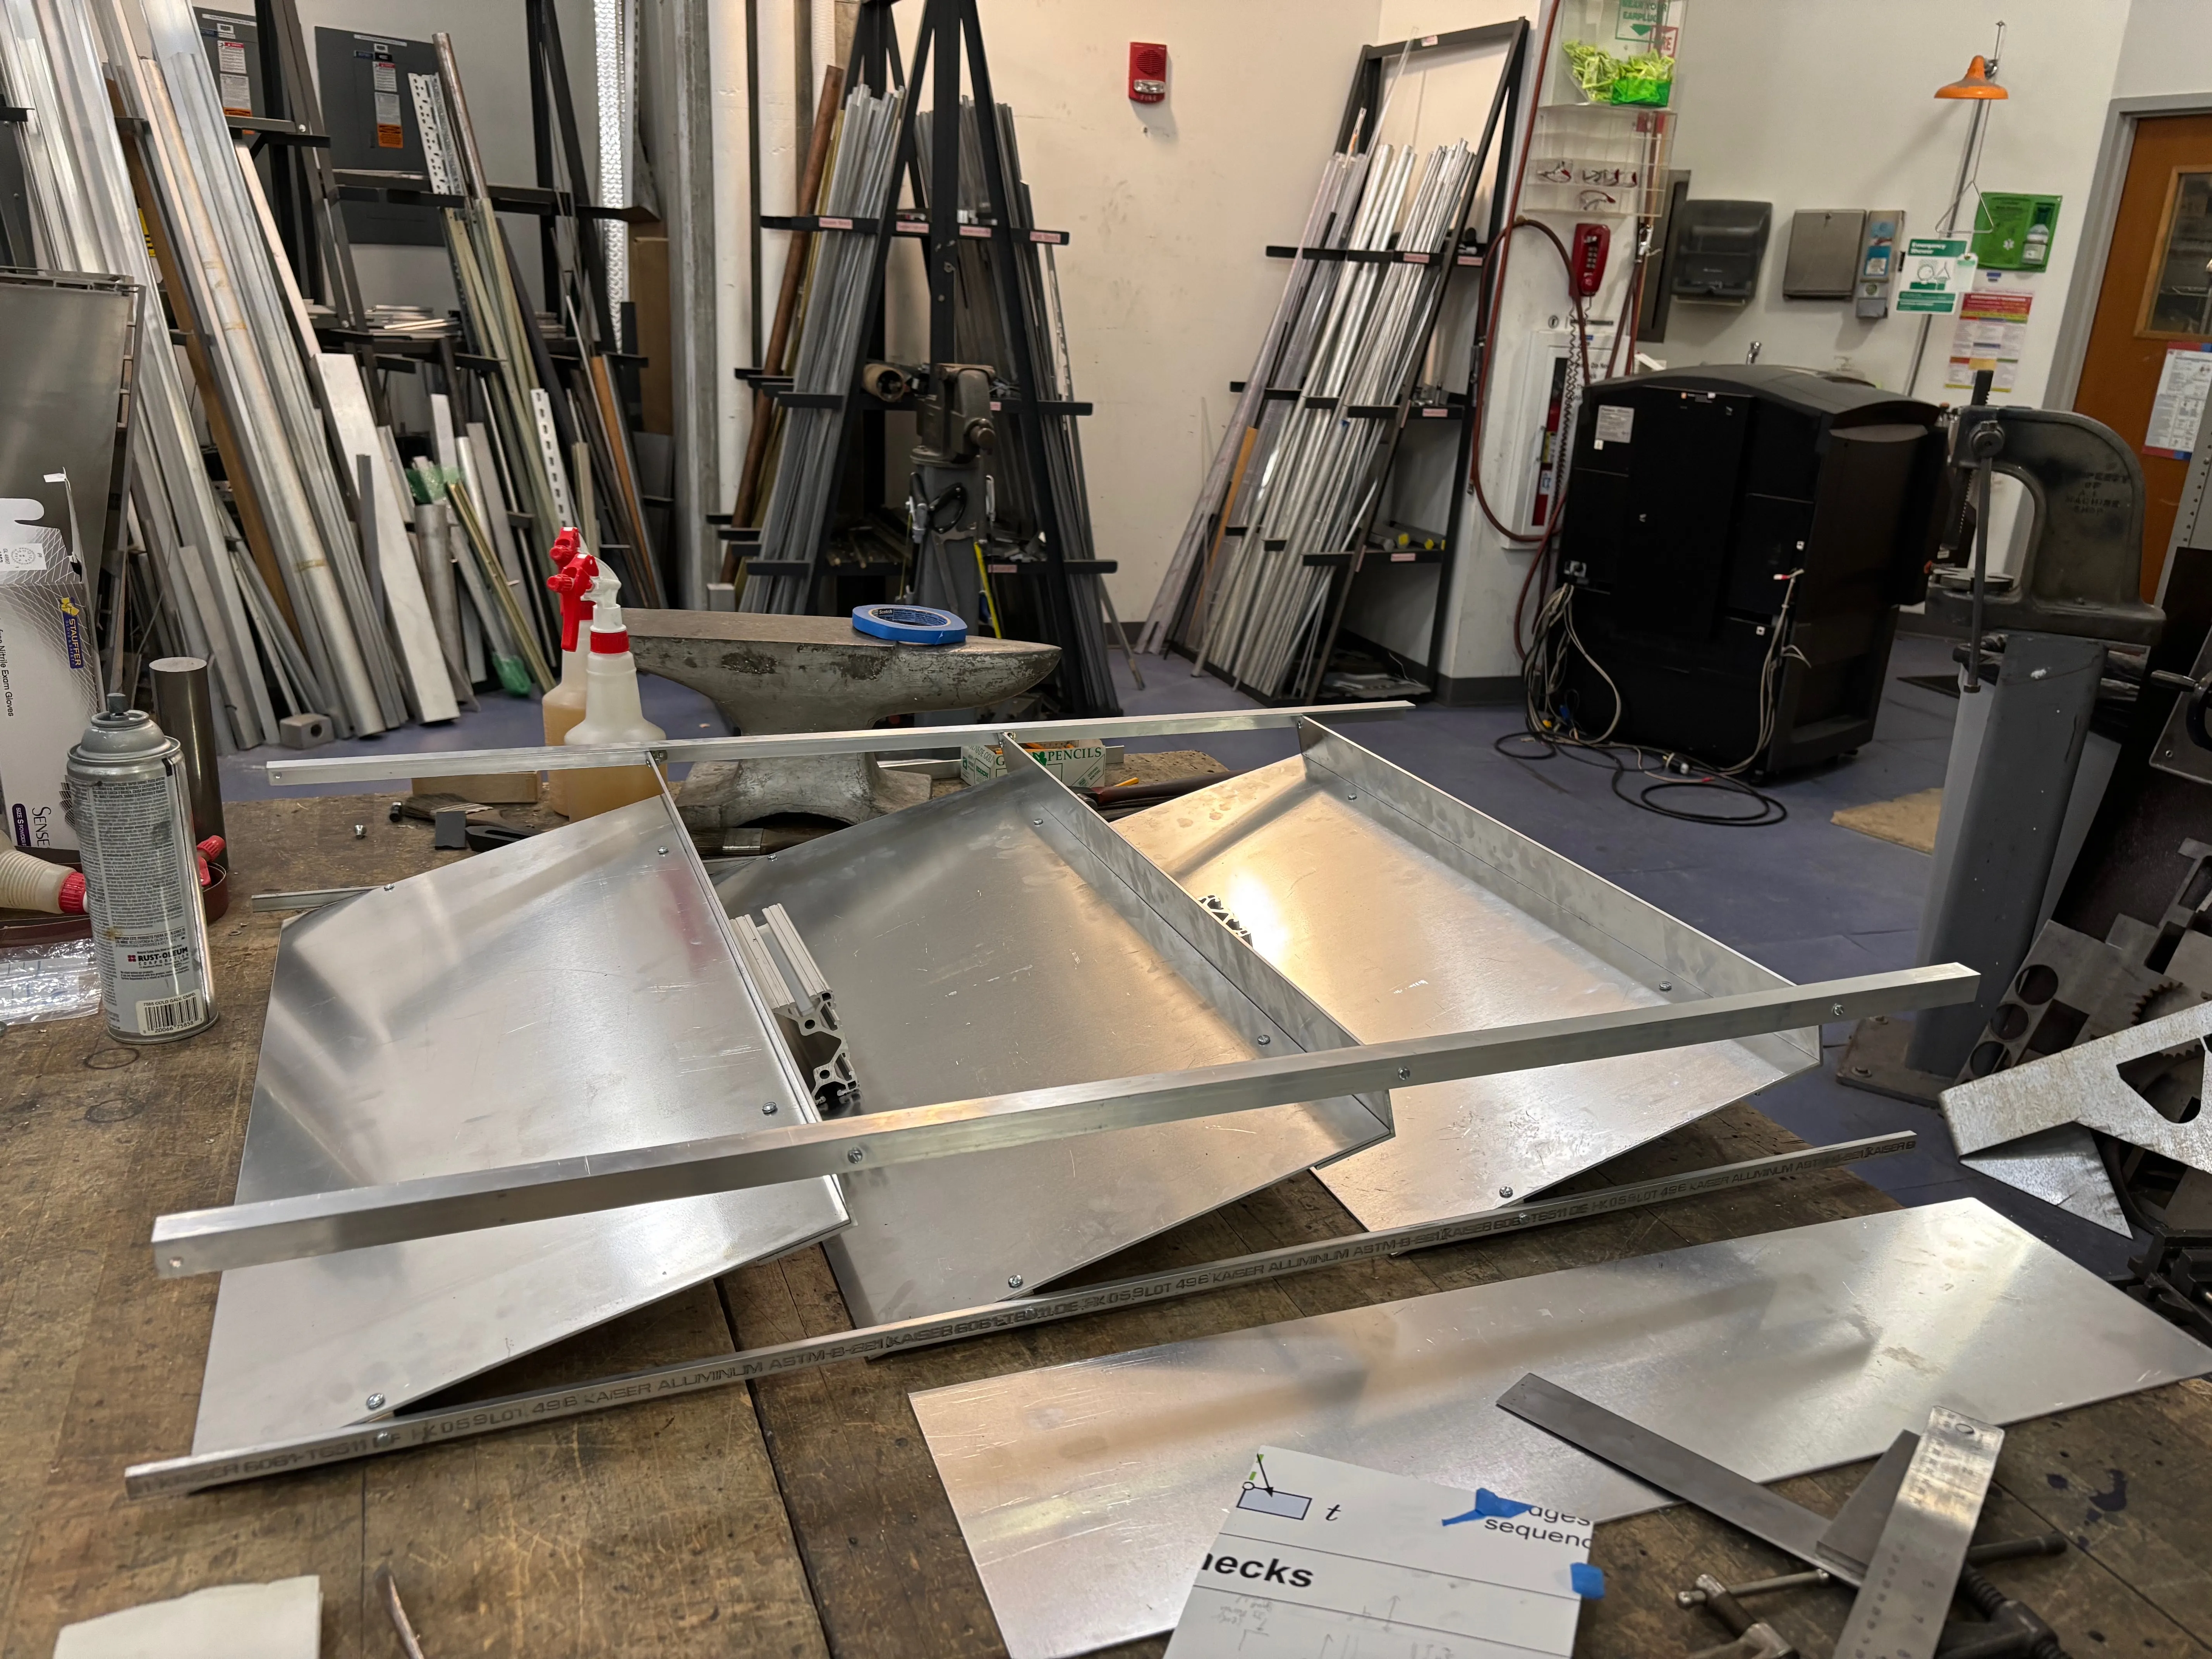
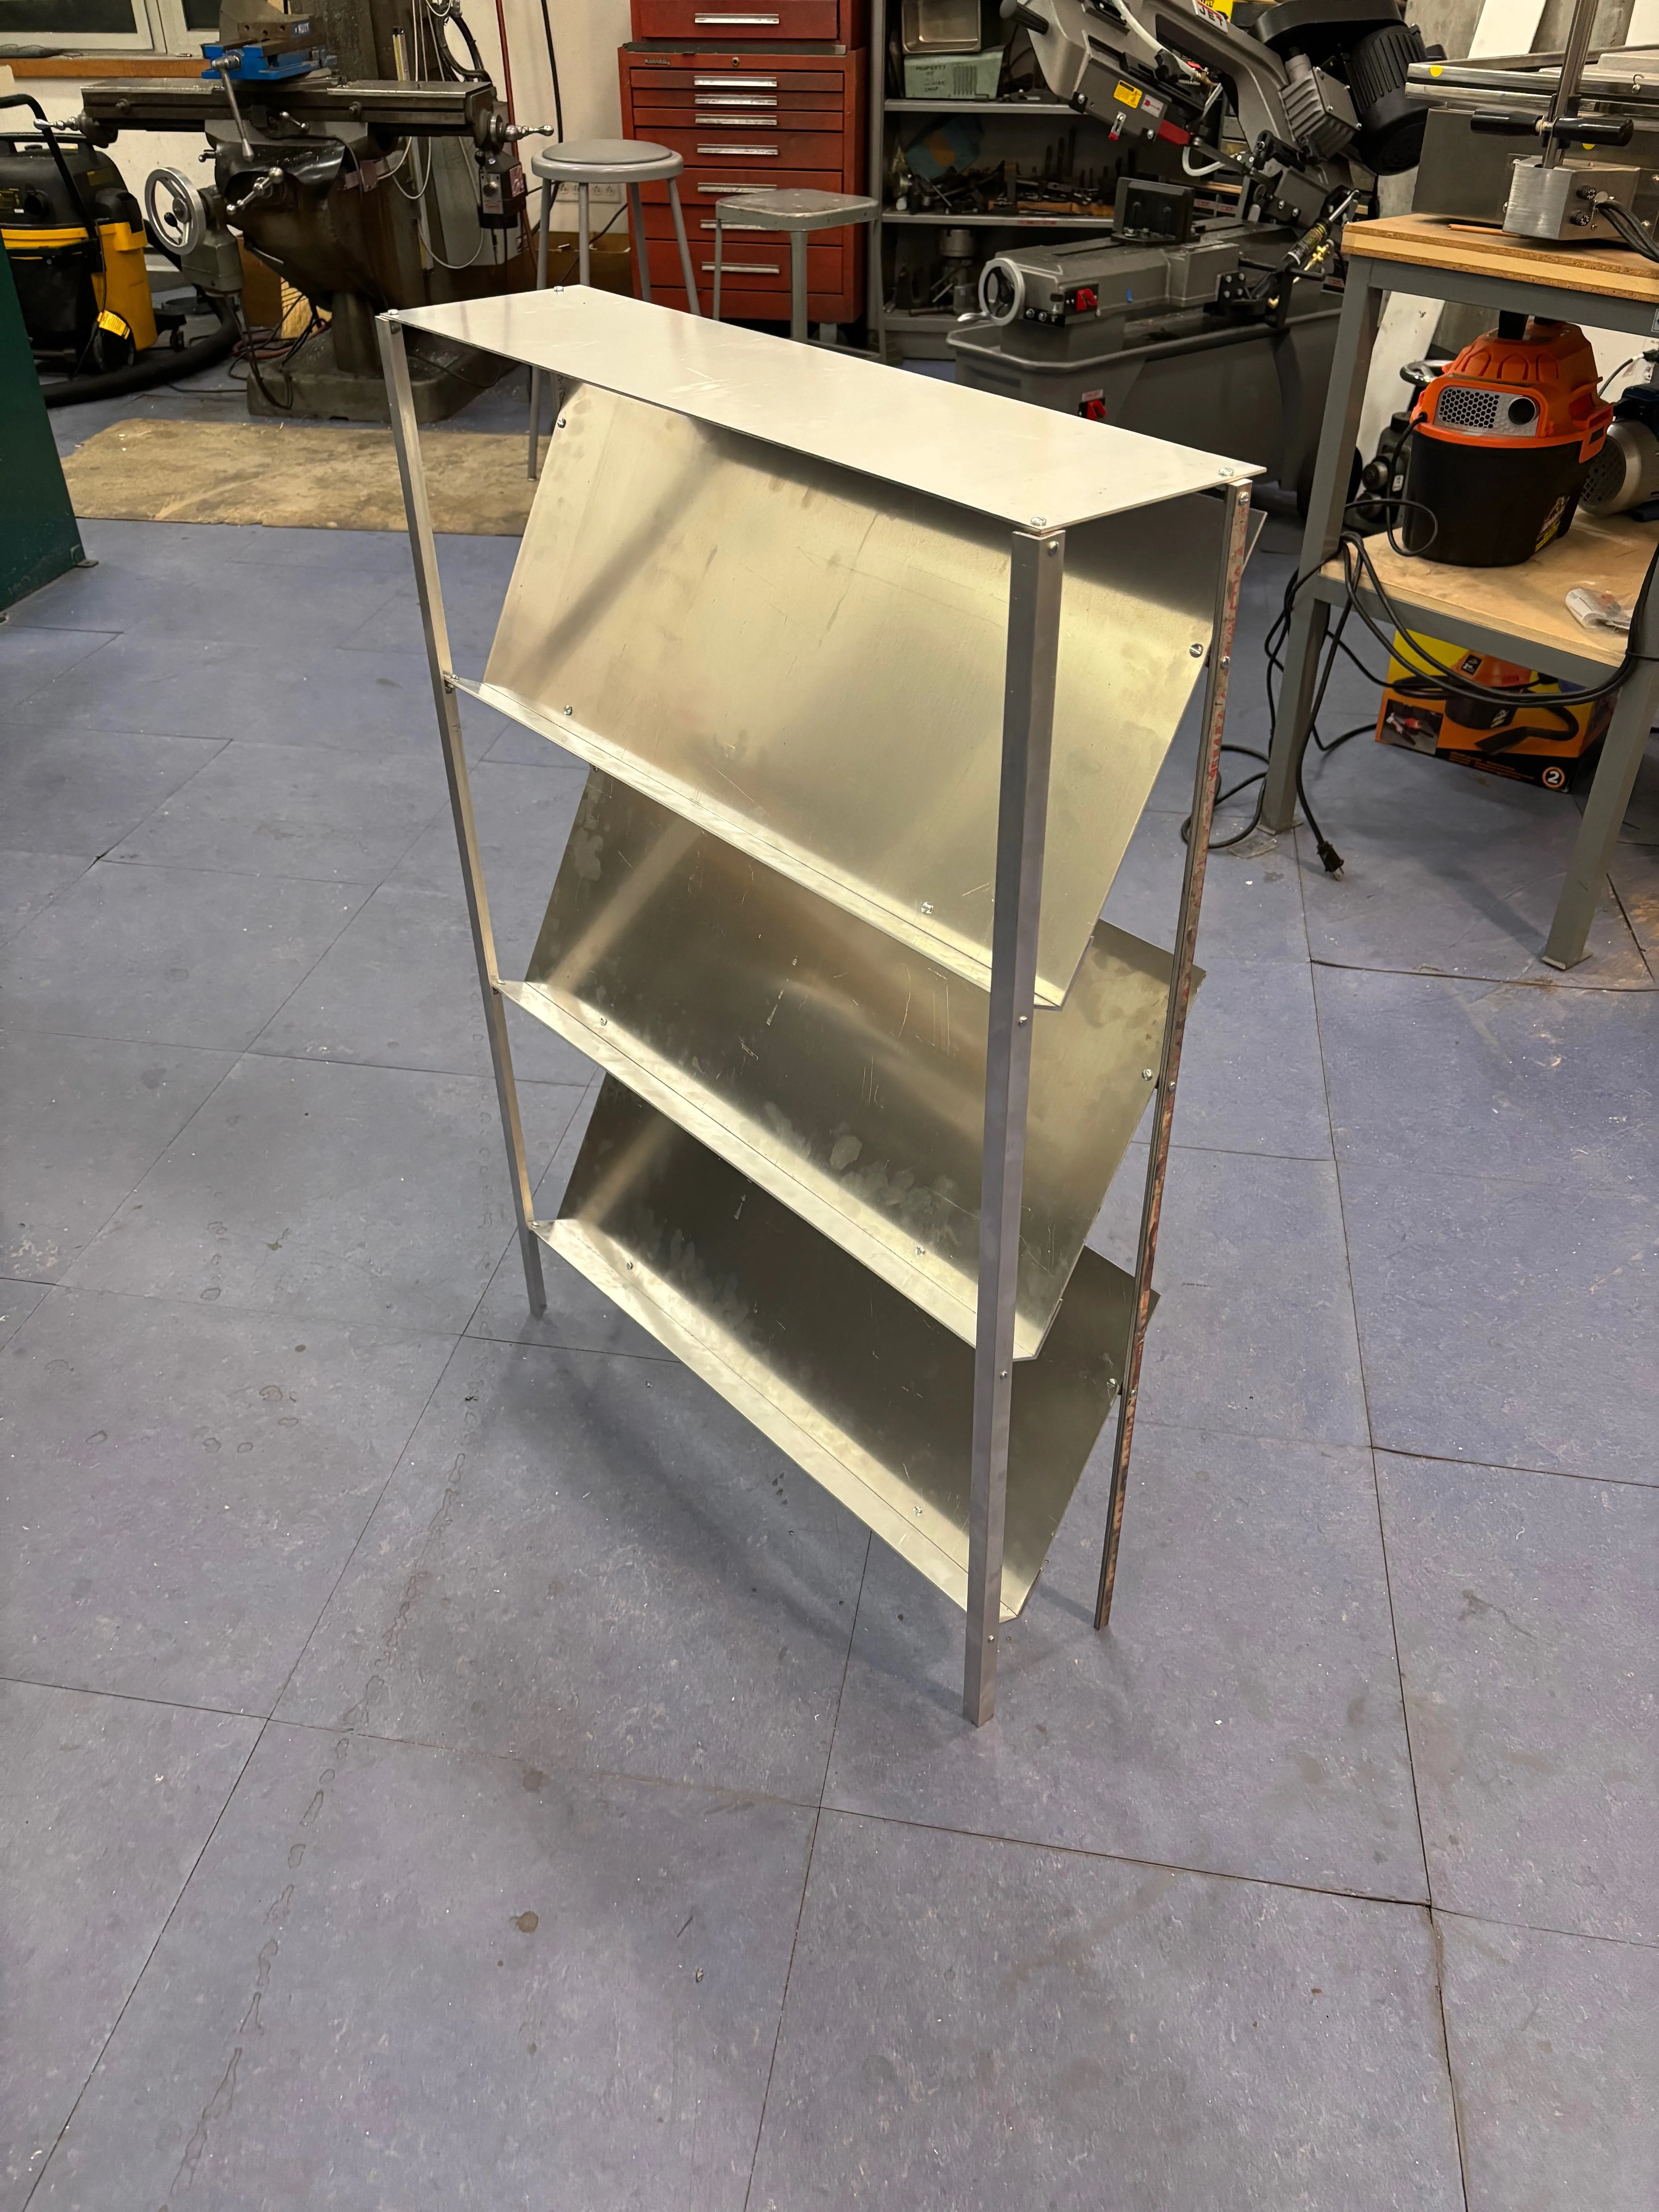
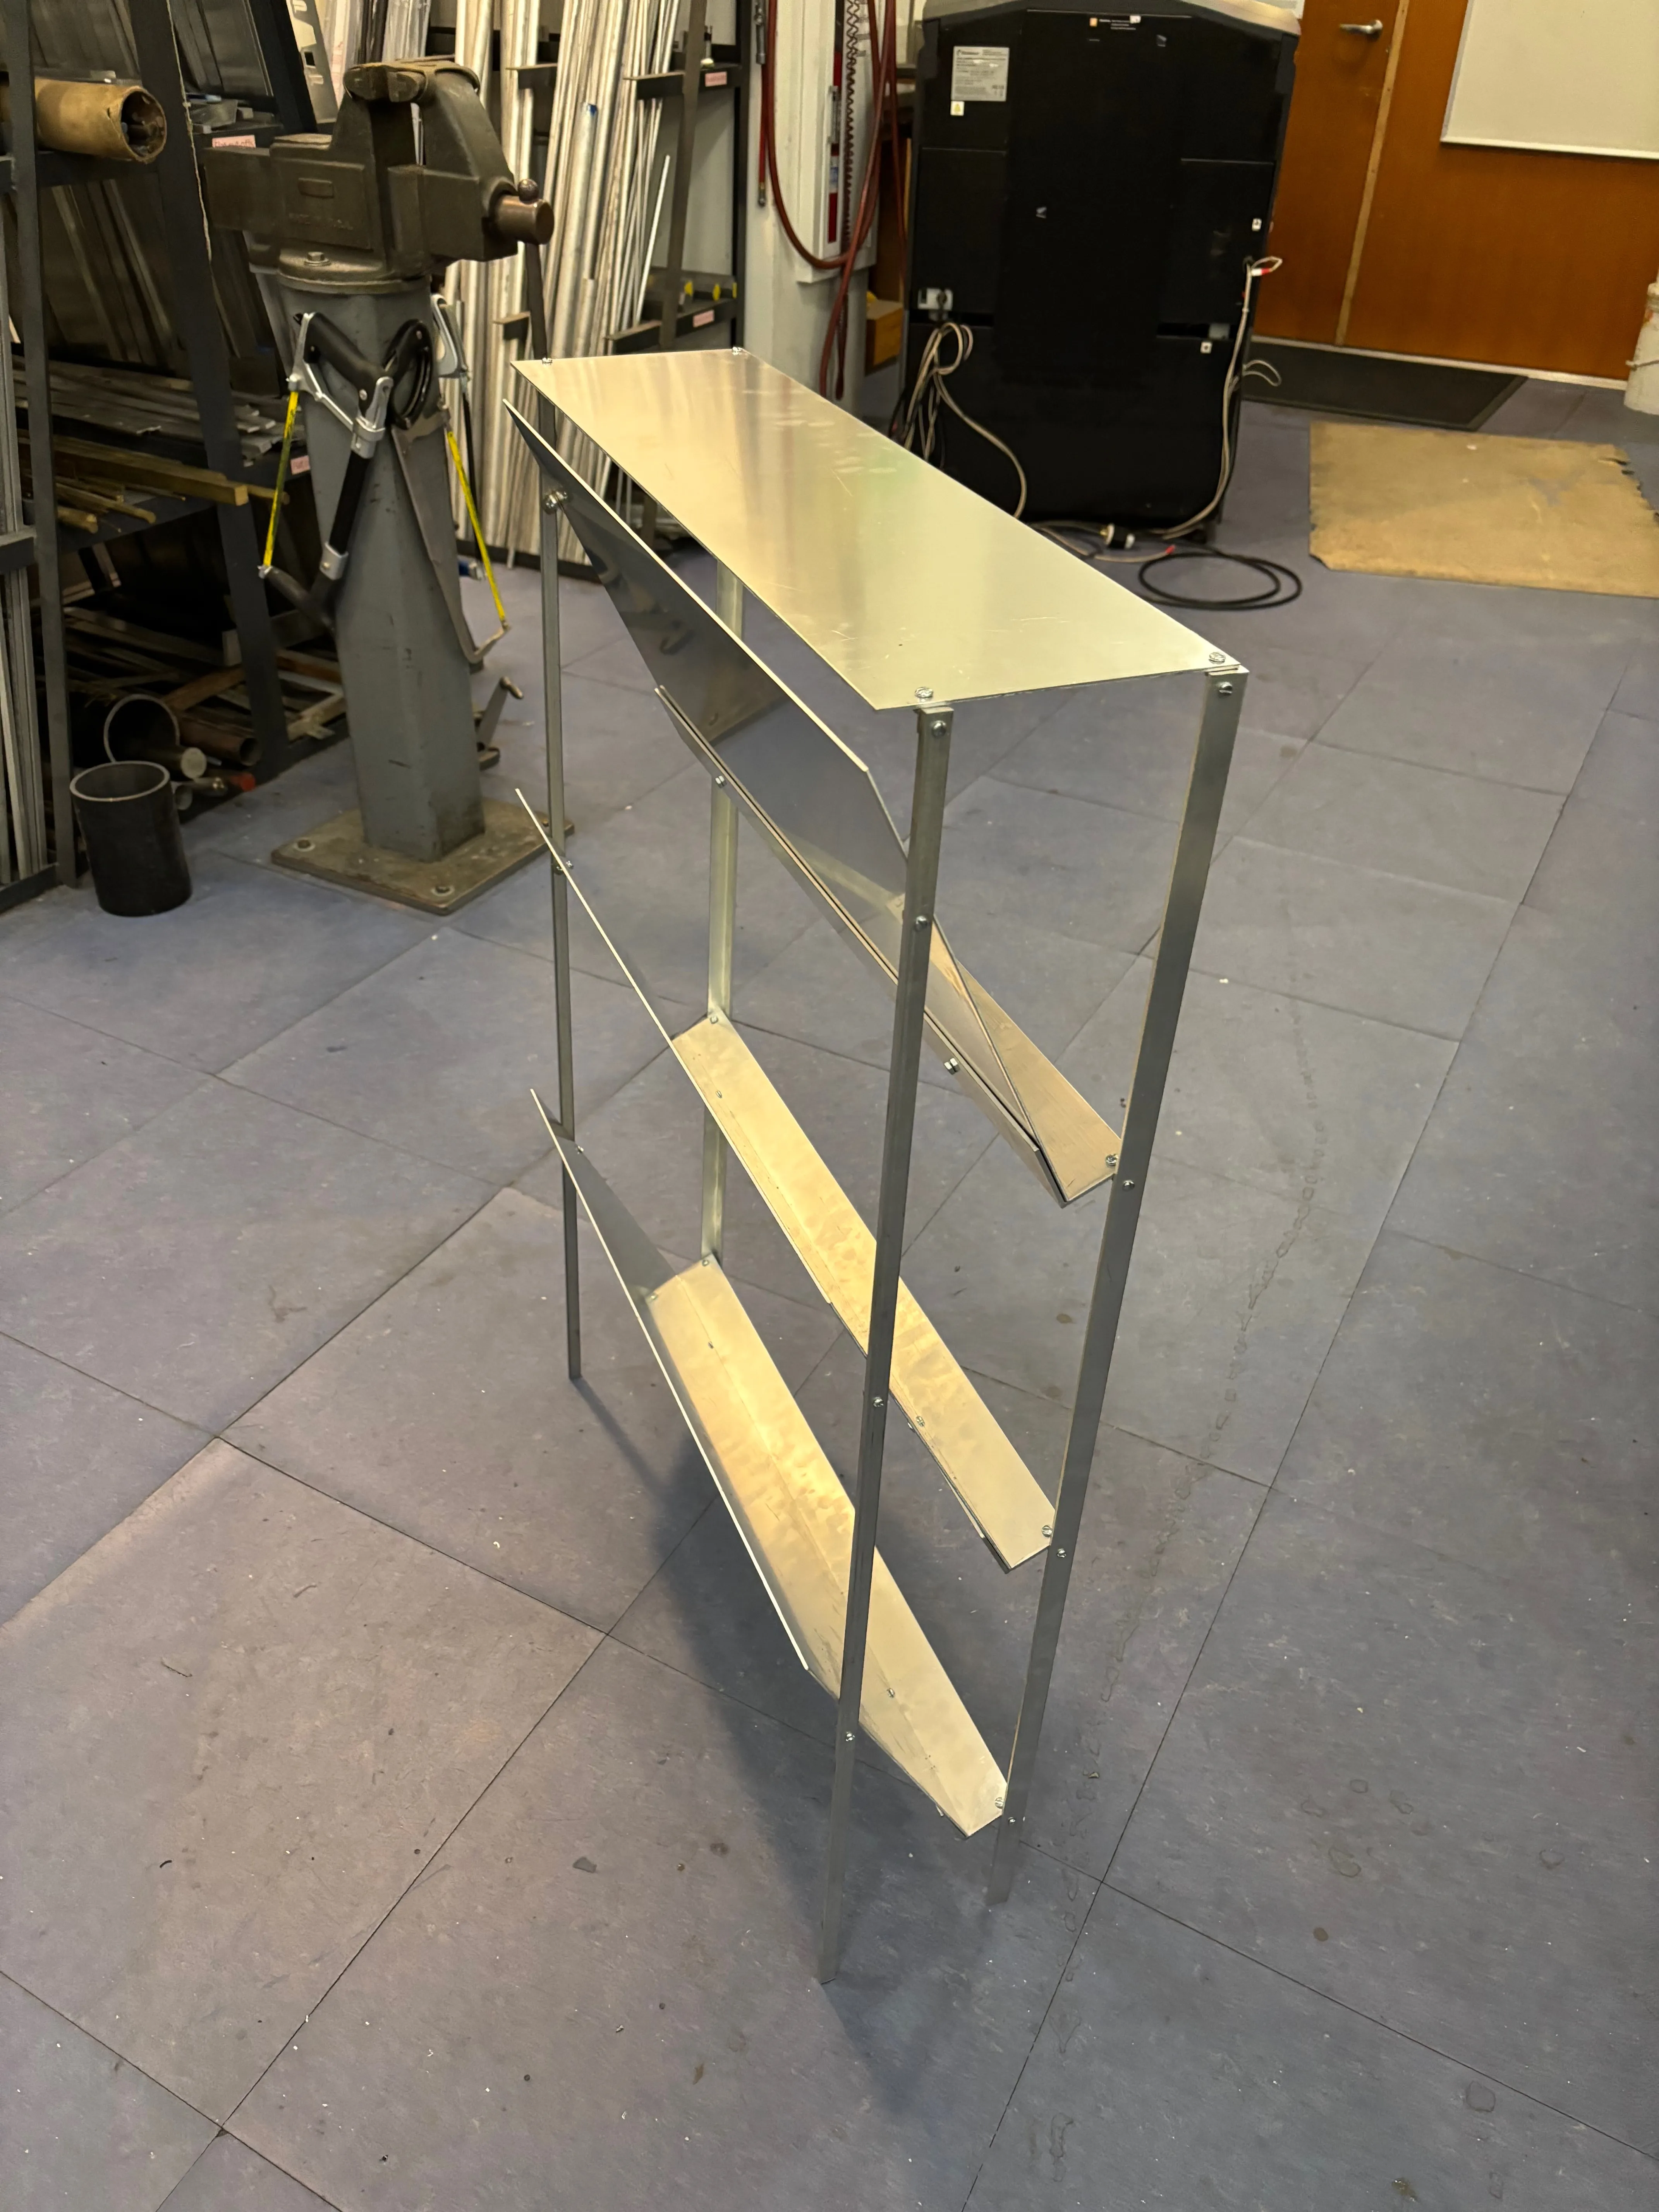
When I was building it I was unsure of how rigid the whole rack would be but after tightening all the bolts it did end up being pretty rigid/stable. The only part that could have been made more rigid is the top shelf. Because it doesn’t have the angle iron bolted to it like the shoe shelves, it is kind of flexible in the middle, so you can’t put heavy things at the center. I could always add angle iron to the top shelf, at the back, either pointing up like a backsplash or pointing down to be more out of sight, but at this point I think I was ready to be done with the piece.
Installation
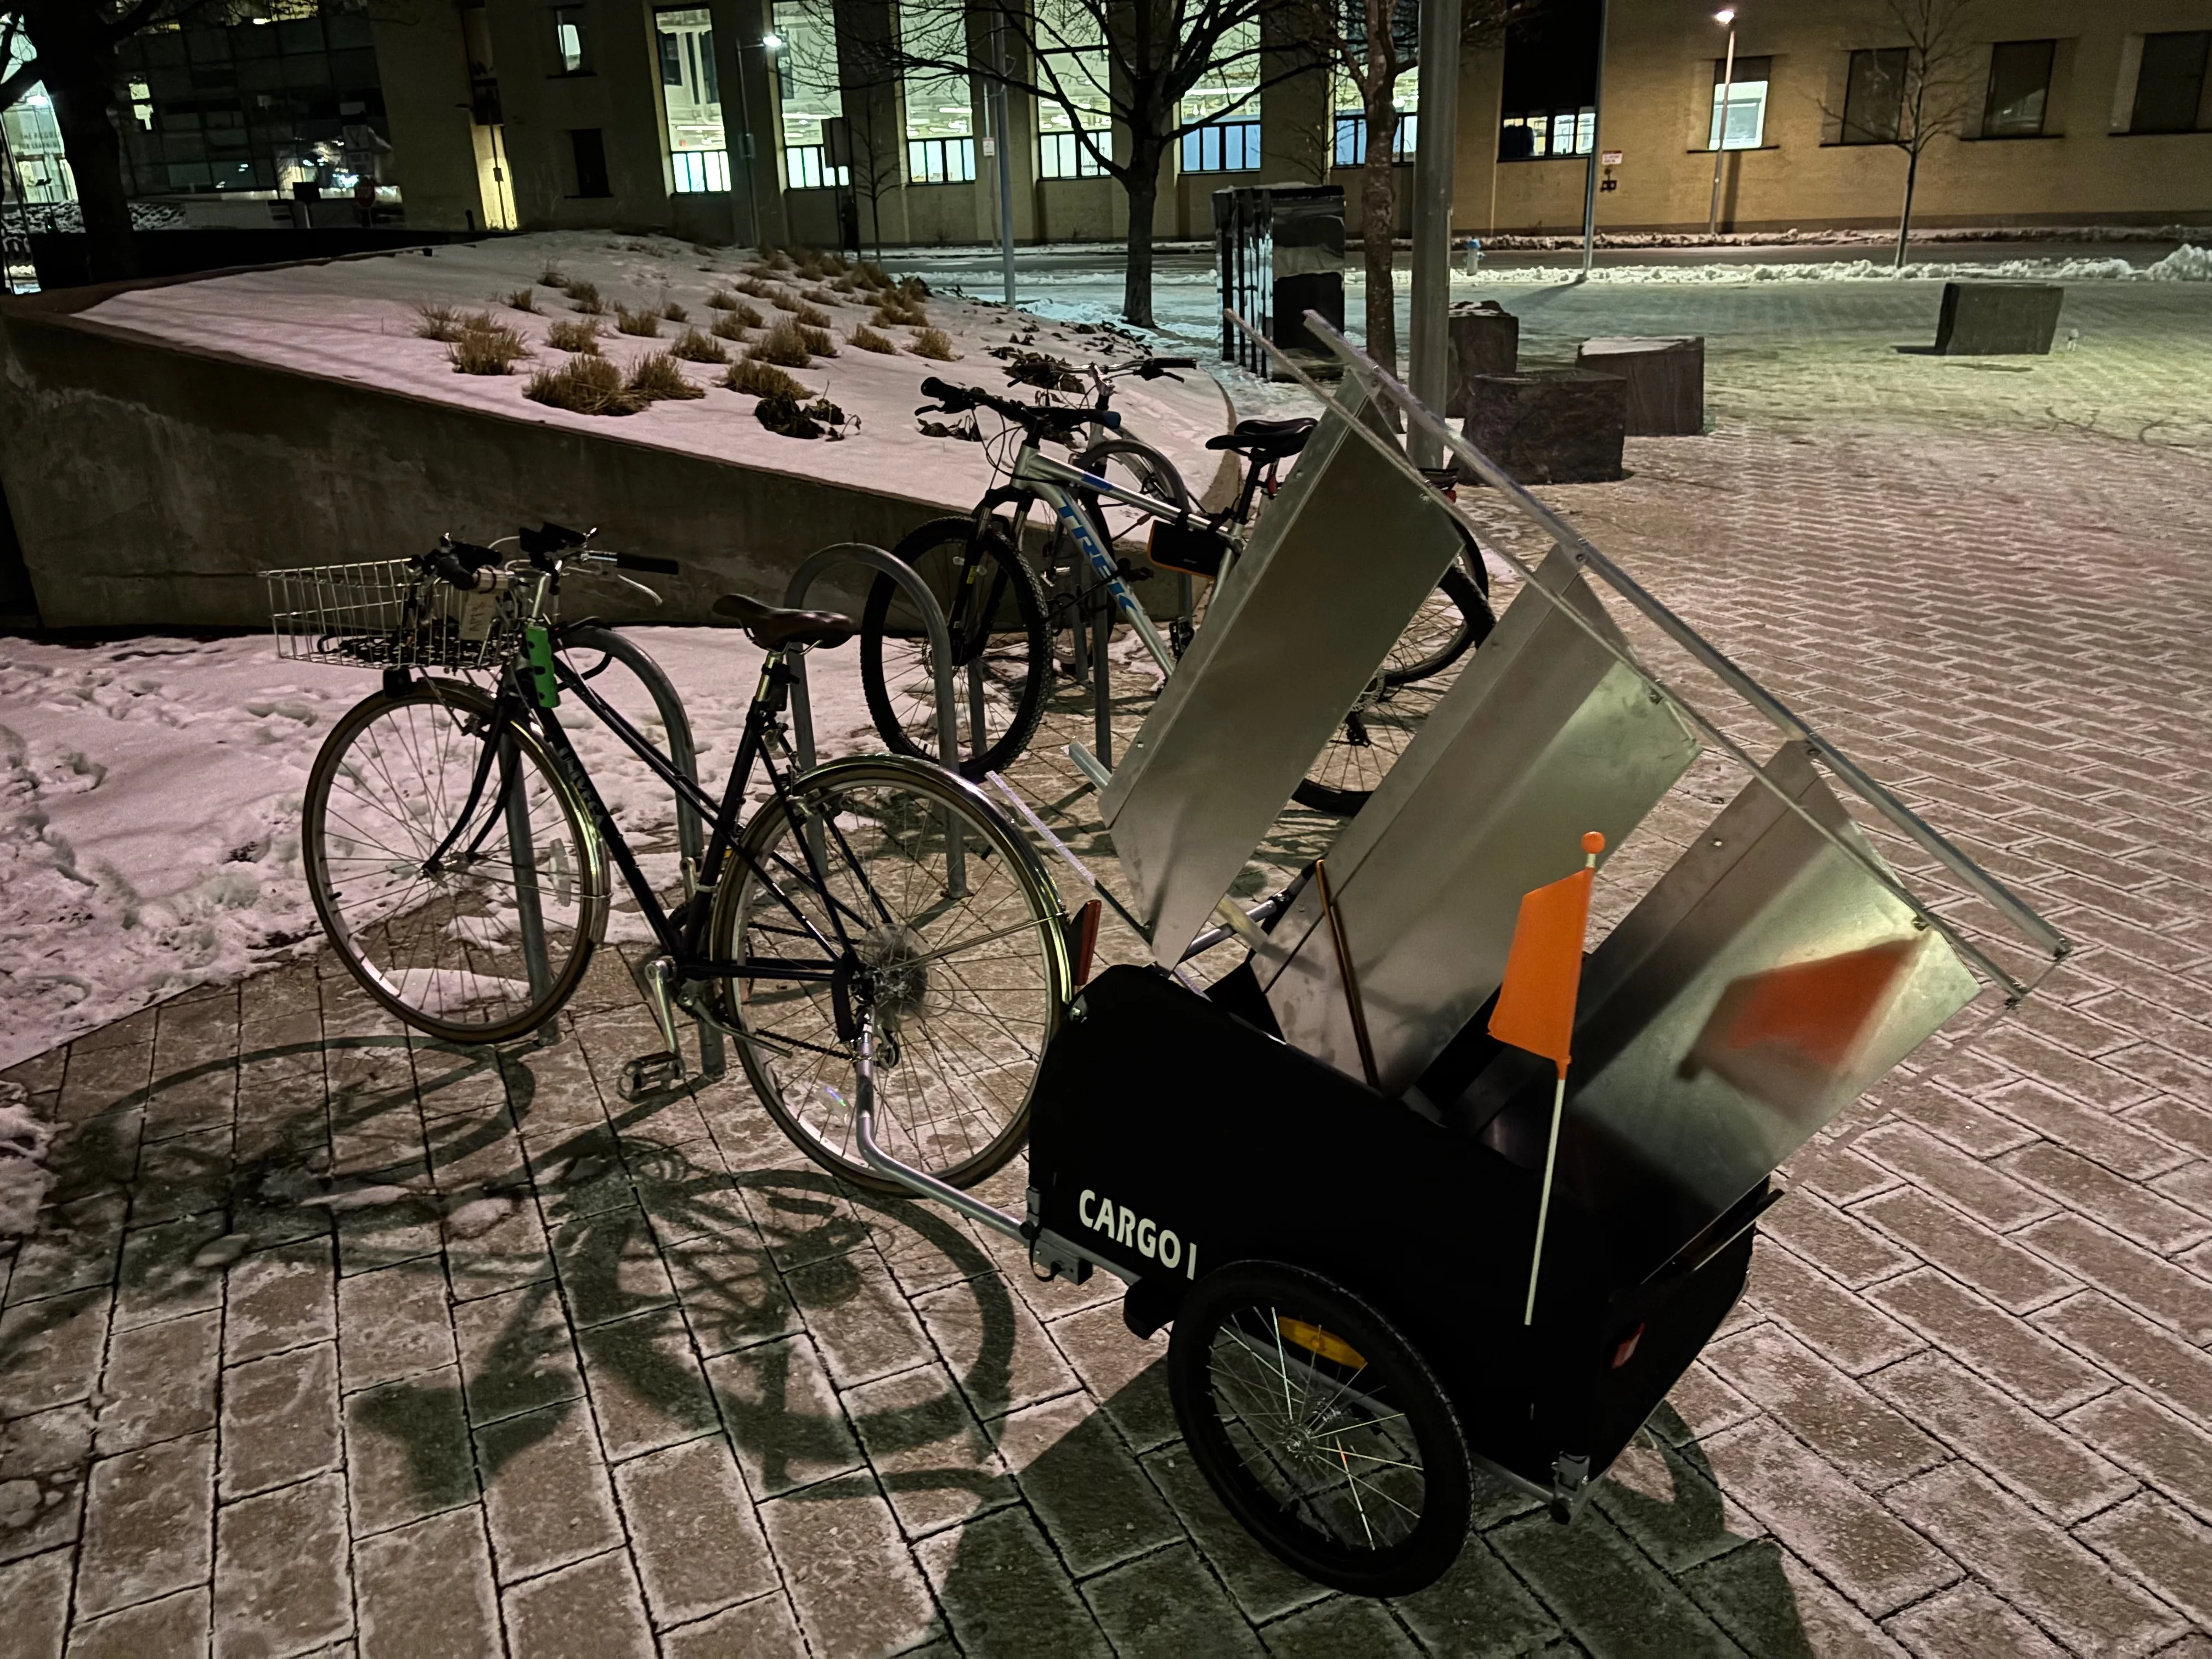
Cycling it home in my bike trailer was kind of an adventure. I had used lock washers and normal washers at random and a couple of the connections that used normal washers came loose on the ride back. Fortunately, enough of the nuts and bolts fell directly into the trailer that I was able to have the rack stable enough to start using when I got home. I will definitely be using all lock washers (and maybe even loctite) going forward.
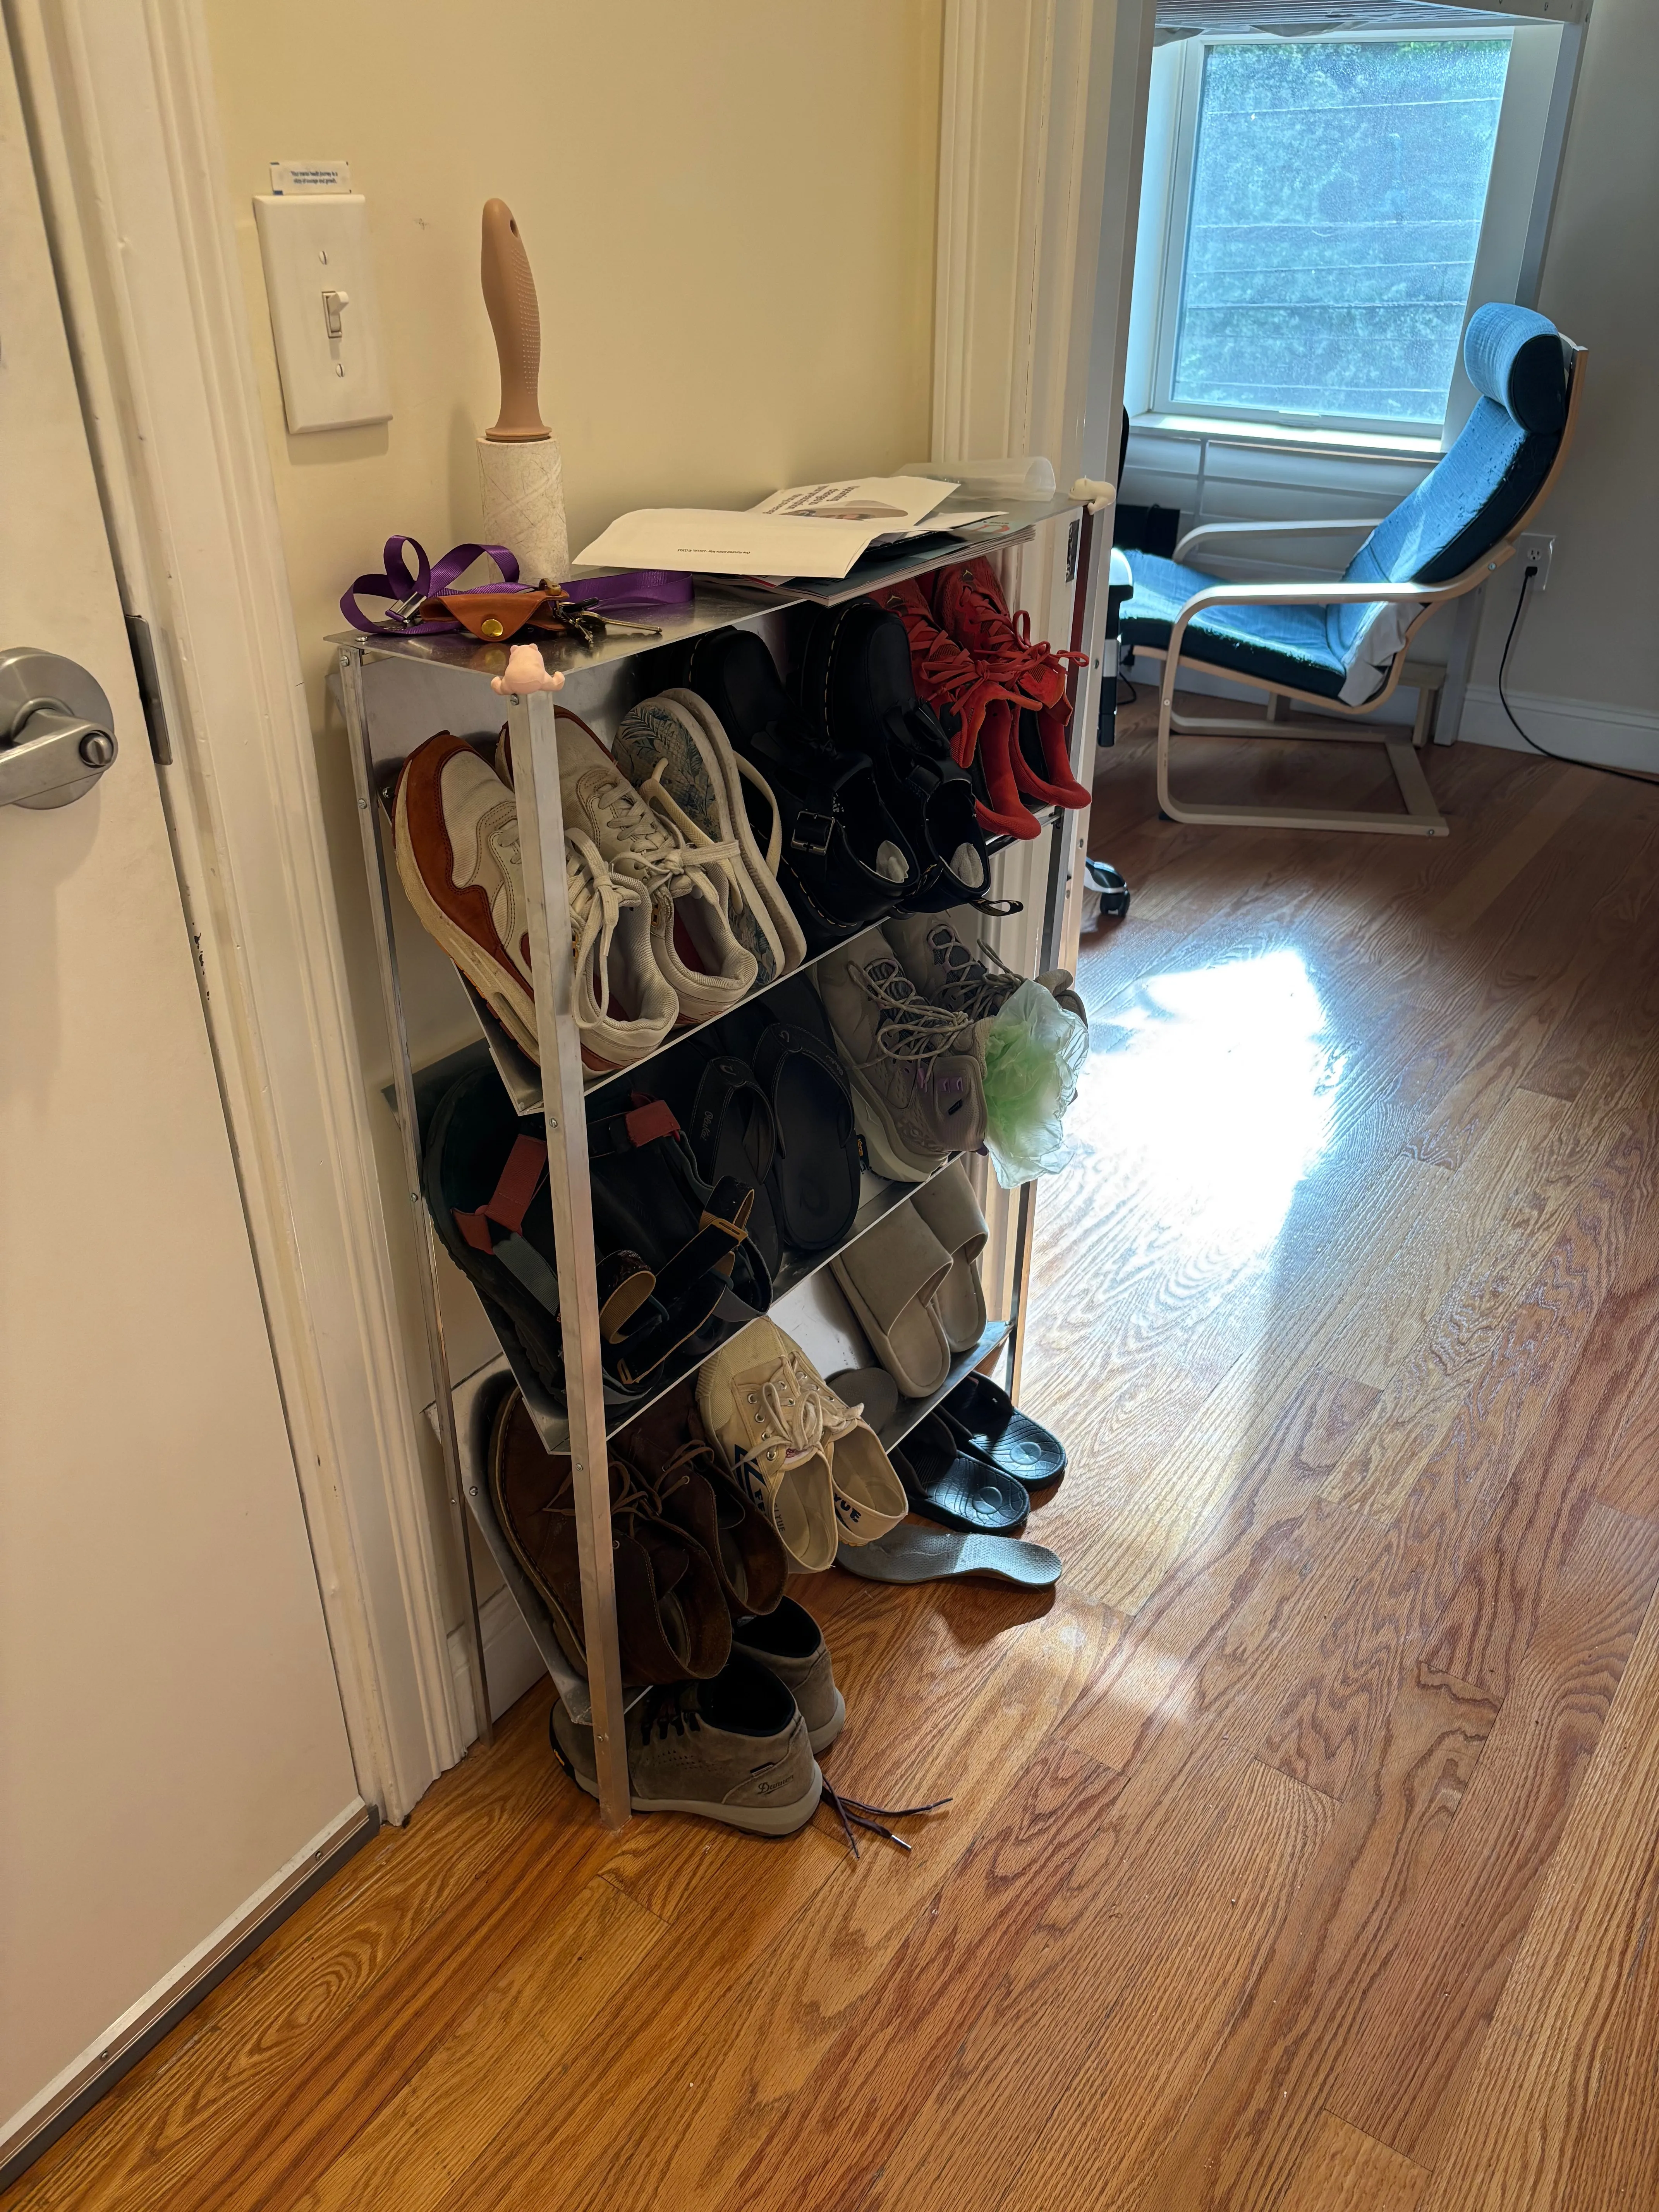
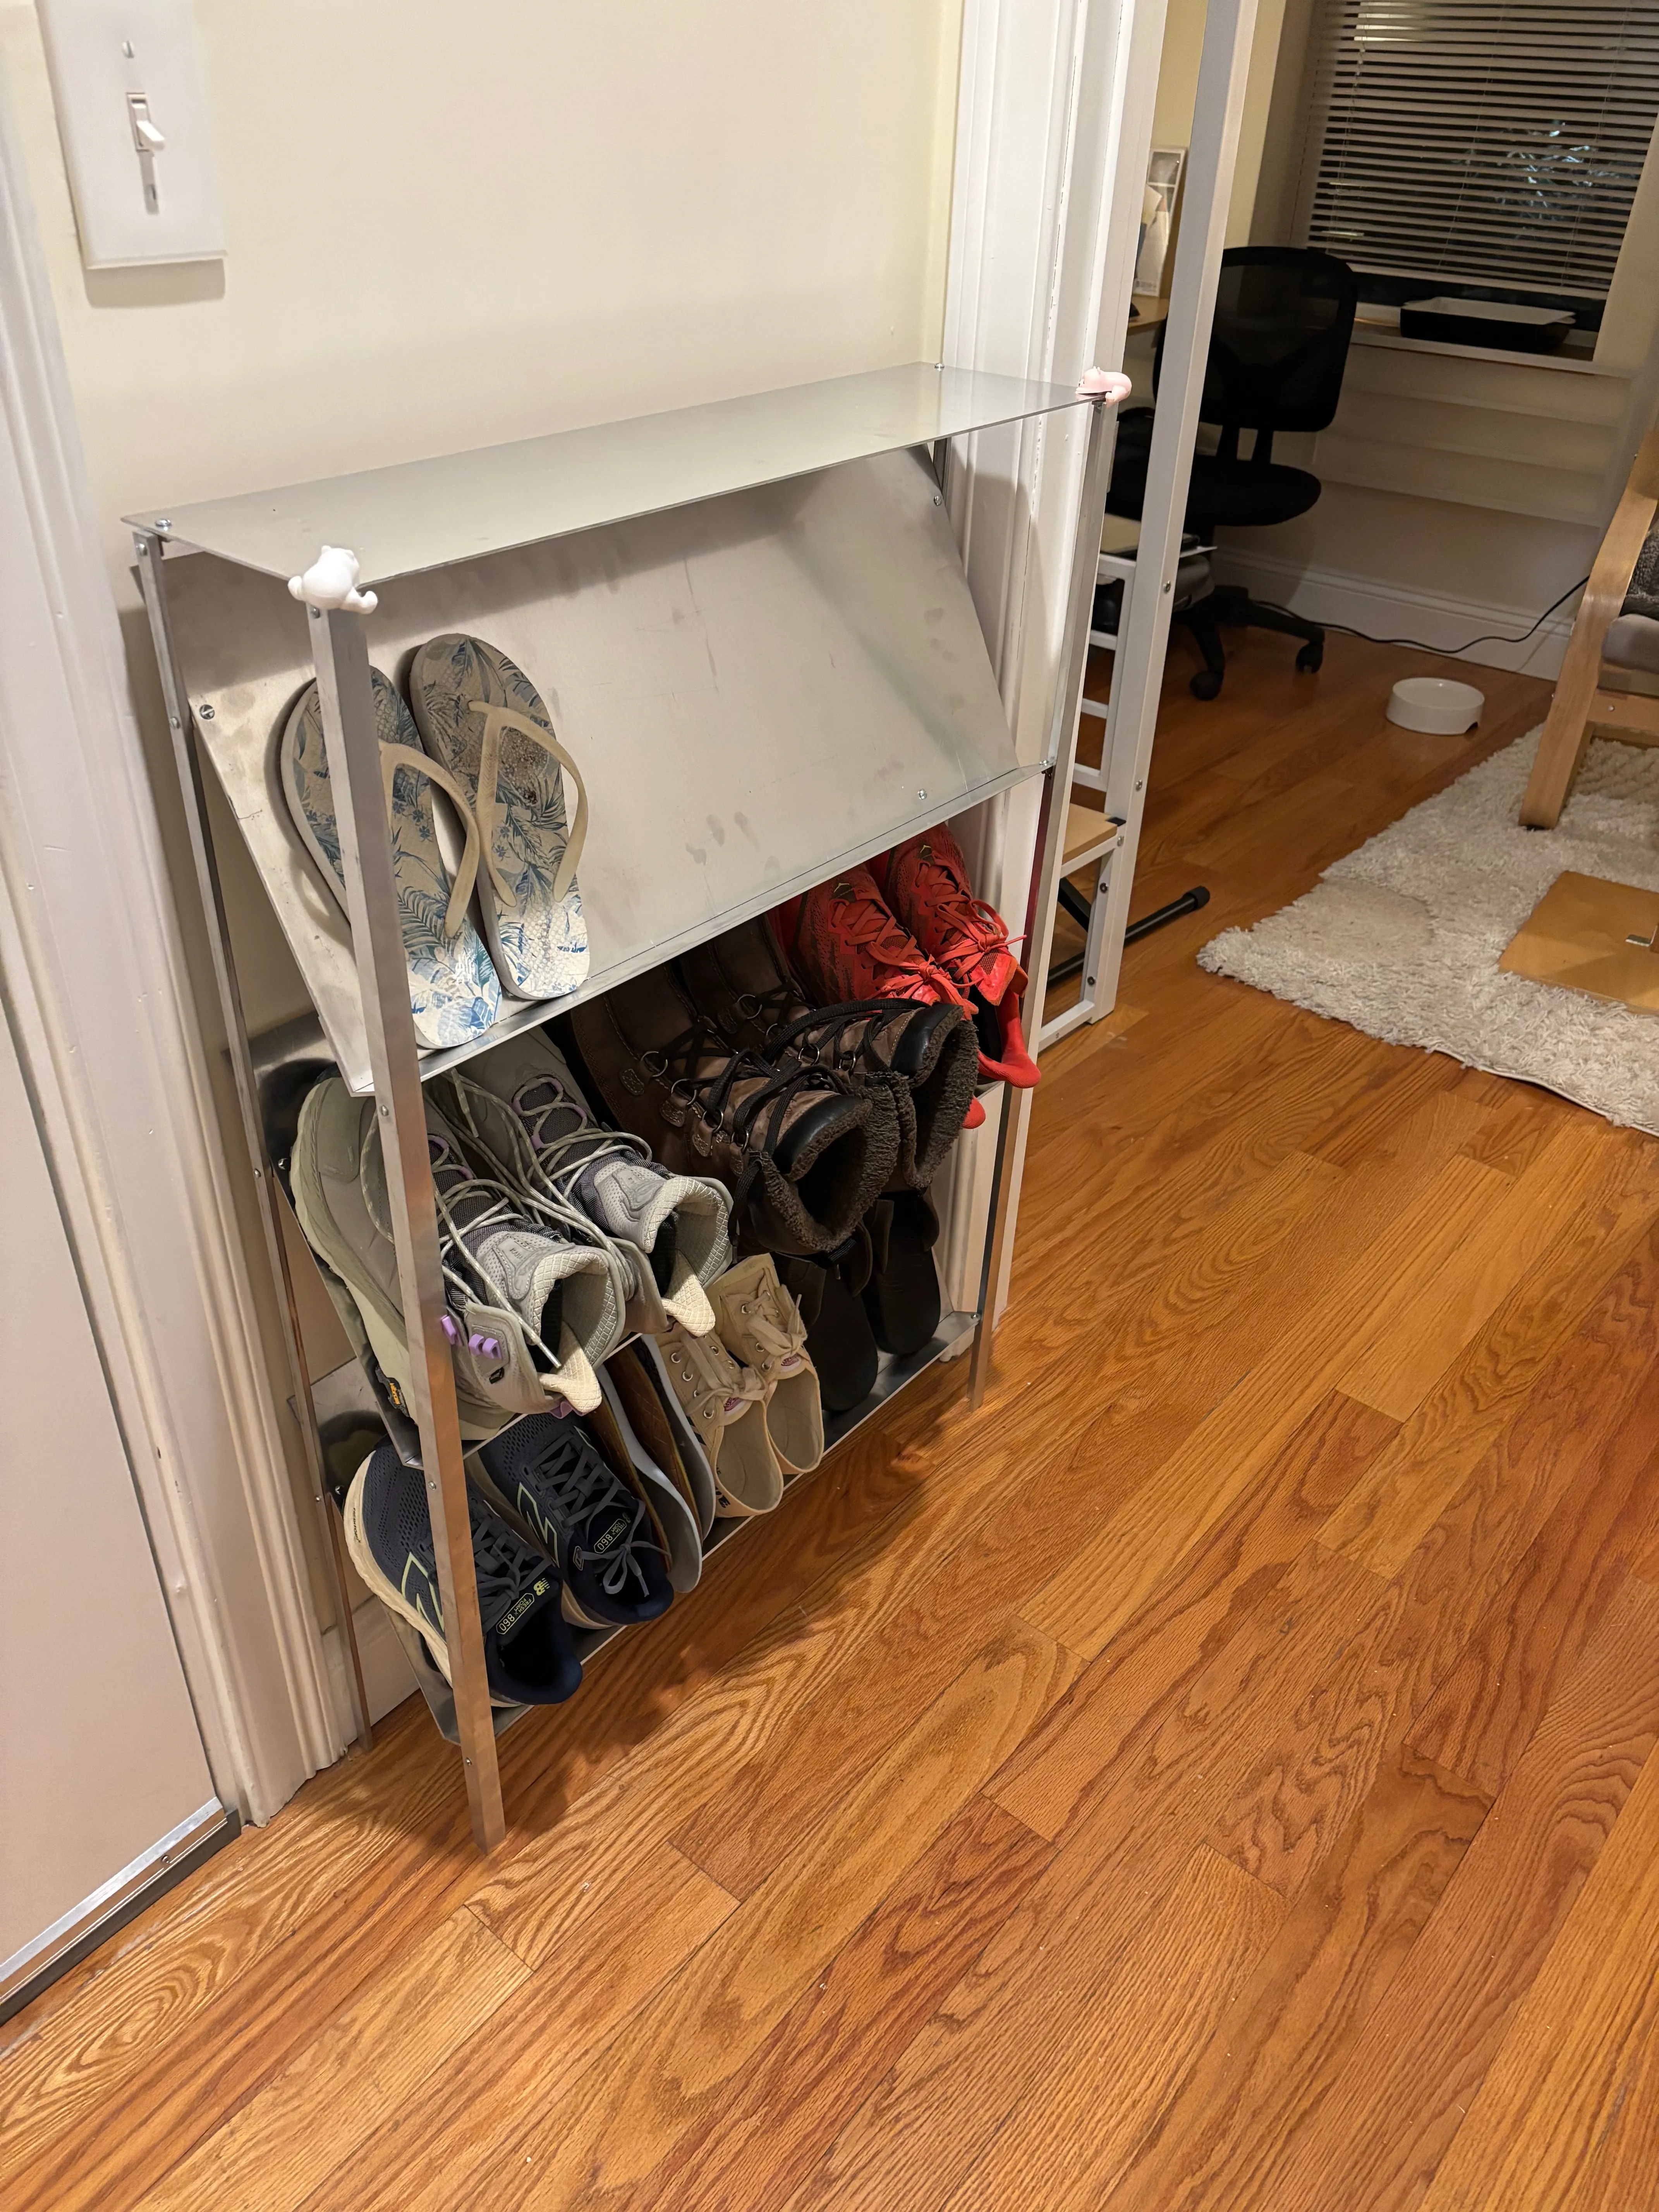
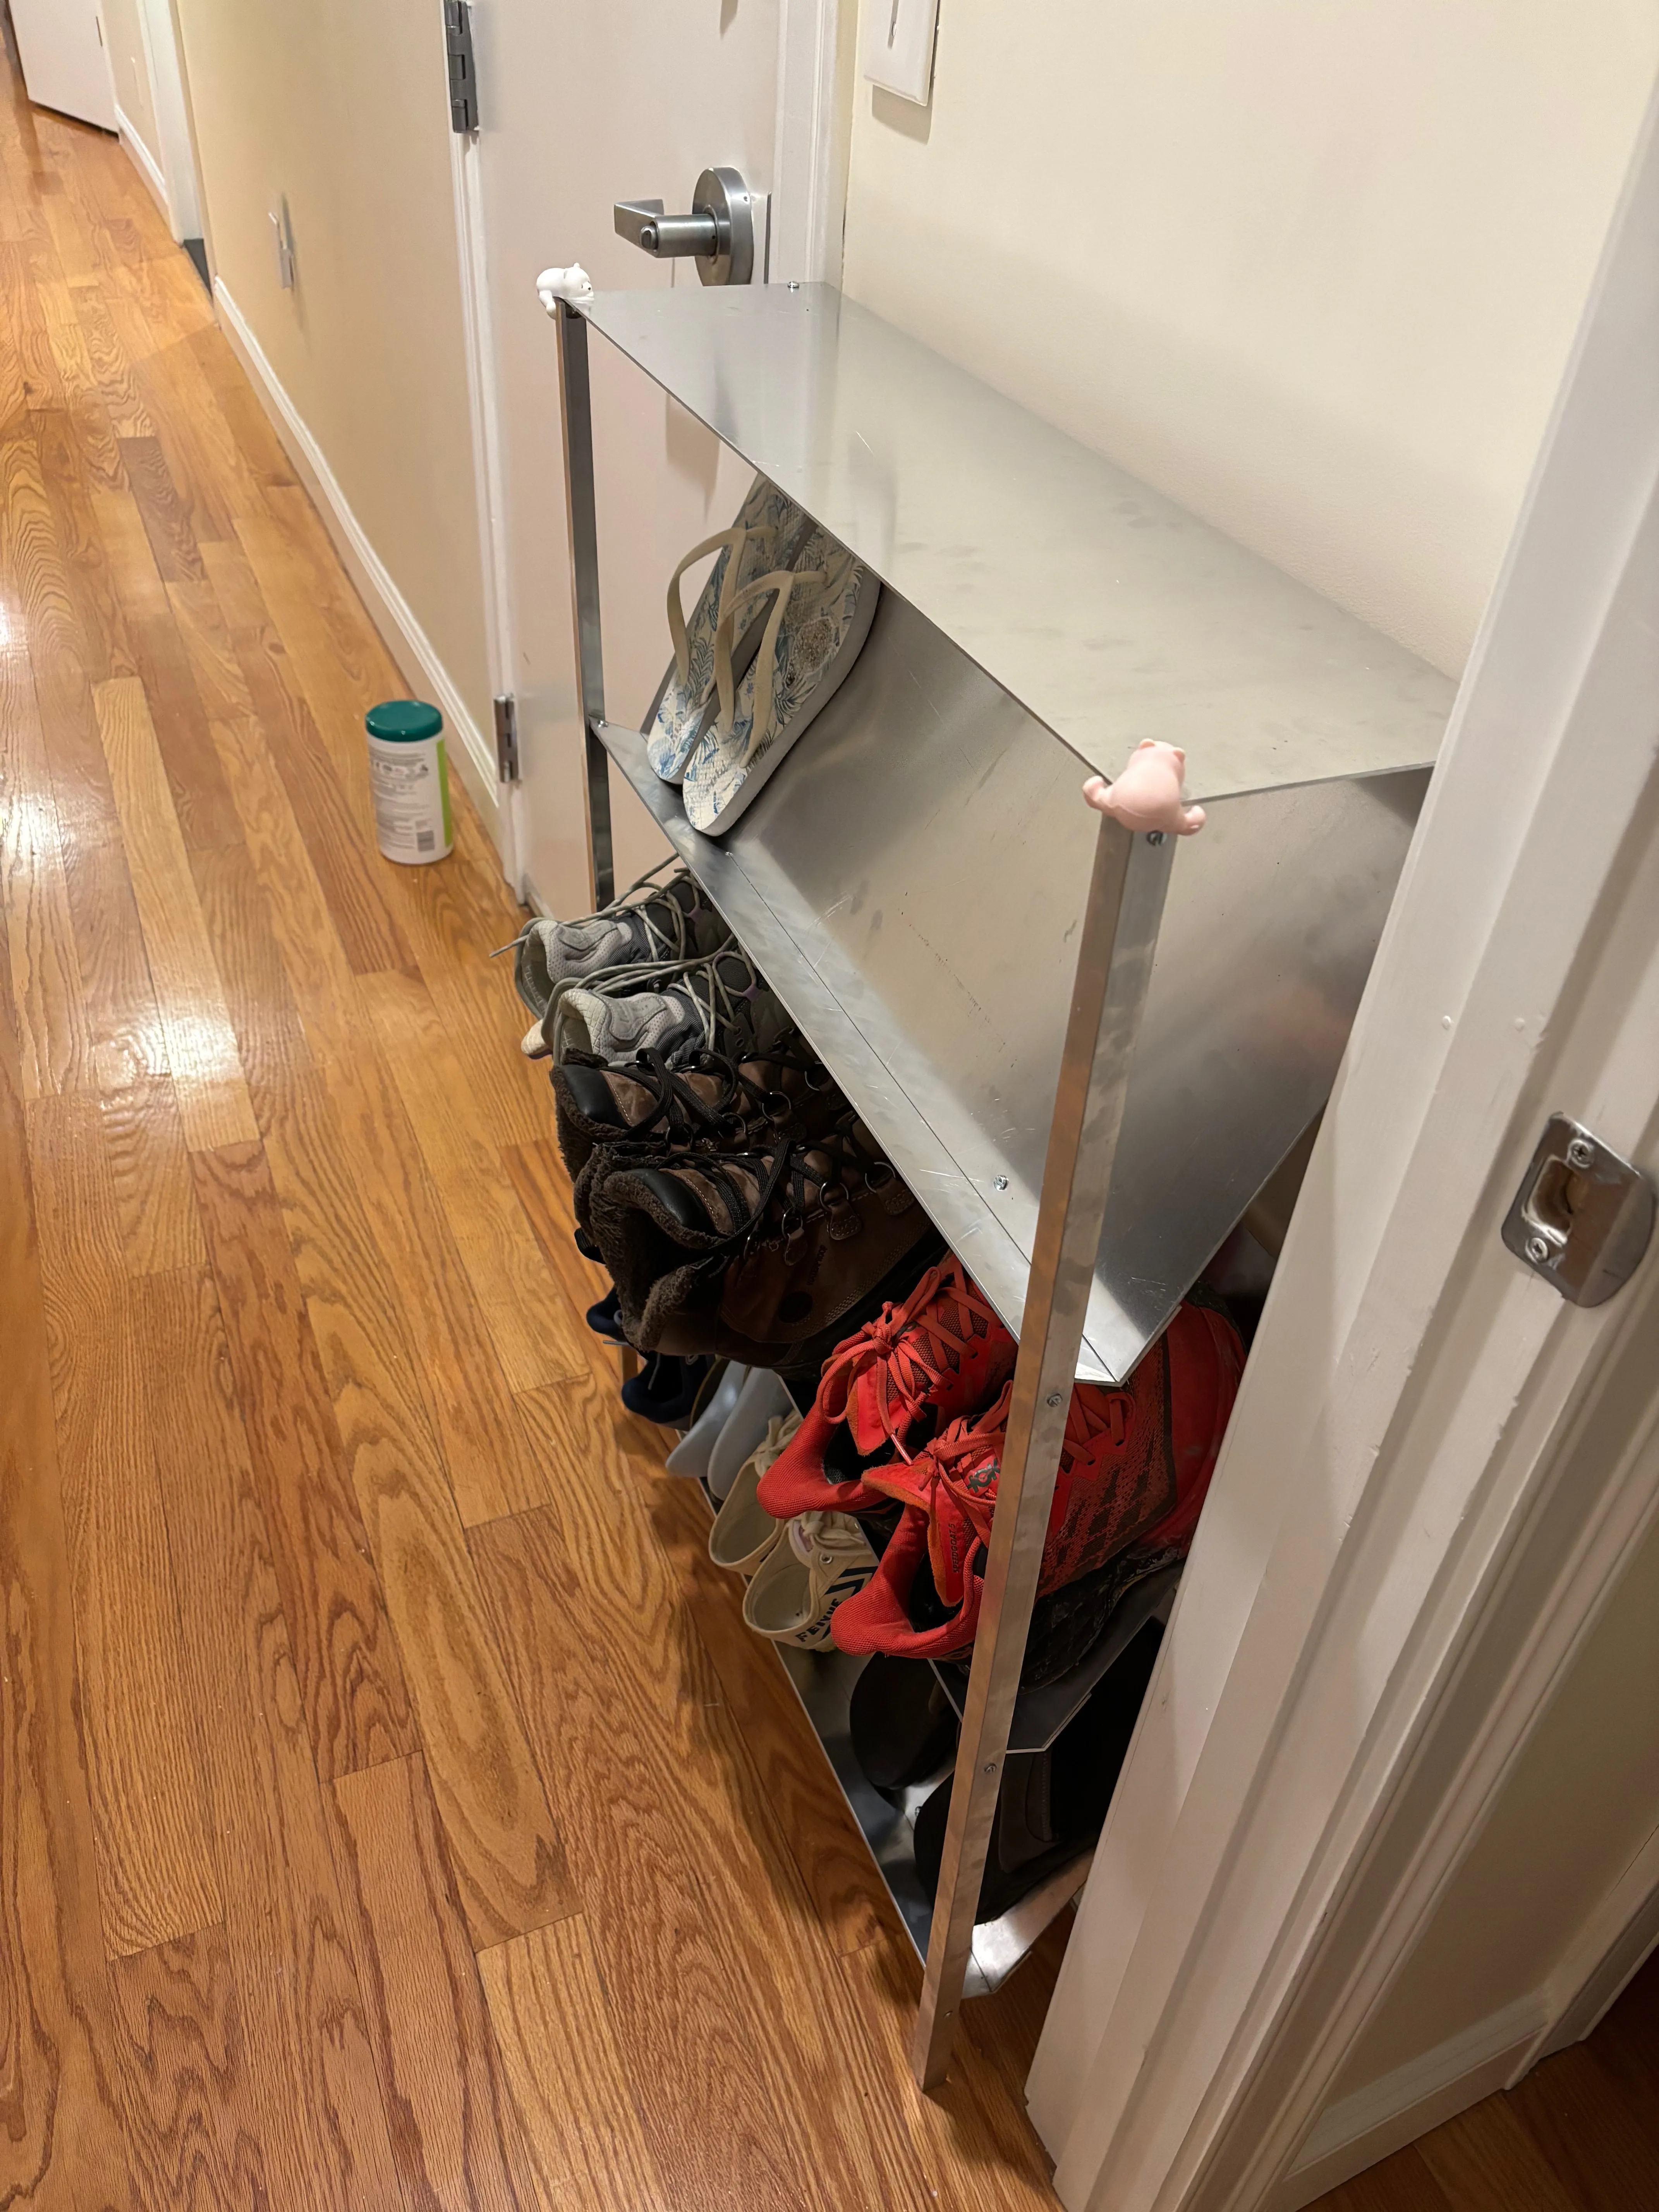
A final addition was corner protectors (we call these specific ones bear-butts) to the front two corners of the top shelf. I had left them exposed and they might catch on people’s clothes as they walk past or poke someone’s eye out when they reach down to get their shoes from the lower shelf.
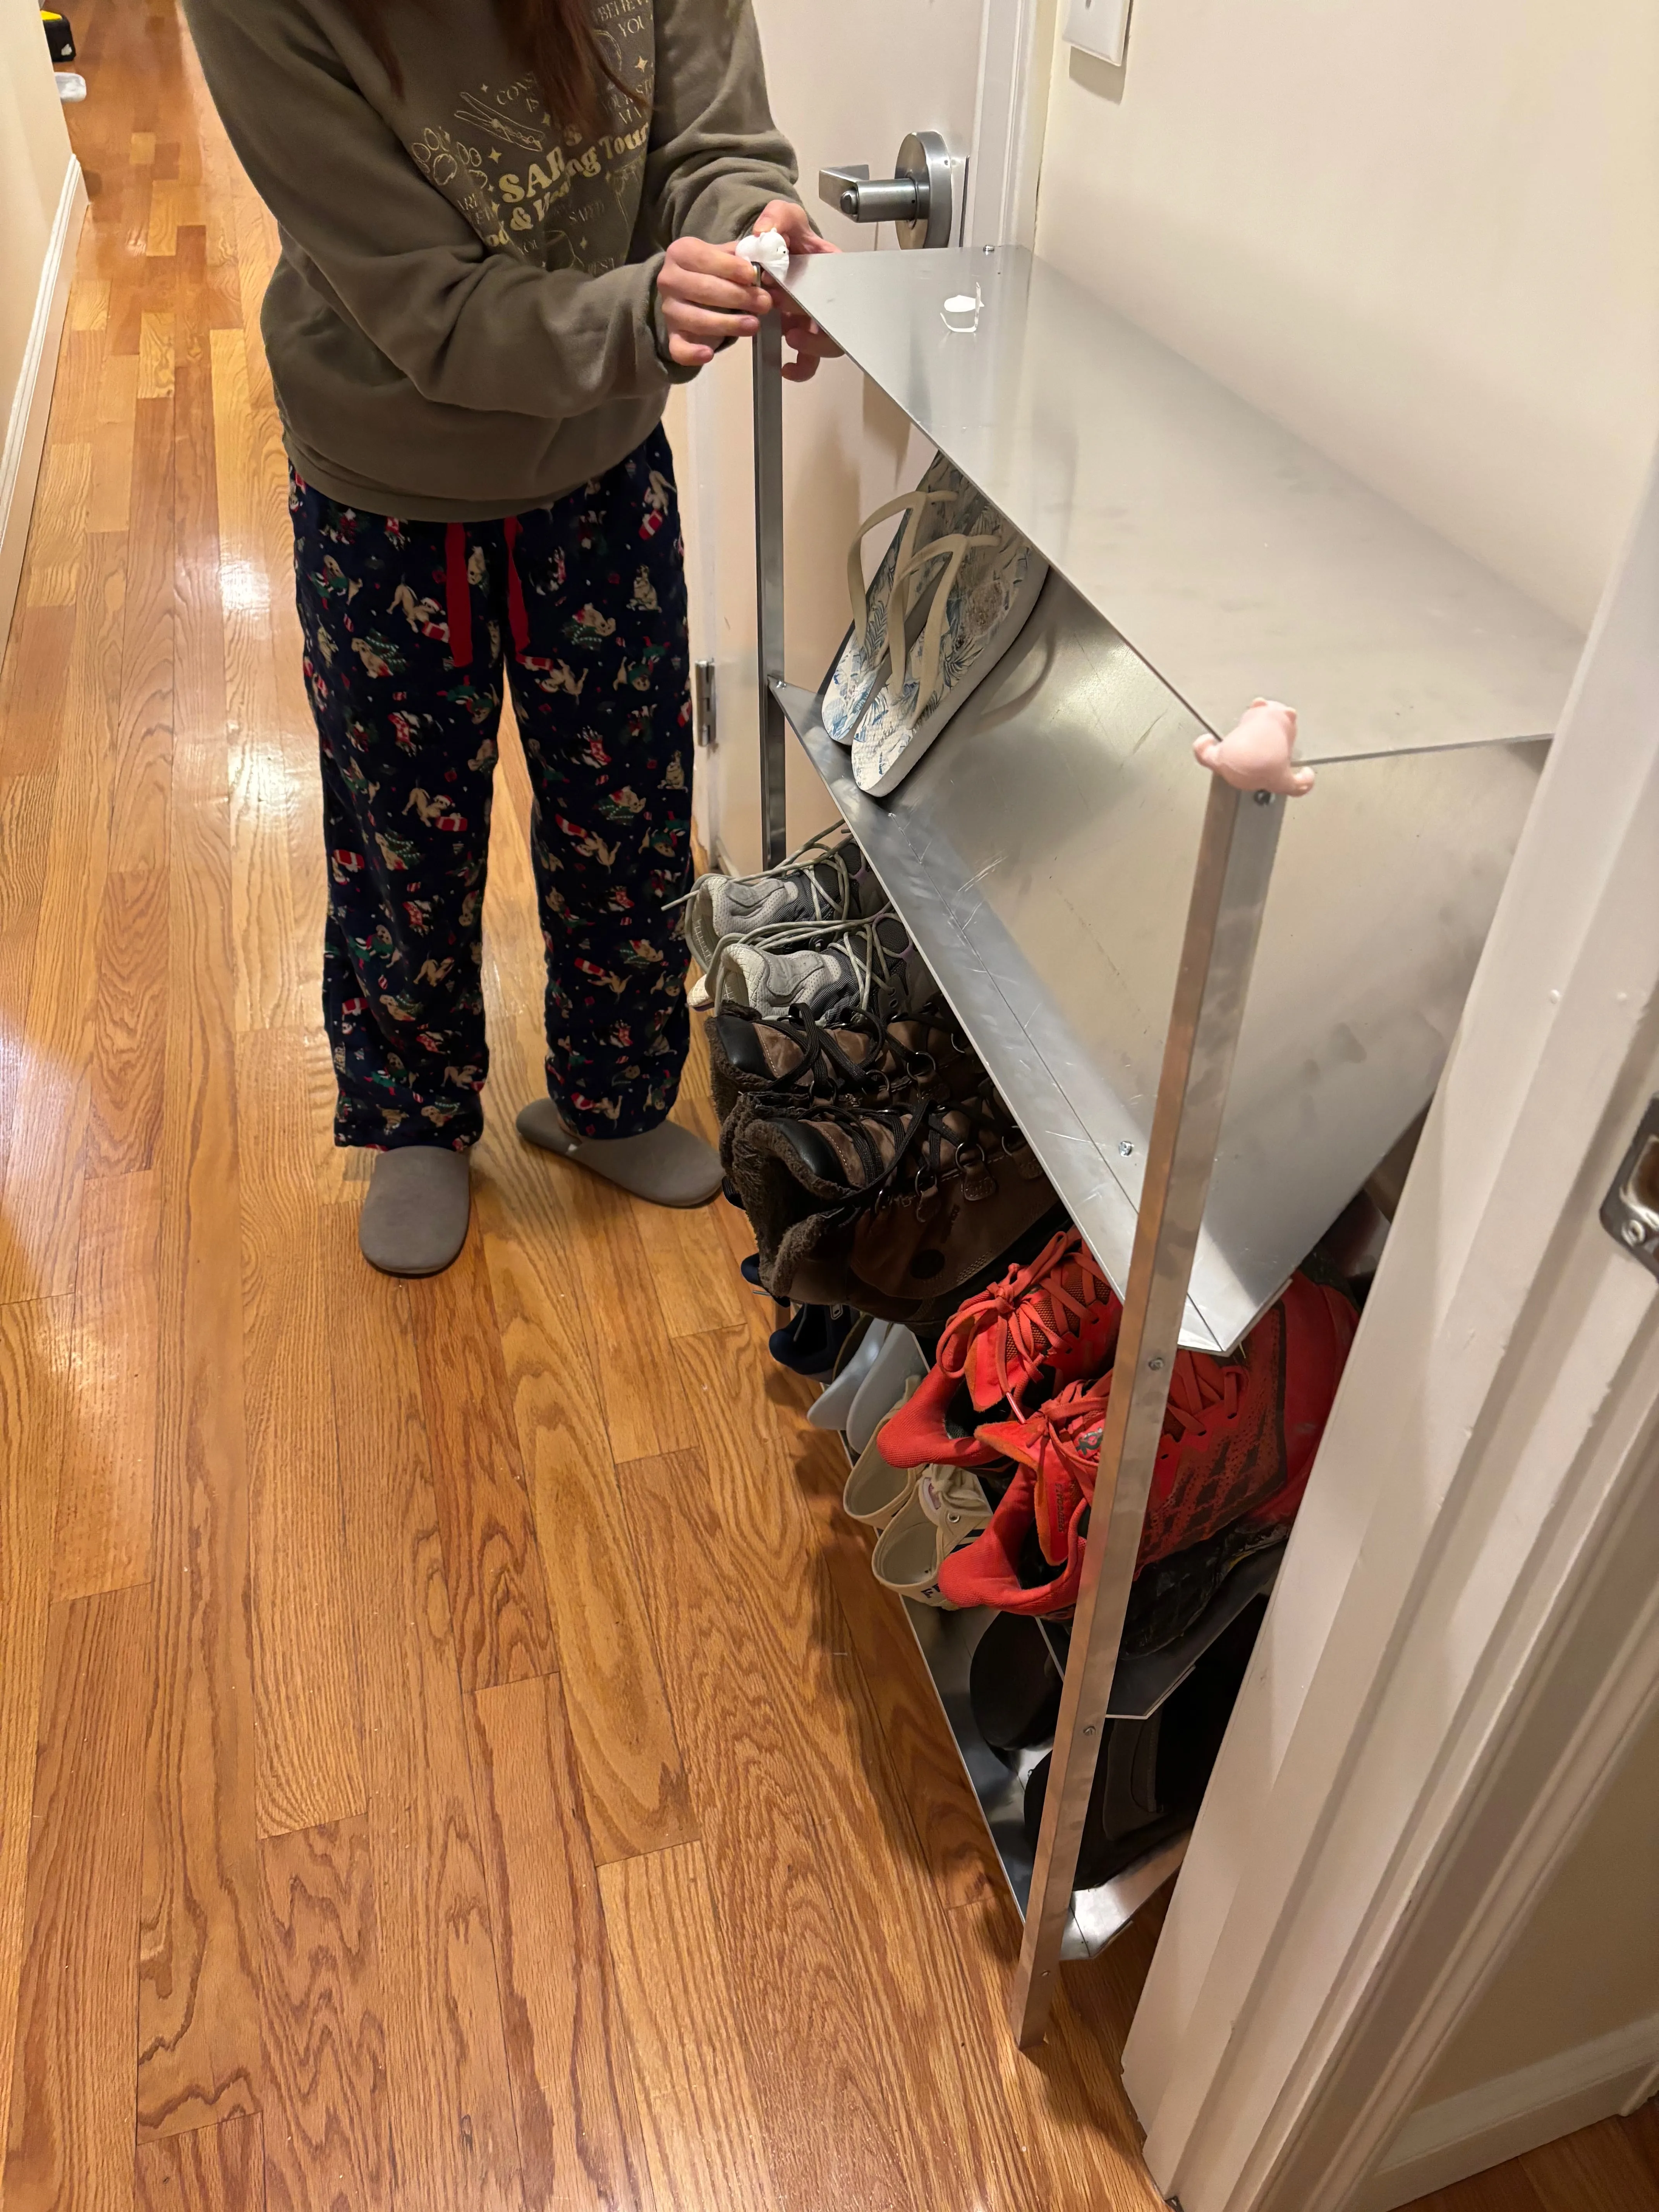
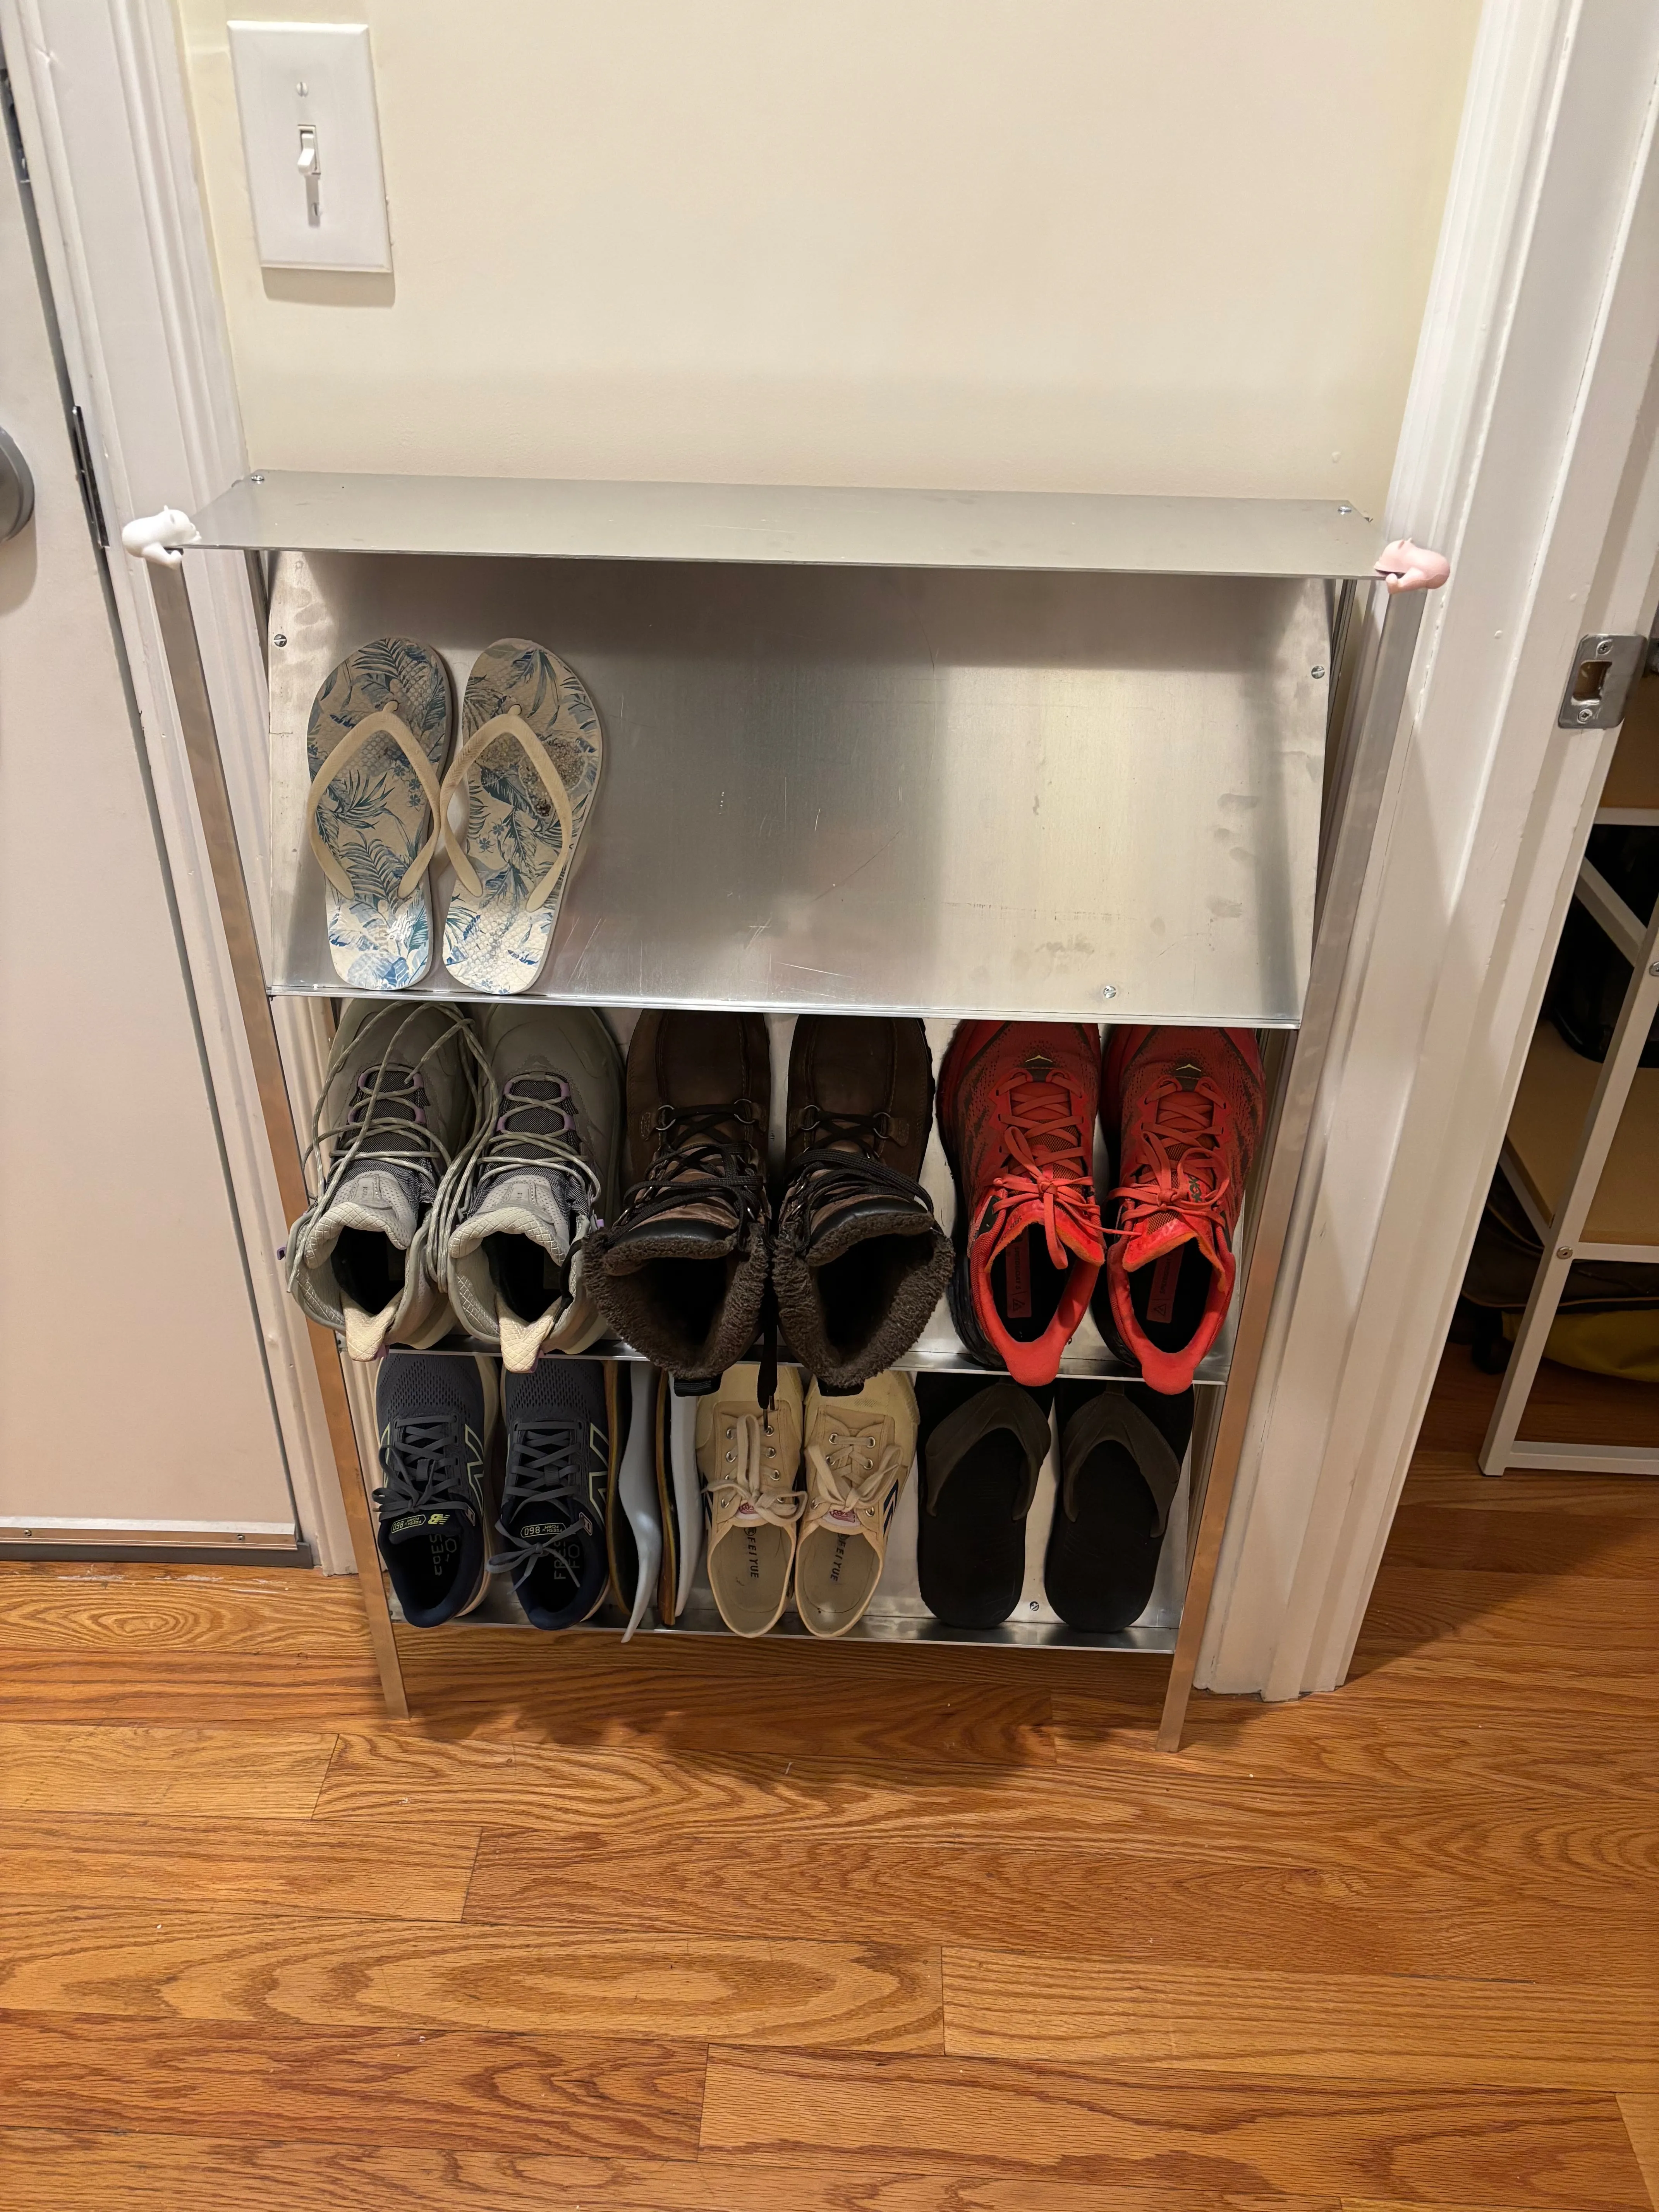
Everyone was really happy with the new shoe rack. It fit the space perfectly and satisfied all of our requirements. A couple of months later, it has gotten a little more cluttered and dirty but is still working well for us.