Context
I’d been wanting to do more things with sheet metal. Many years ago I watched a YouTube video (or an episode of MythBusters — I can’t remember exactly which) where Adam Savage talked about how sheet metal was such a versatile and efficient way to build lots of (possibly very large) things. Laying out all your cuts and bends in 2D, and then folding, bending and riveting to make your 3D structure feels very efficient and elegant to me so I’d always wanted to explore this medium more. The MIT maker spaces have lots of sheet metal brakes and shears, as well as scrap/free stock material. After whetting my appetite by making a new bracket for my bike fender, I started daydreaming about what I could do next with sheet metal. Something simple and small. I landed on a sheet metal tissue box.
I think that making a box/tray is the prototypical first sheet metal project and there were a bunch of helpful tutorials on YouTube [1, 2, 3]. I typically keep a stack of paper towels on my desk (which I periodically steal from the pantries around Stata) and up until that point I’d just put them on the middle shelf of my desk shelf, but grabbing a piece was a two-handed operation and I really felt like they could do with a proper home.
Requirements
- Fit easily into the middle shelf of my desk shelf
- One-handed operation
- Look neat when stowed (didn’t want to see ugly pieces of tissue sticking out of my shelf)
- Easy to refill
Design
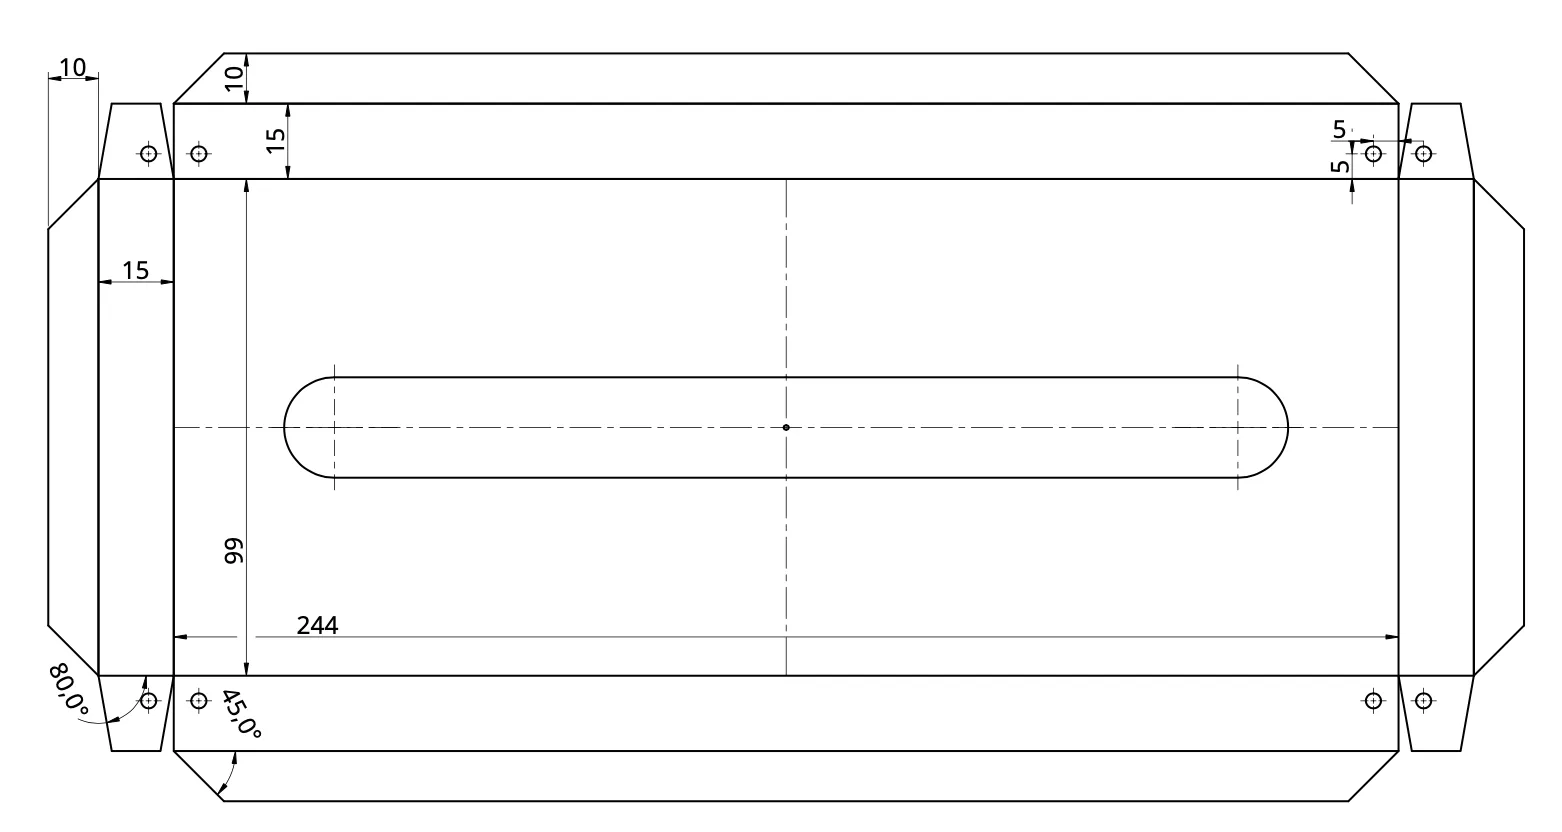
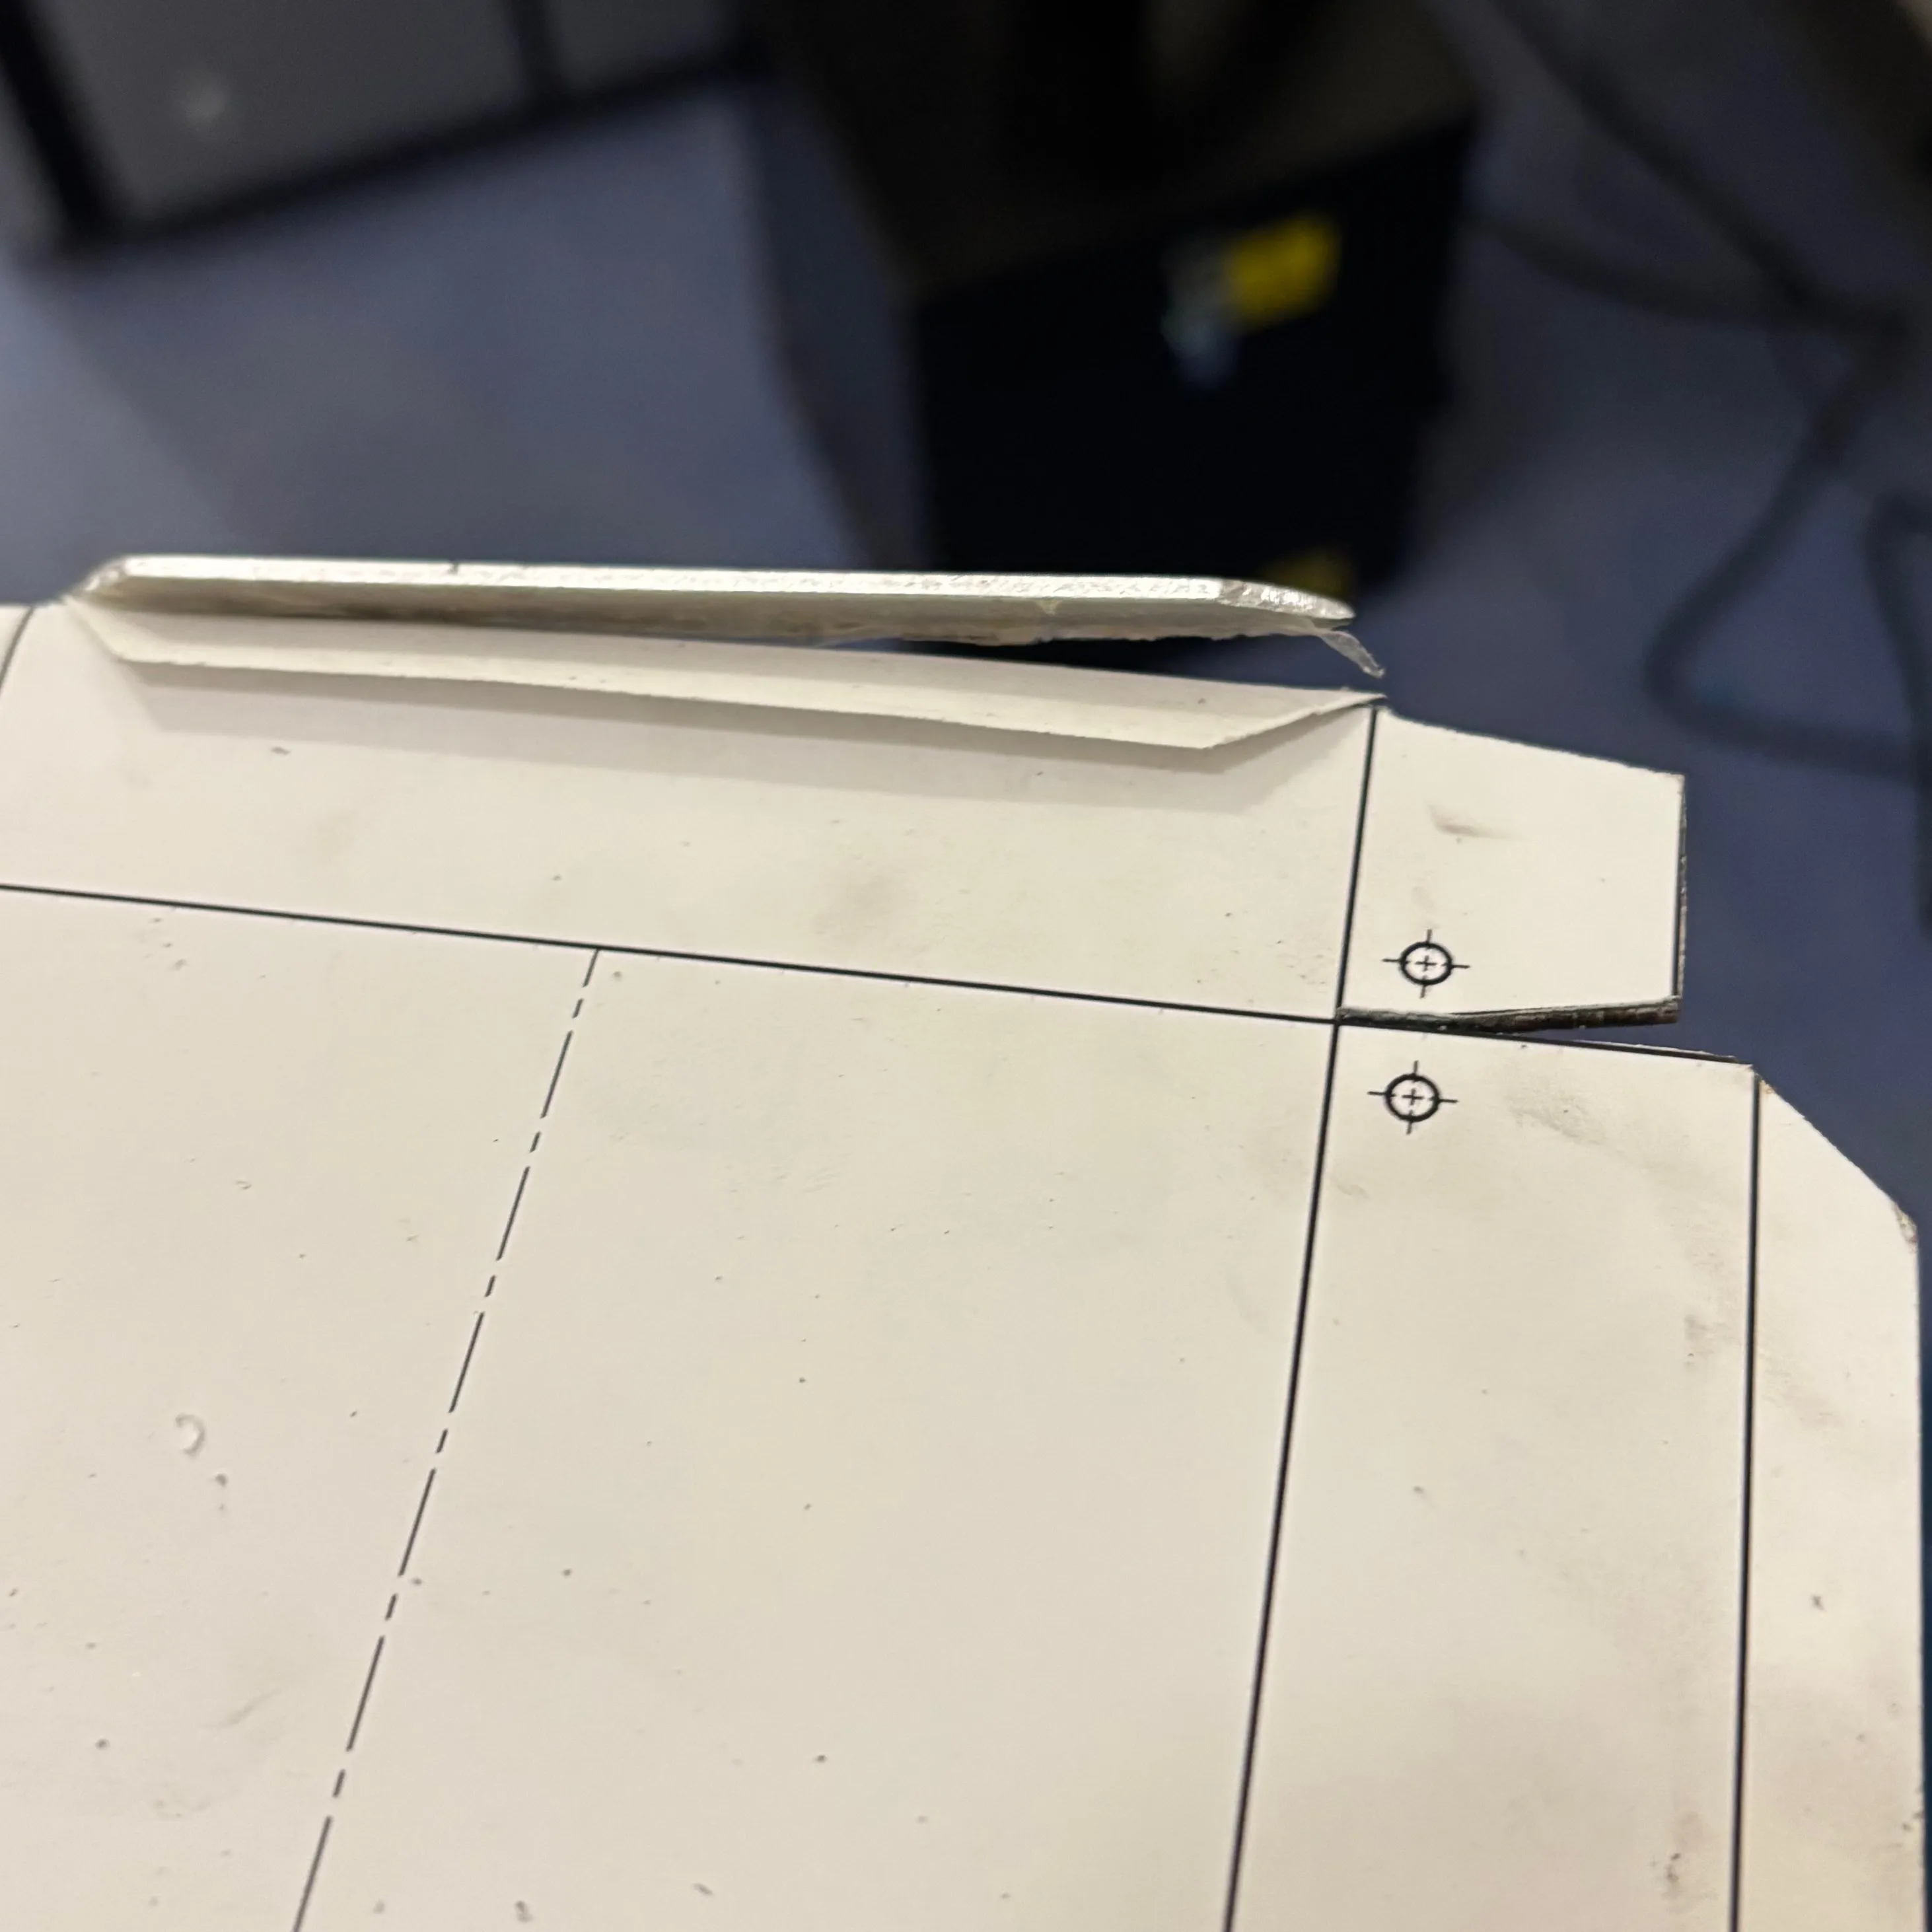
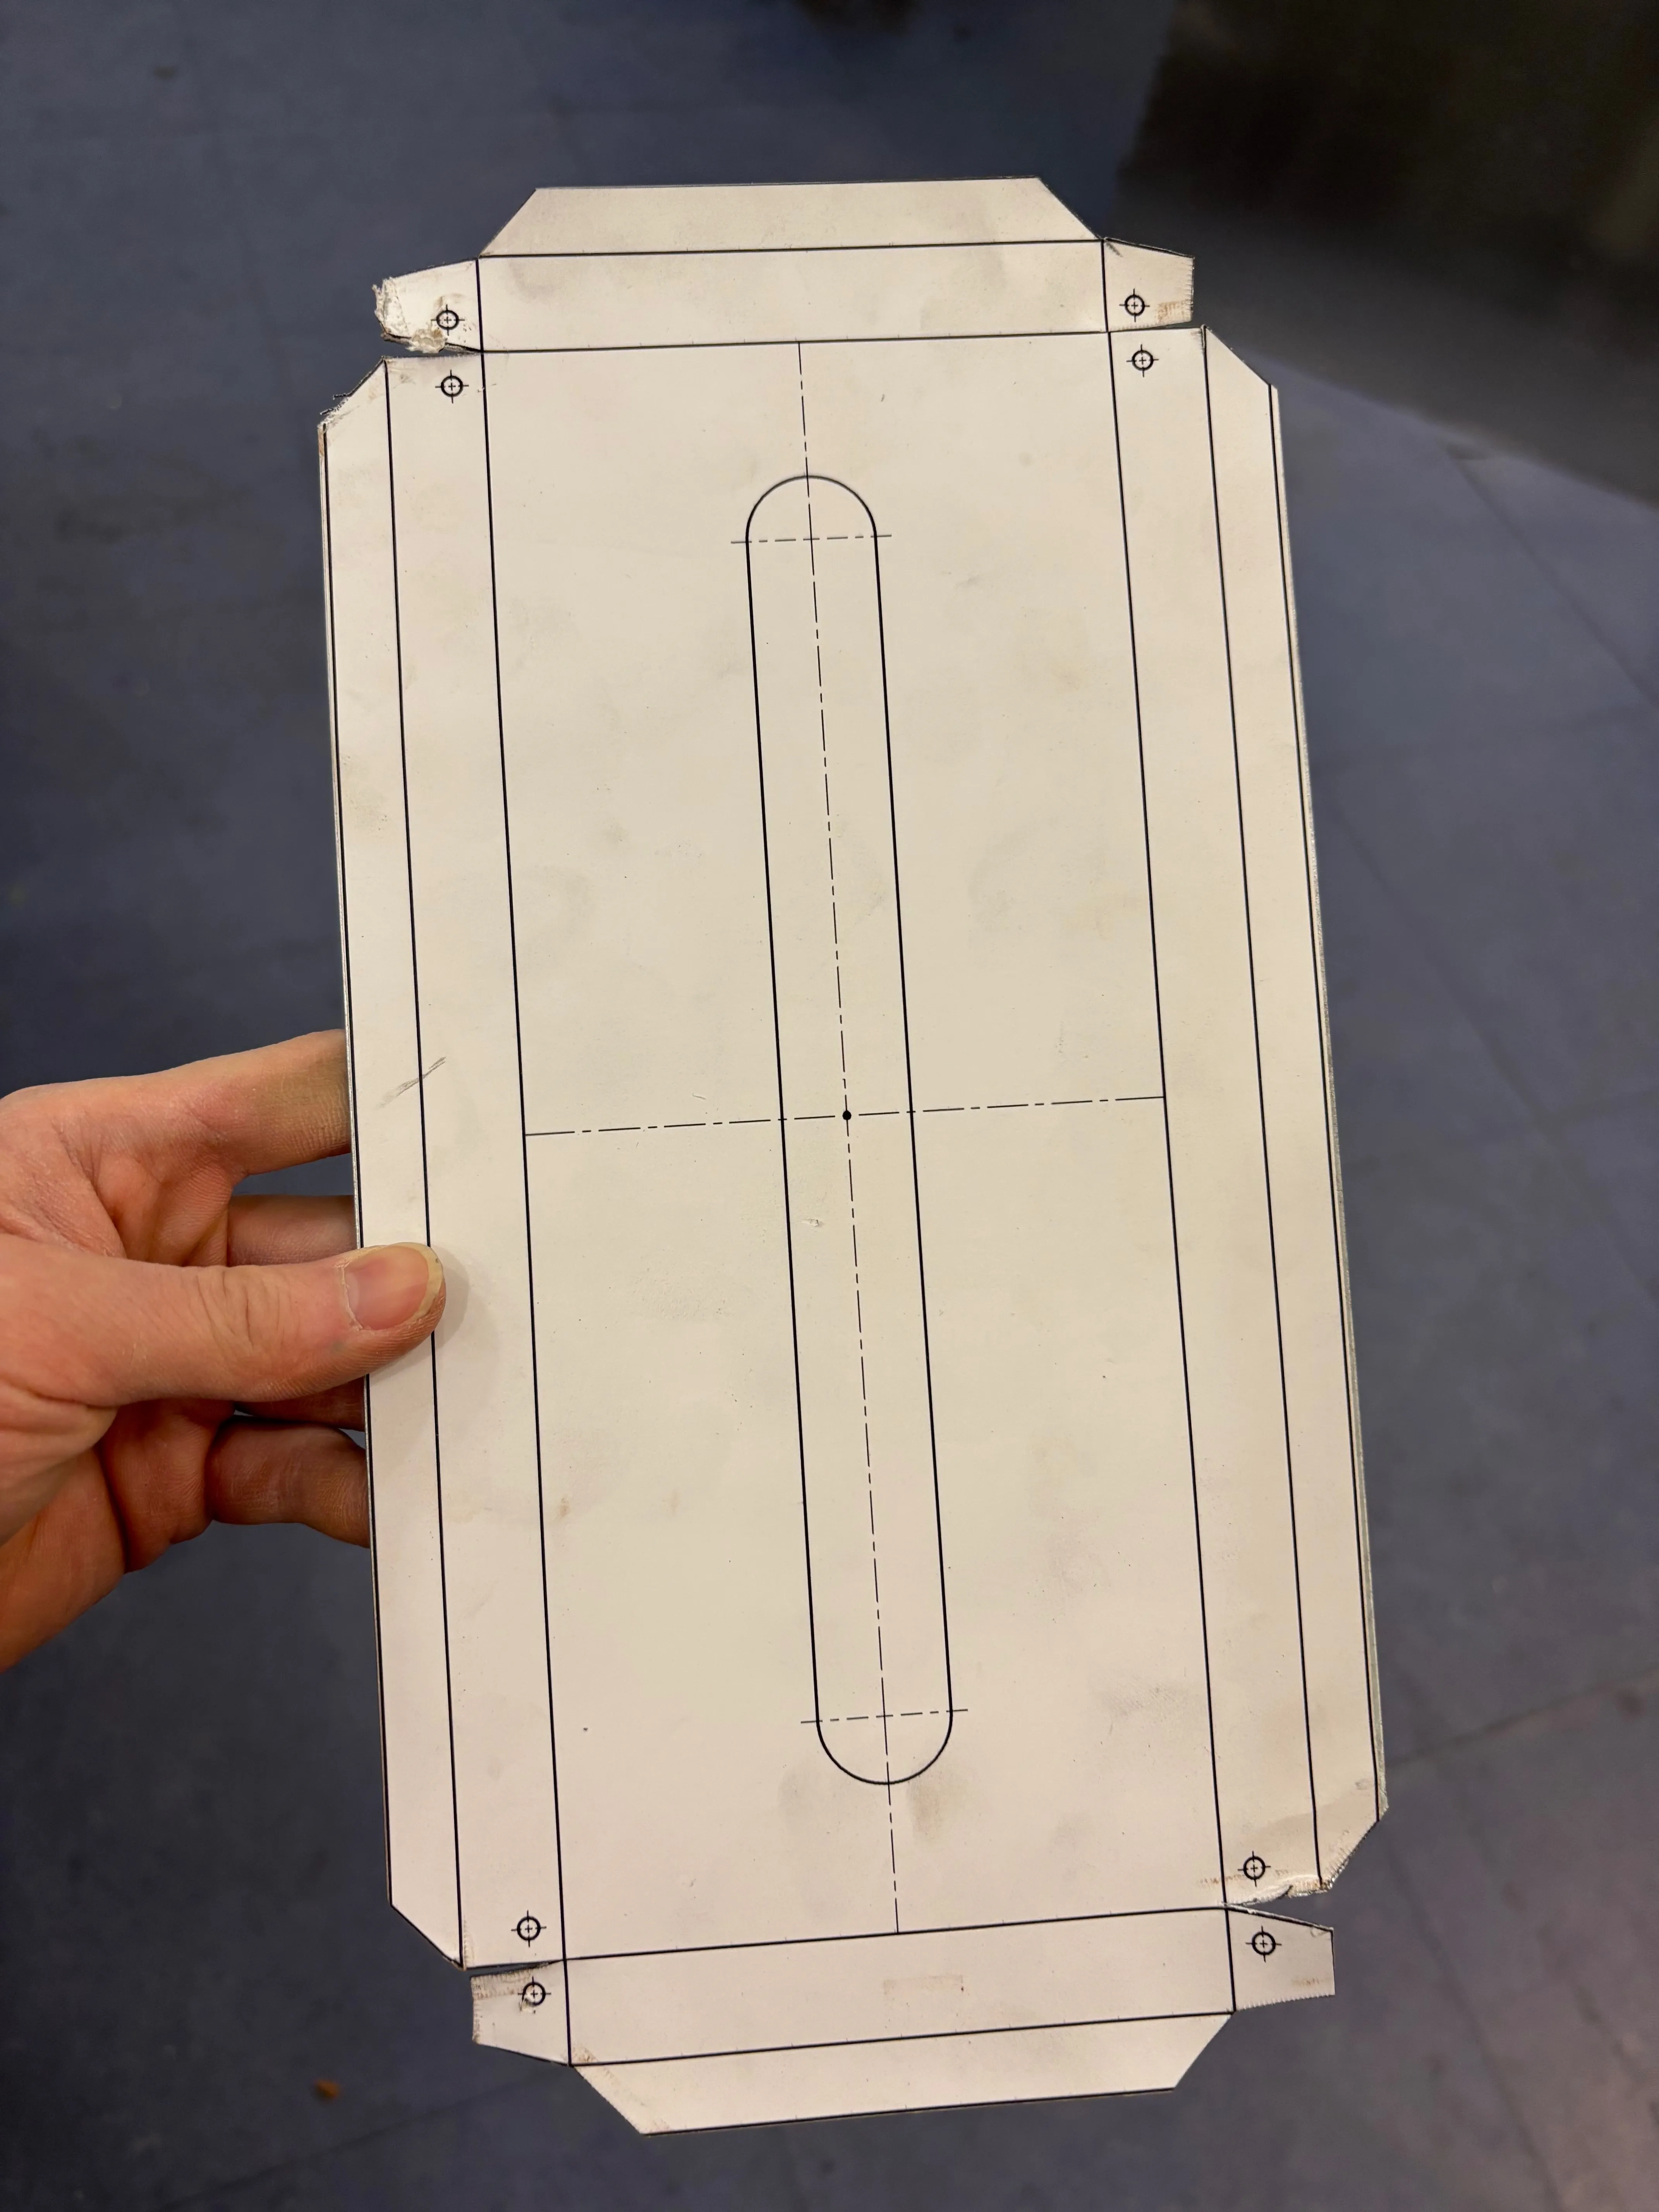
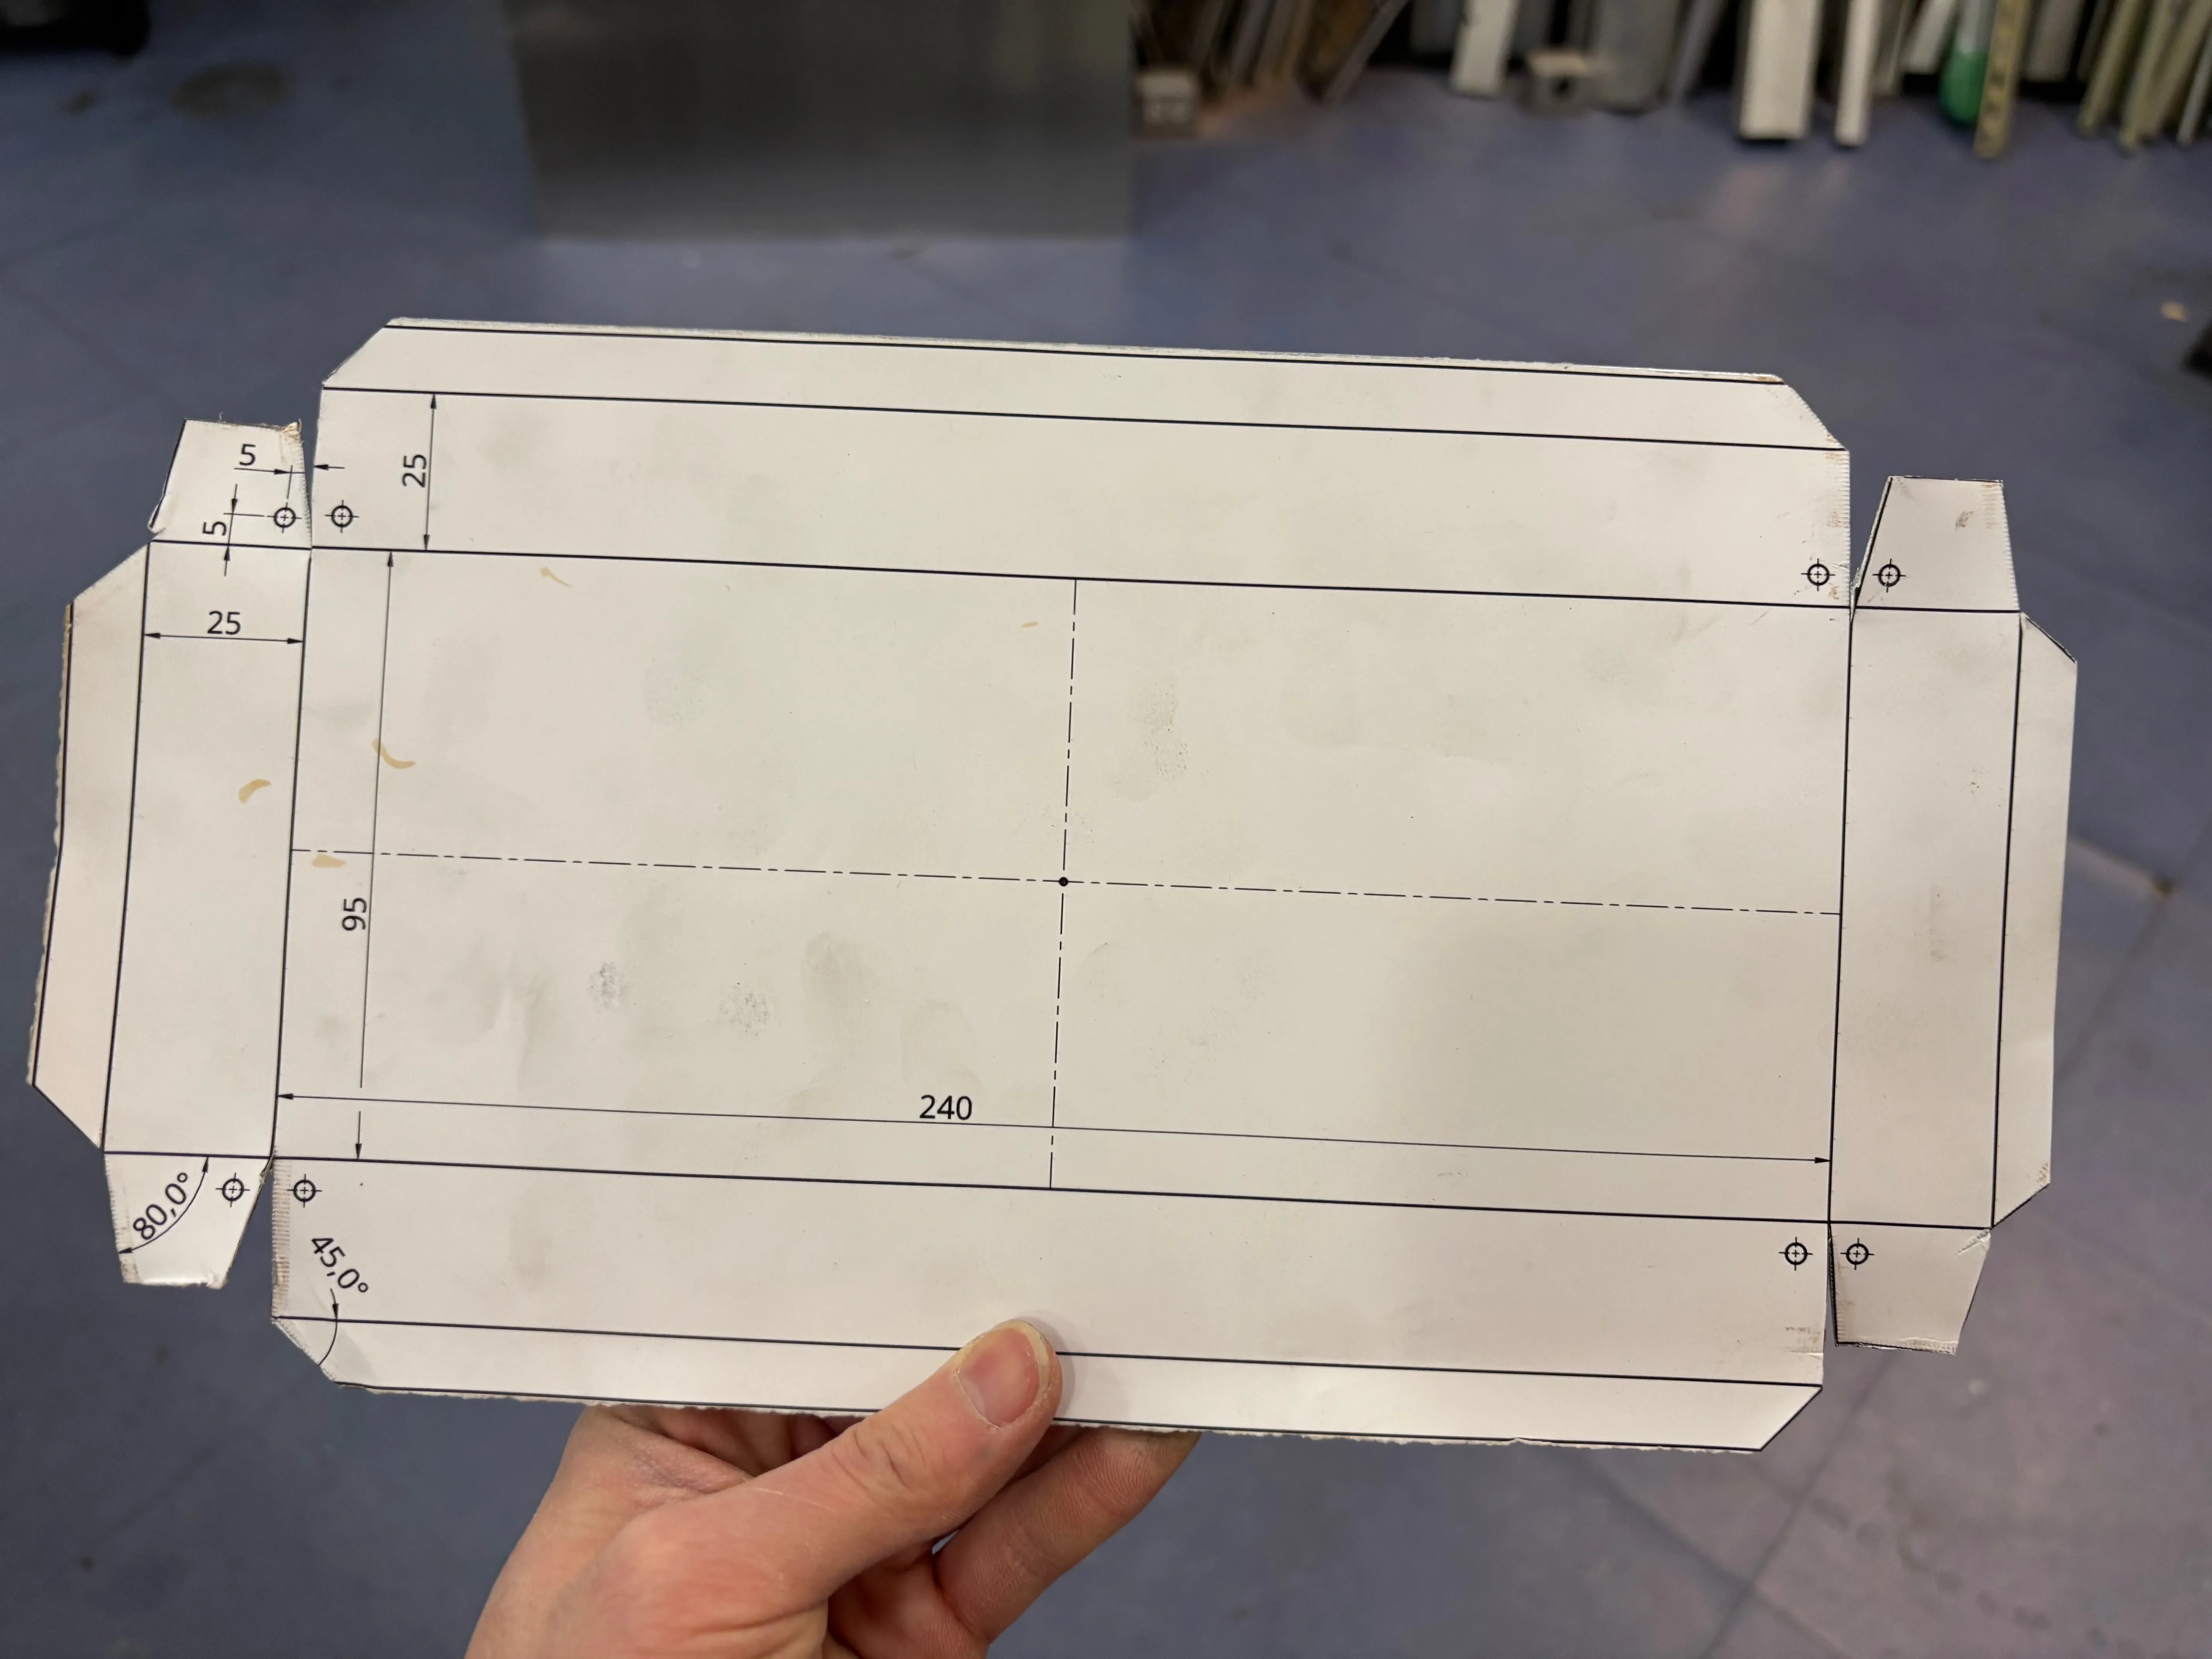
Here you can see I marked out holes for rivets but I didn’t end up riveting the sides together because it seemed strong enough and like the rivets would interfere with the closing of the box. The box is a really short box so it can fit into the shelf, but that meant the hems were really large relative to the sides and that made things more difficult. For example, it was impossible to tuck the tab of one side under the hem of the other side.
Here’s the link to the onshape file if you want to make your own/modify my plans.
Build
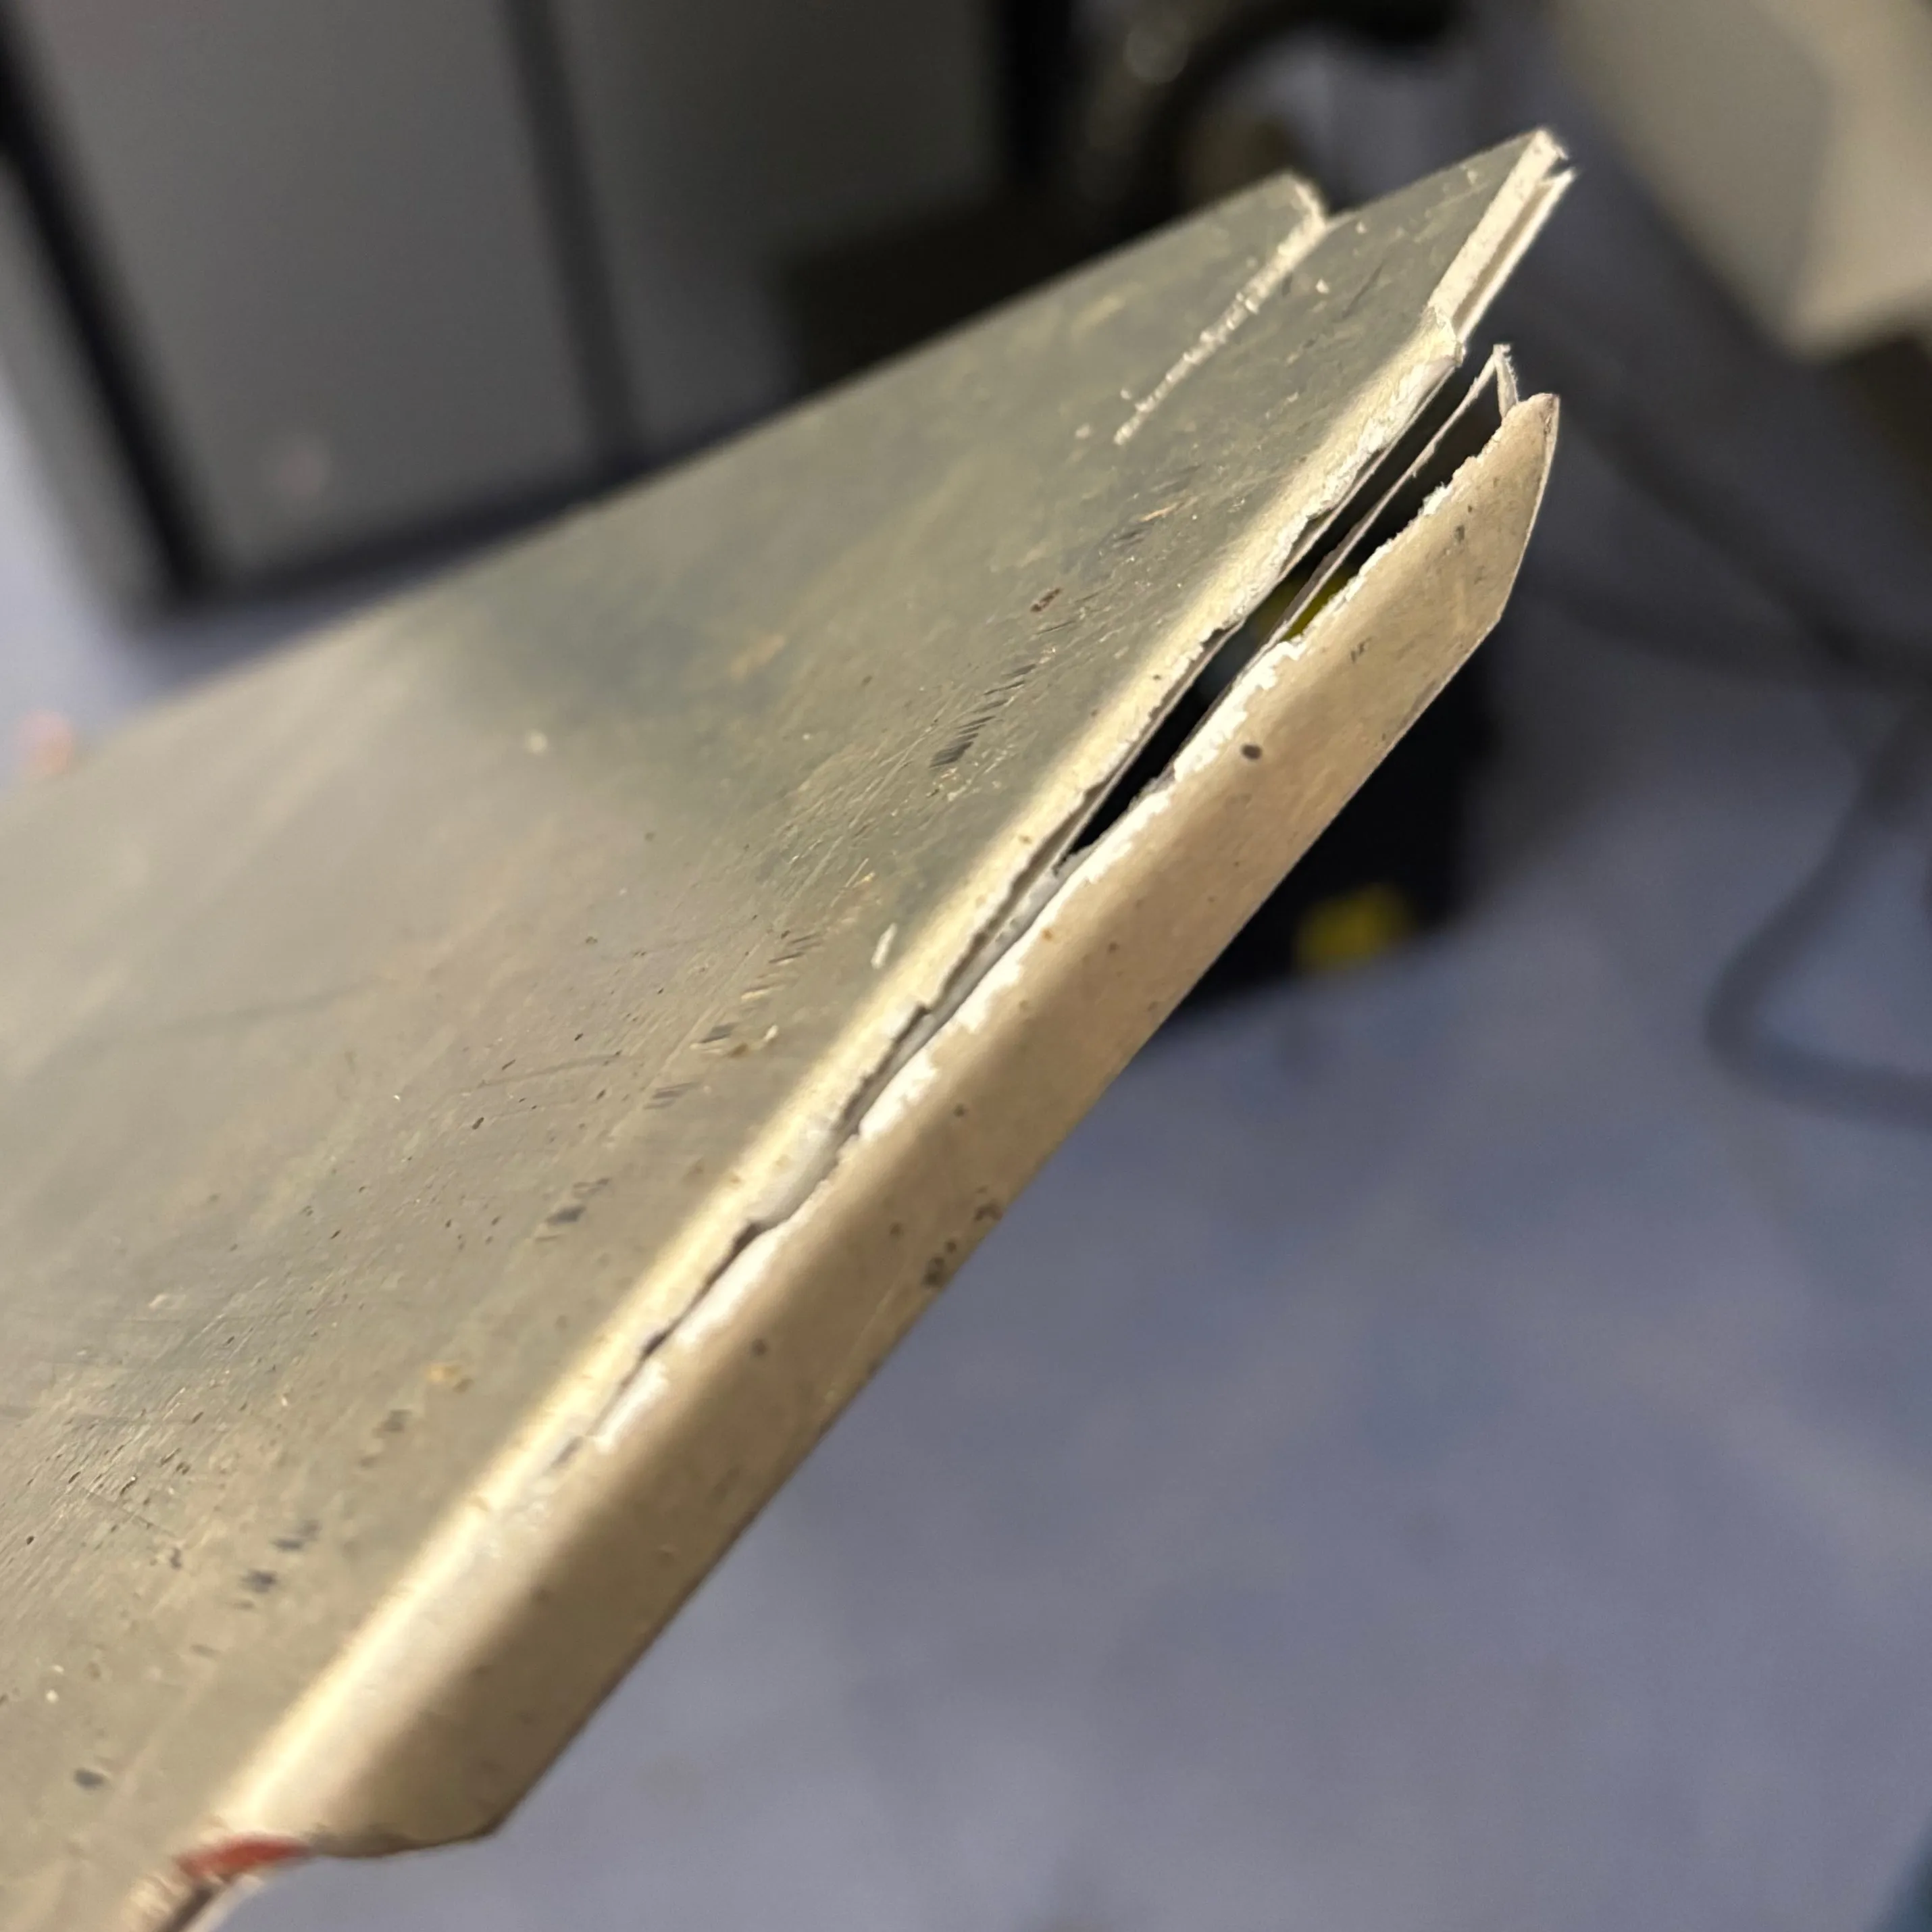
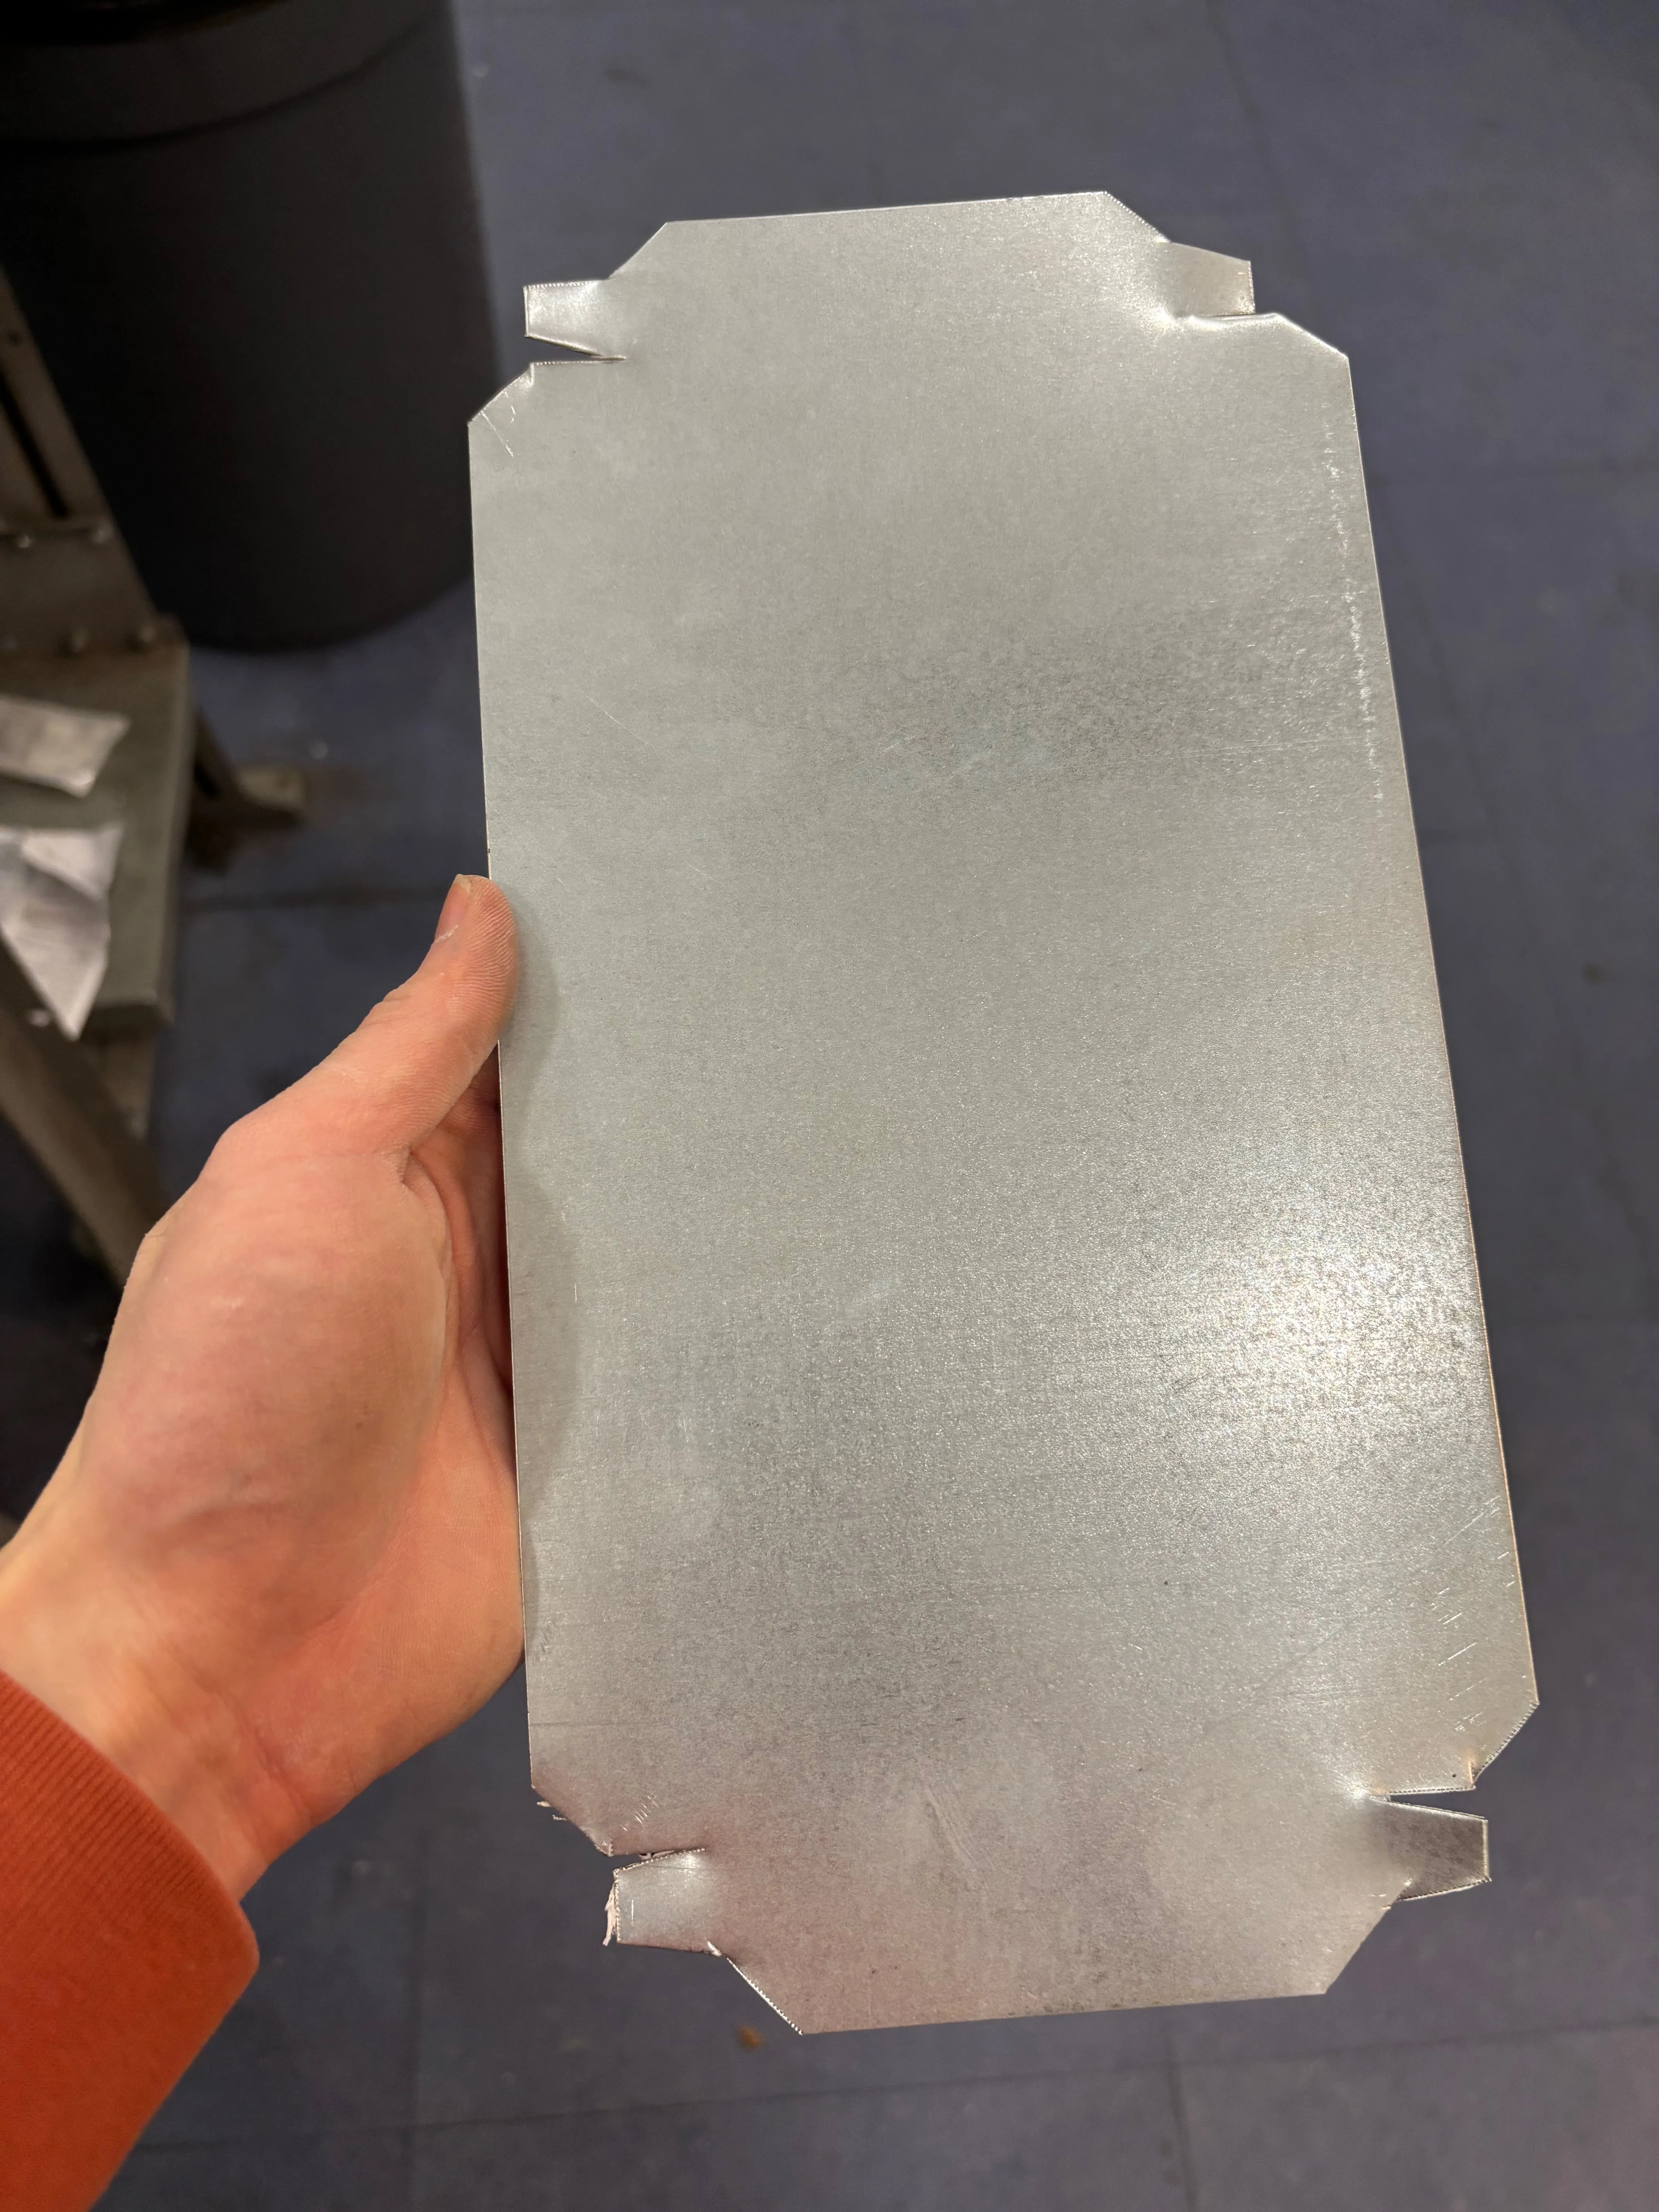
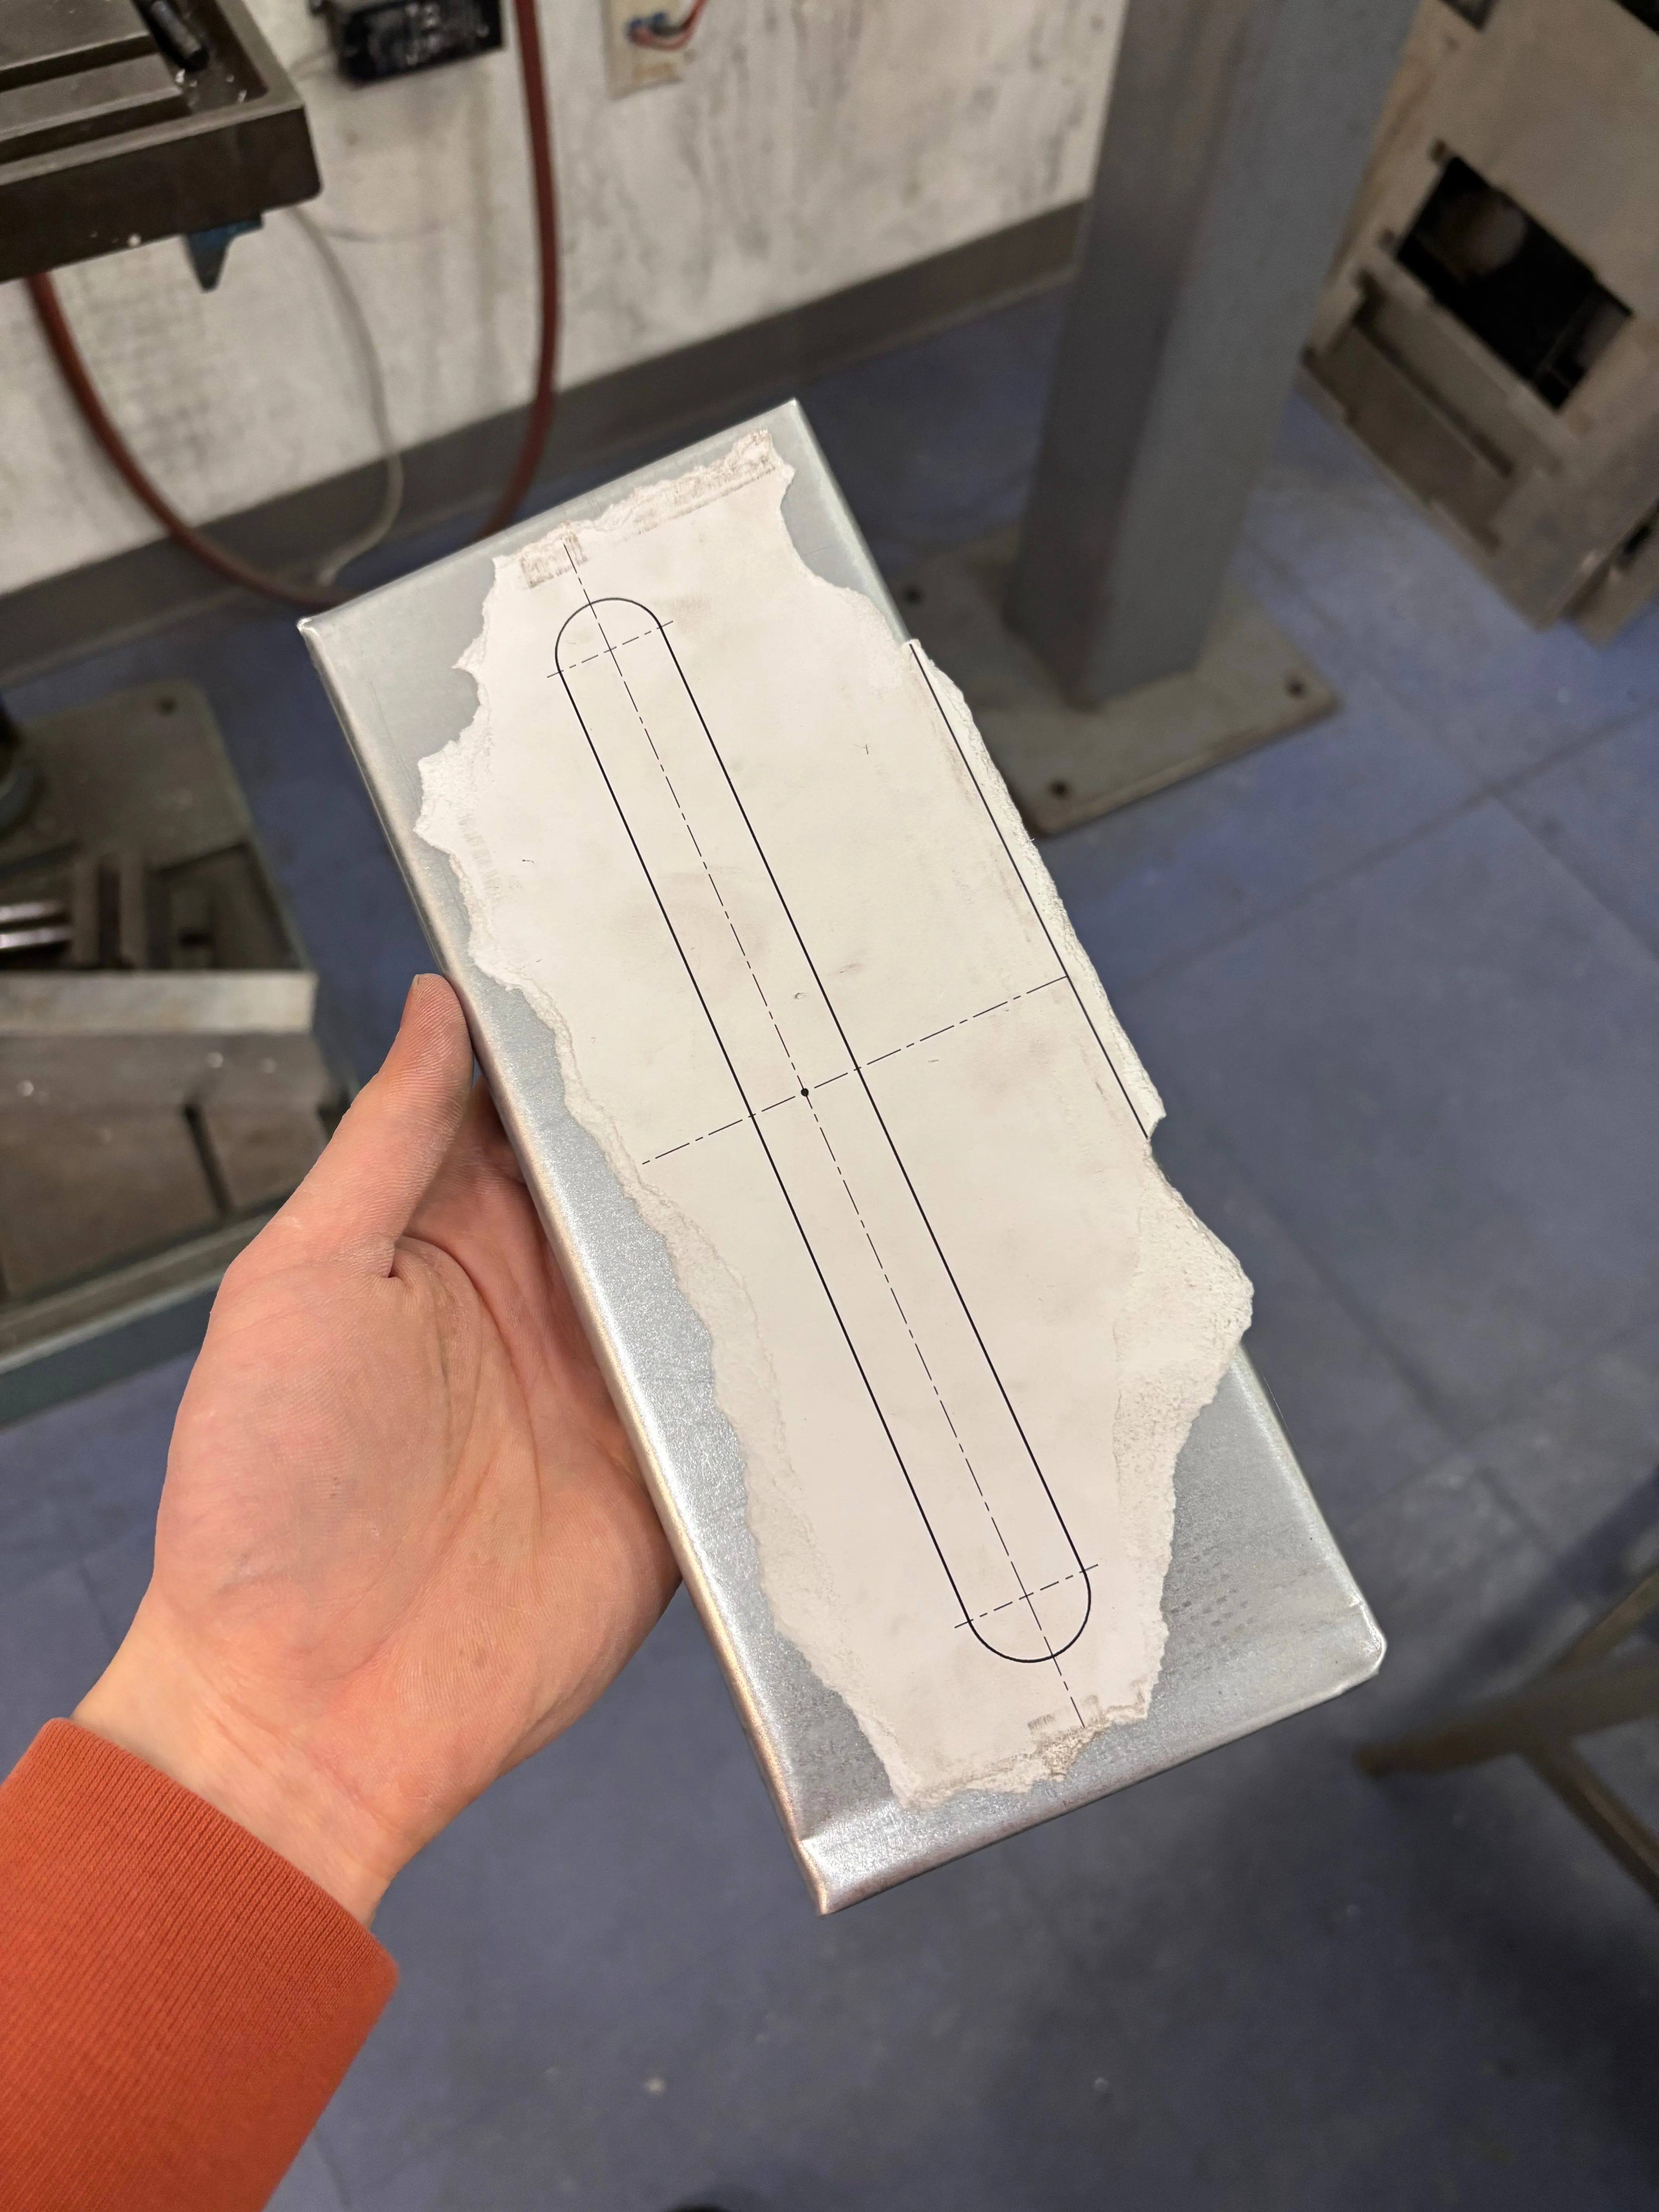
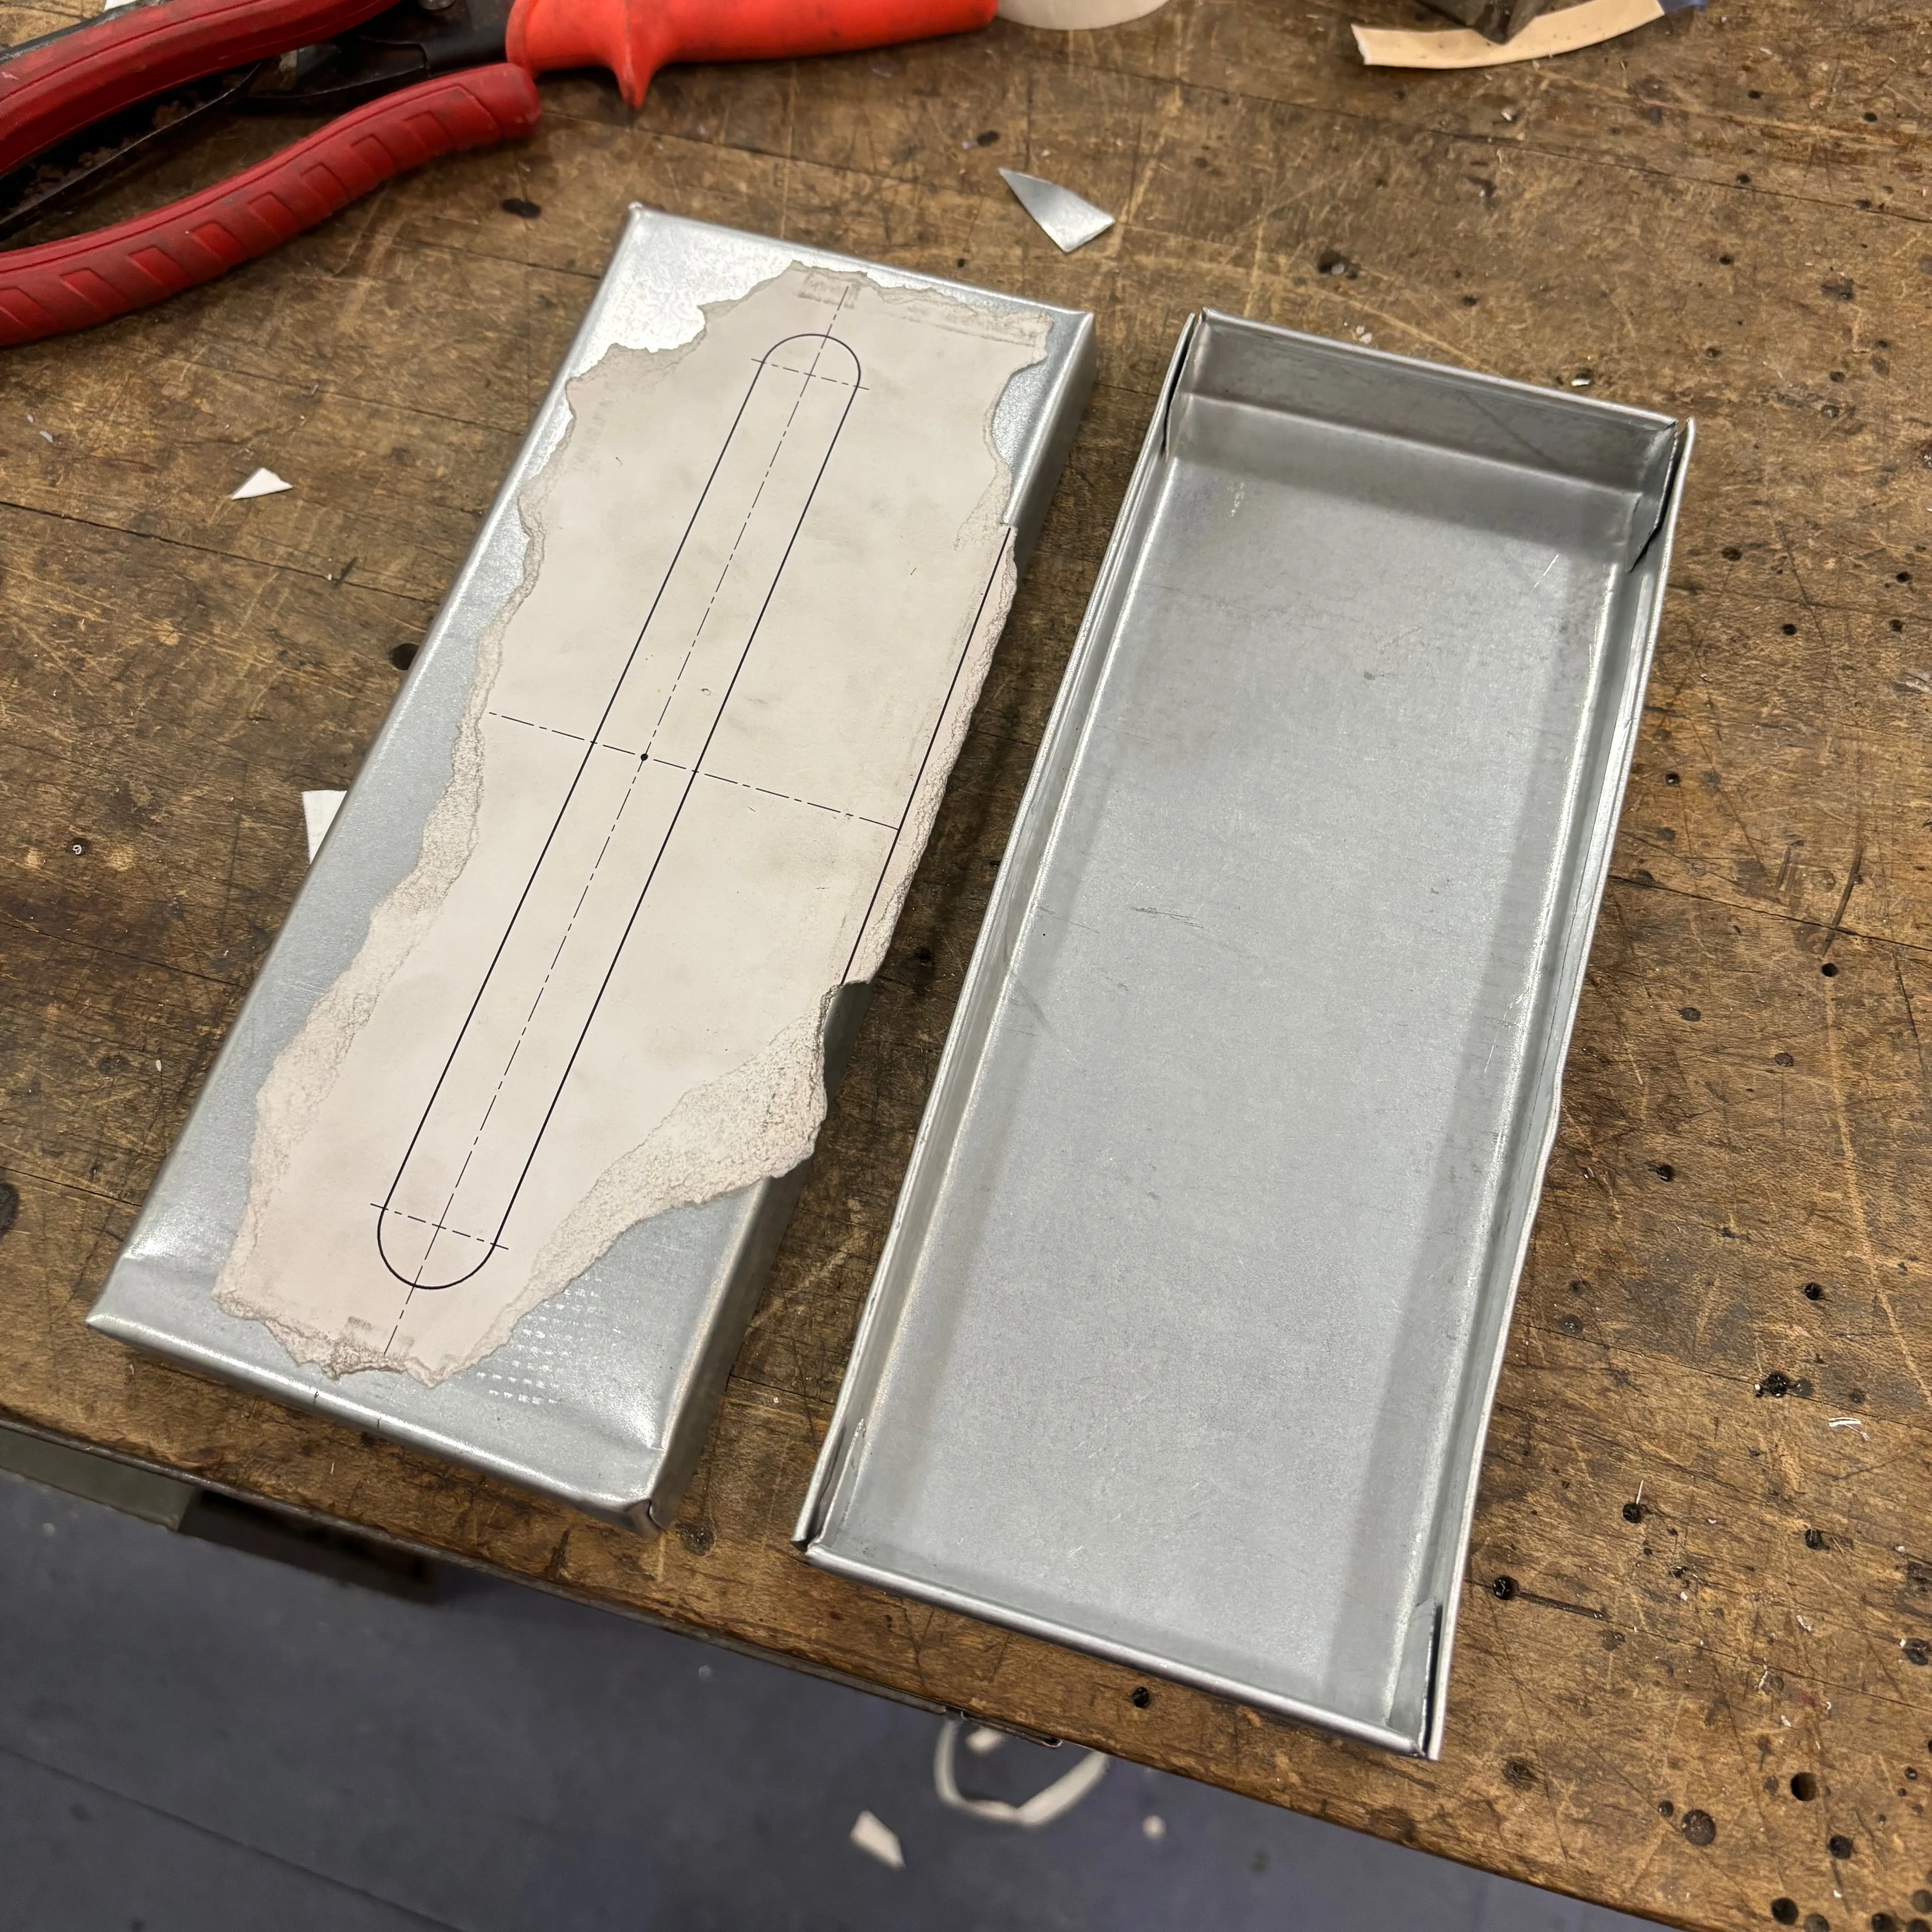
The first thing I did was find a sheet of aluminum of the appropriate size and thickness and stick the template on it. I tried to use the type of aluminum which is supposed to be able to bend but even this ended up tearing when I tried to fold the hems completely over.
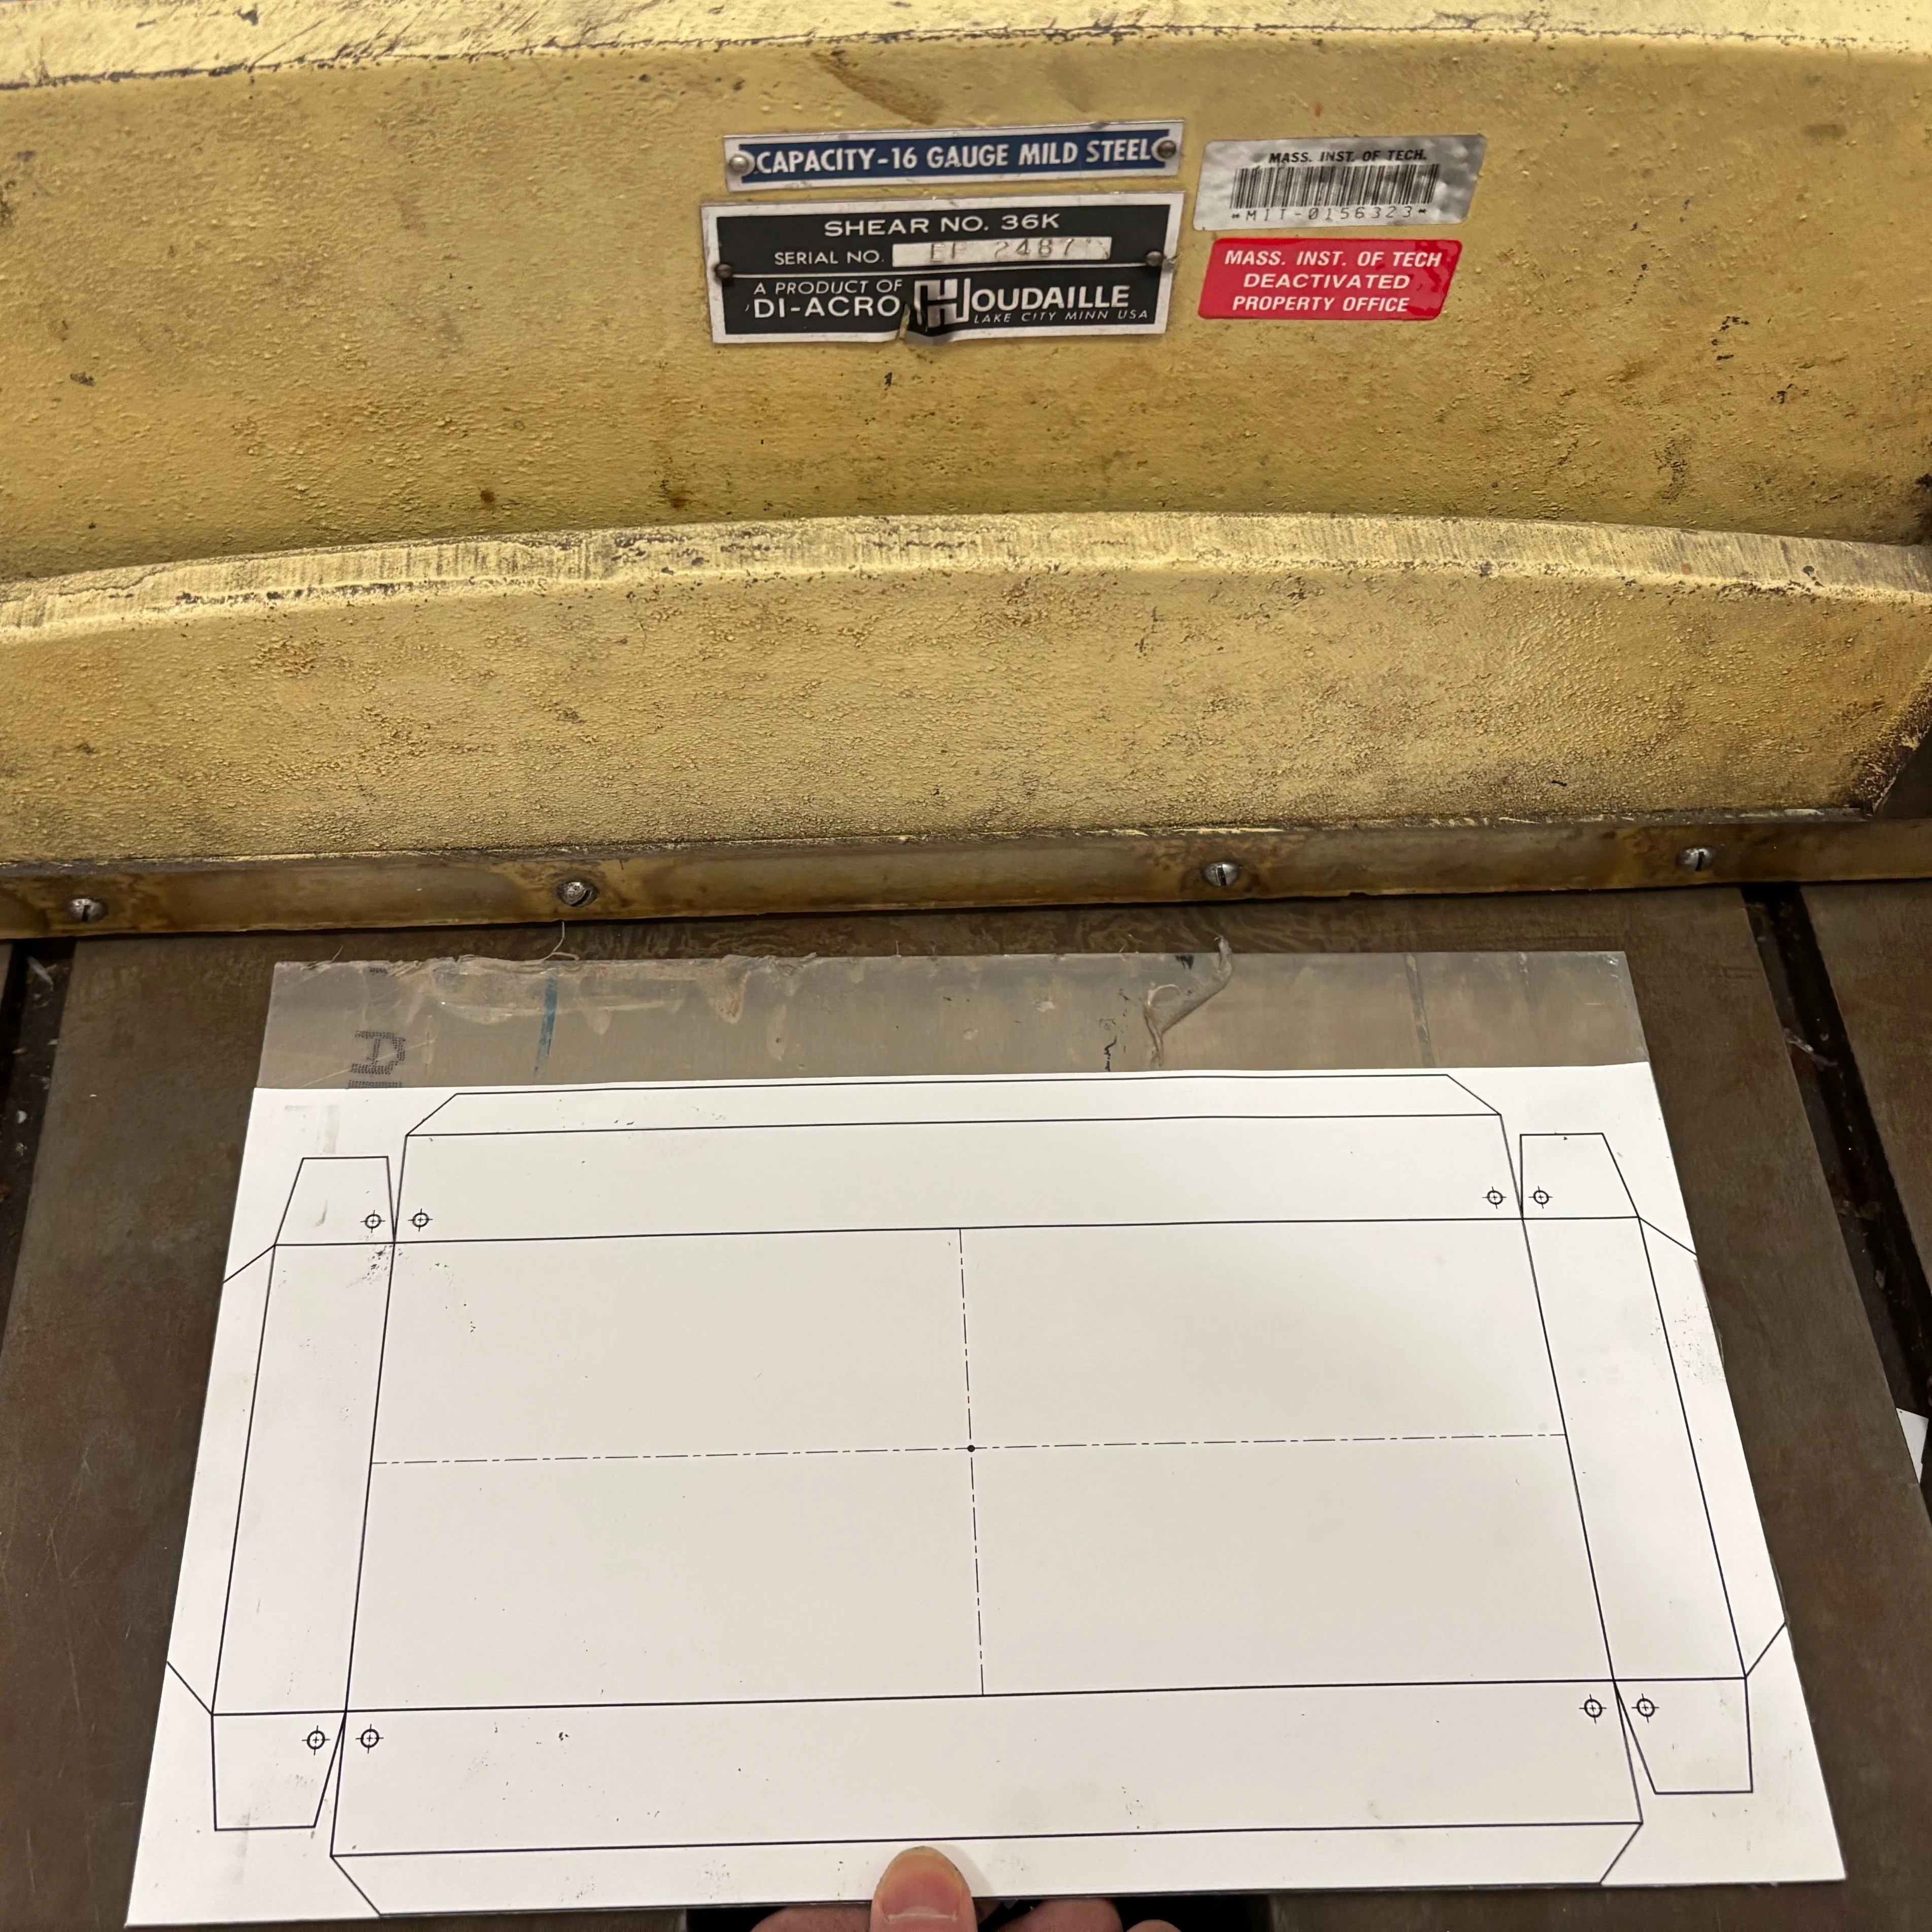

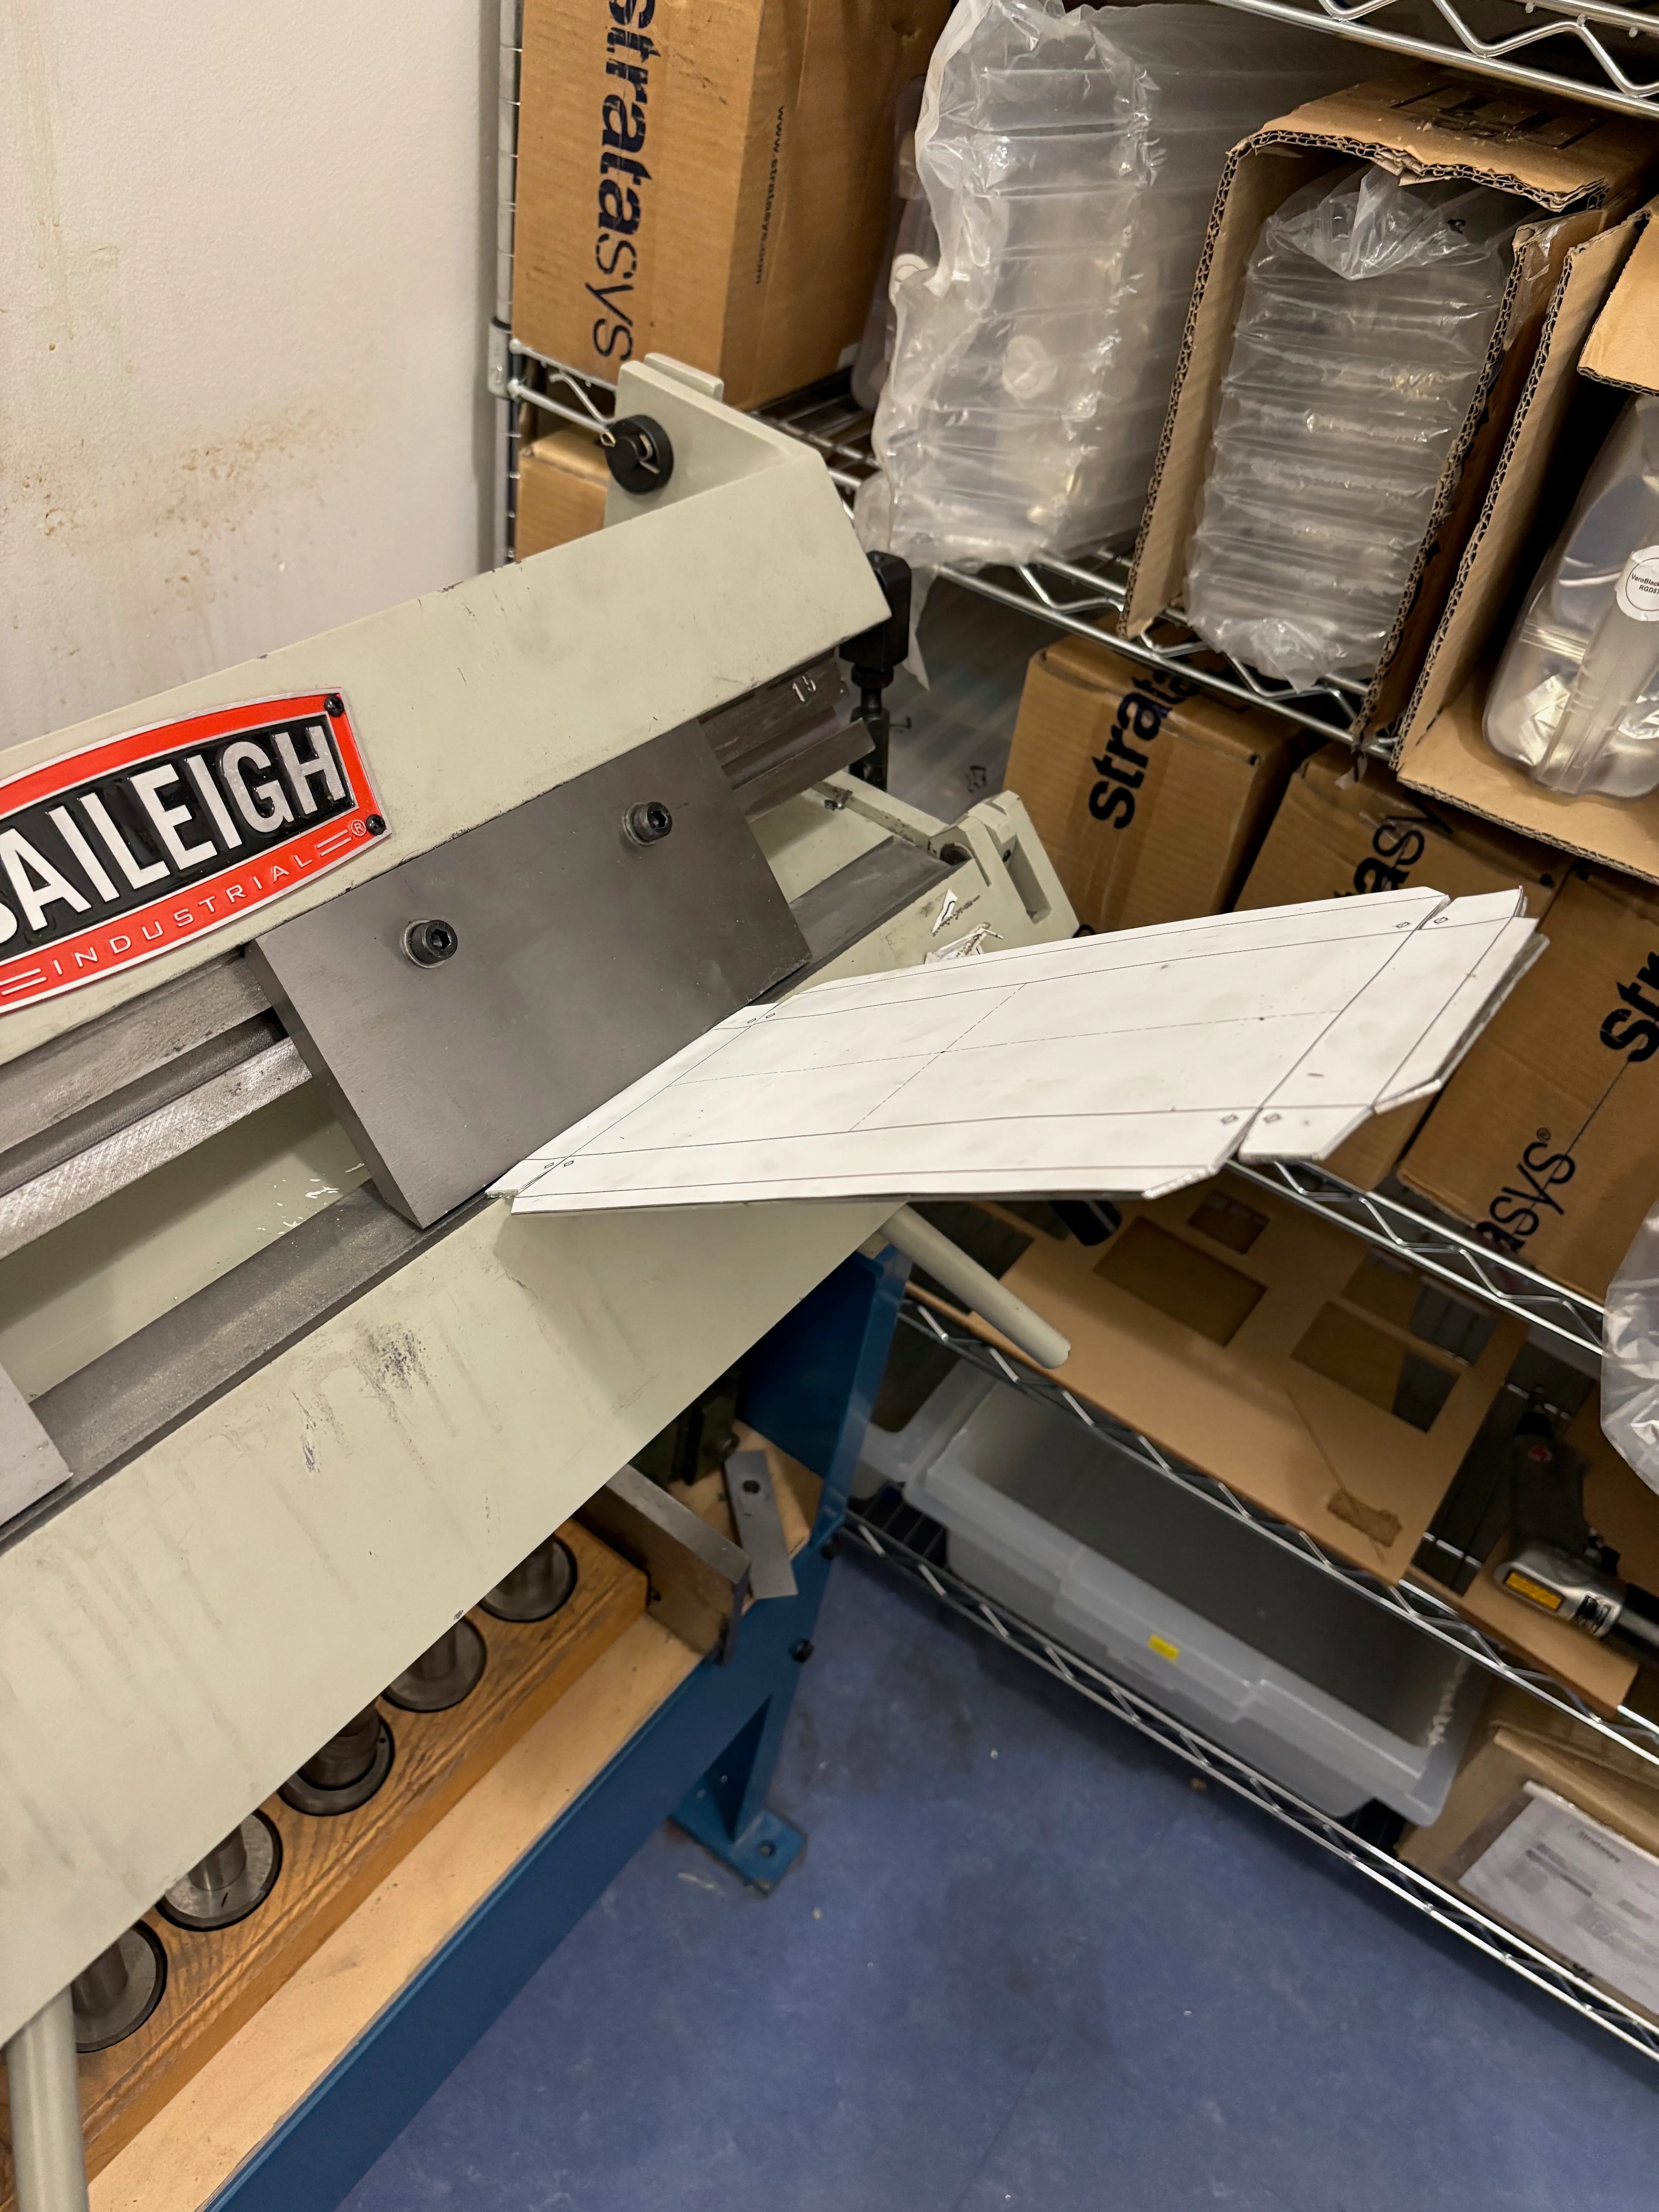
After that I found some 26 gauge steel sheet metal that I thought would bend without tearing and re-cut the blank.
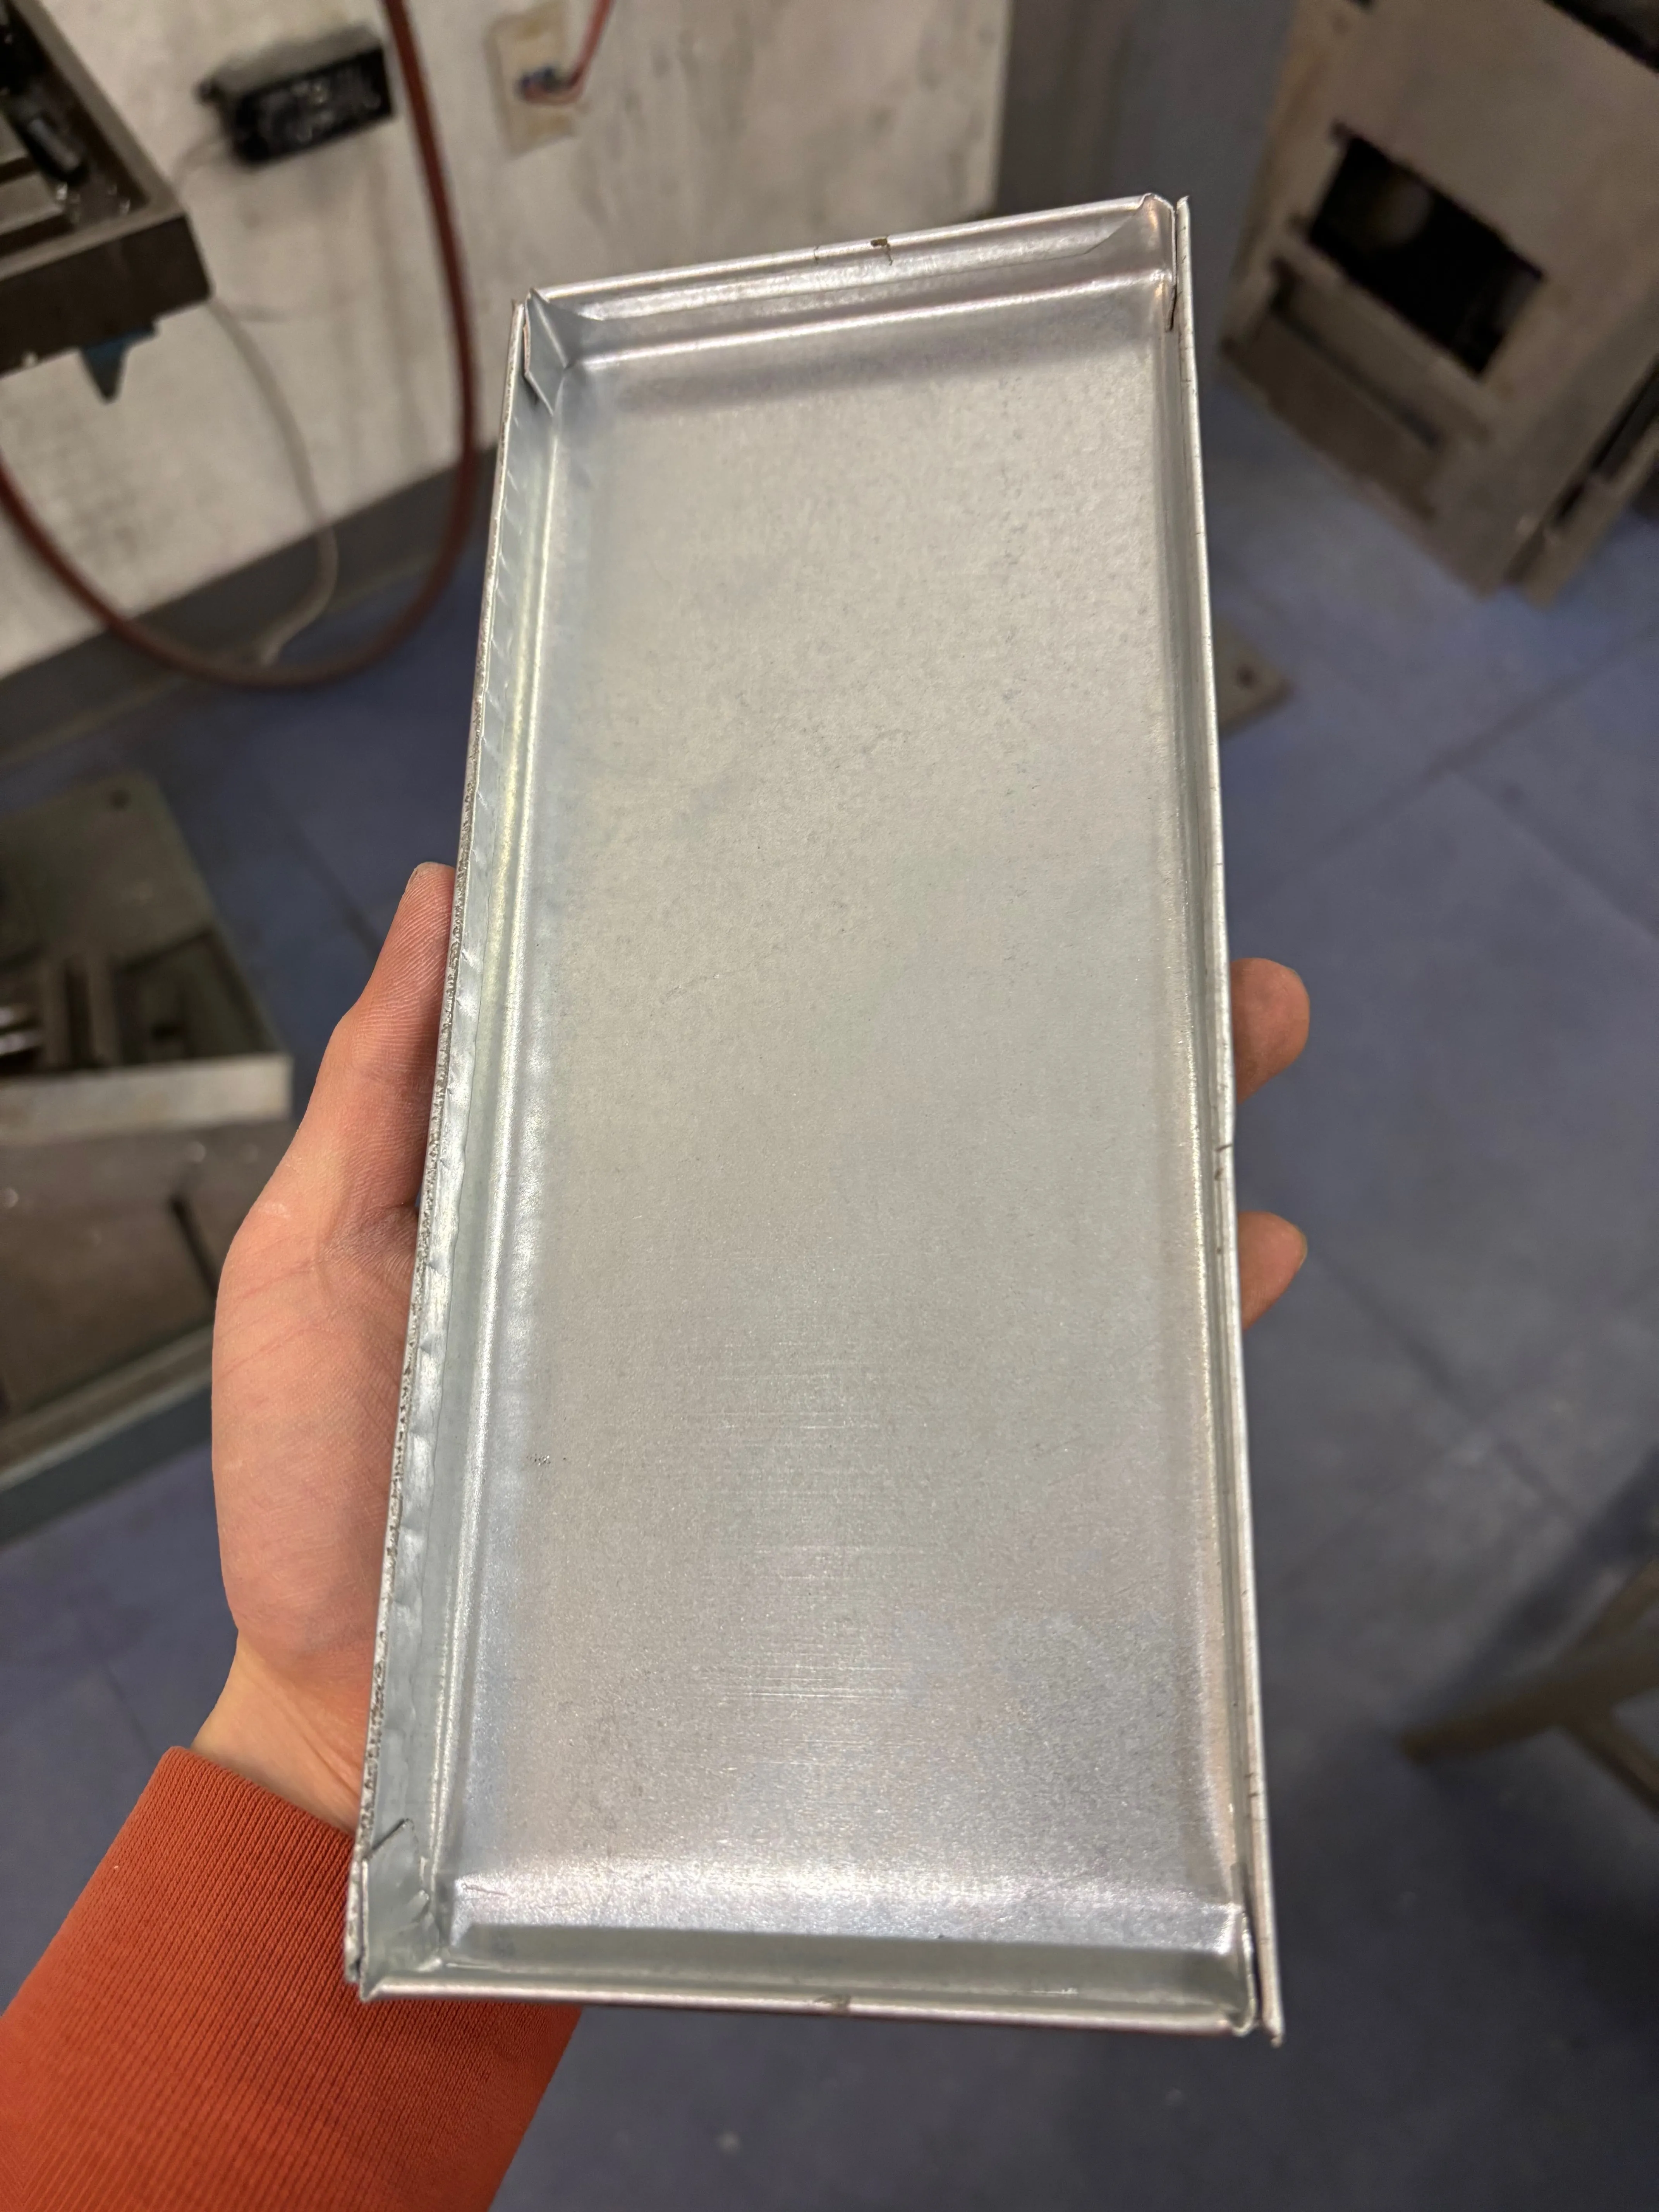
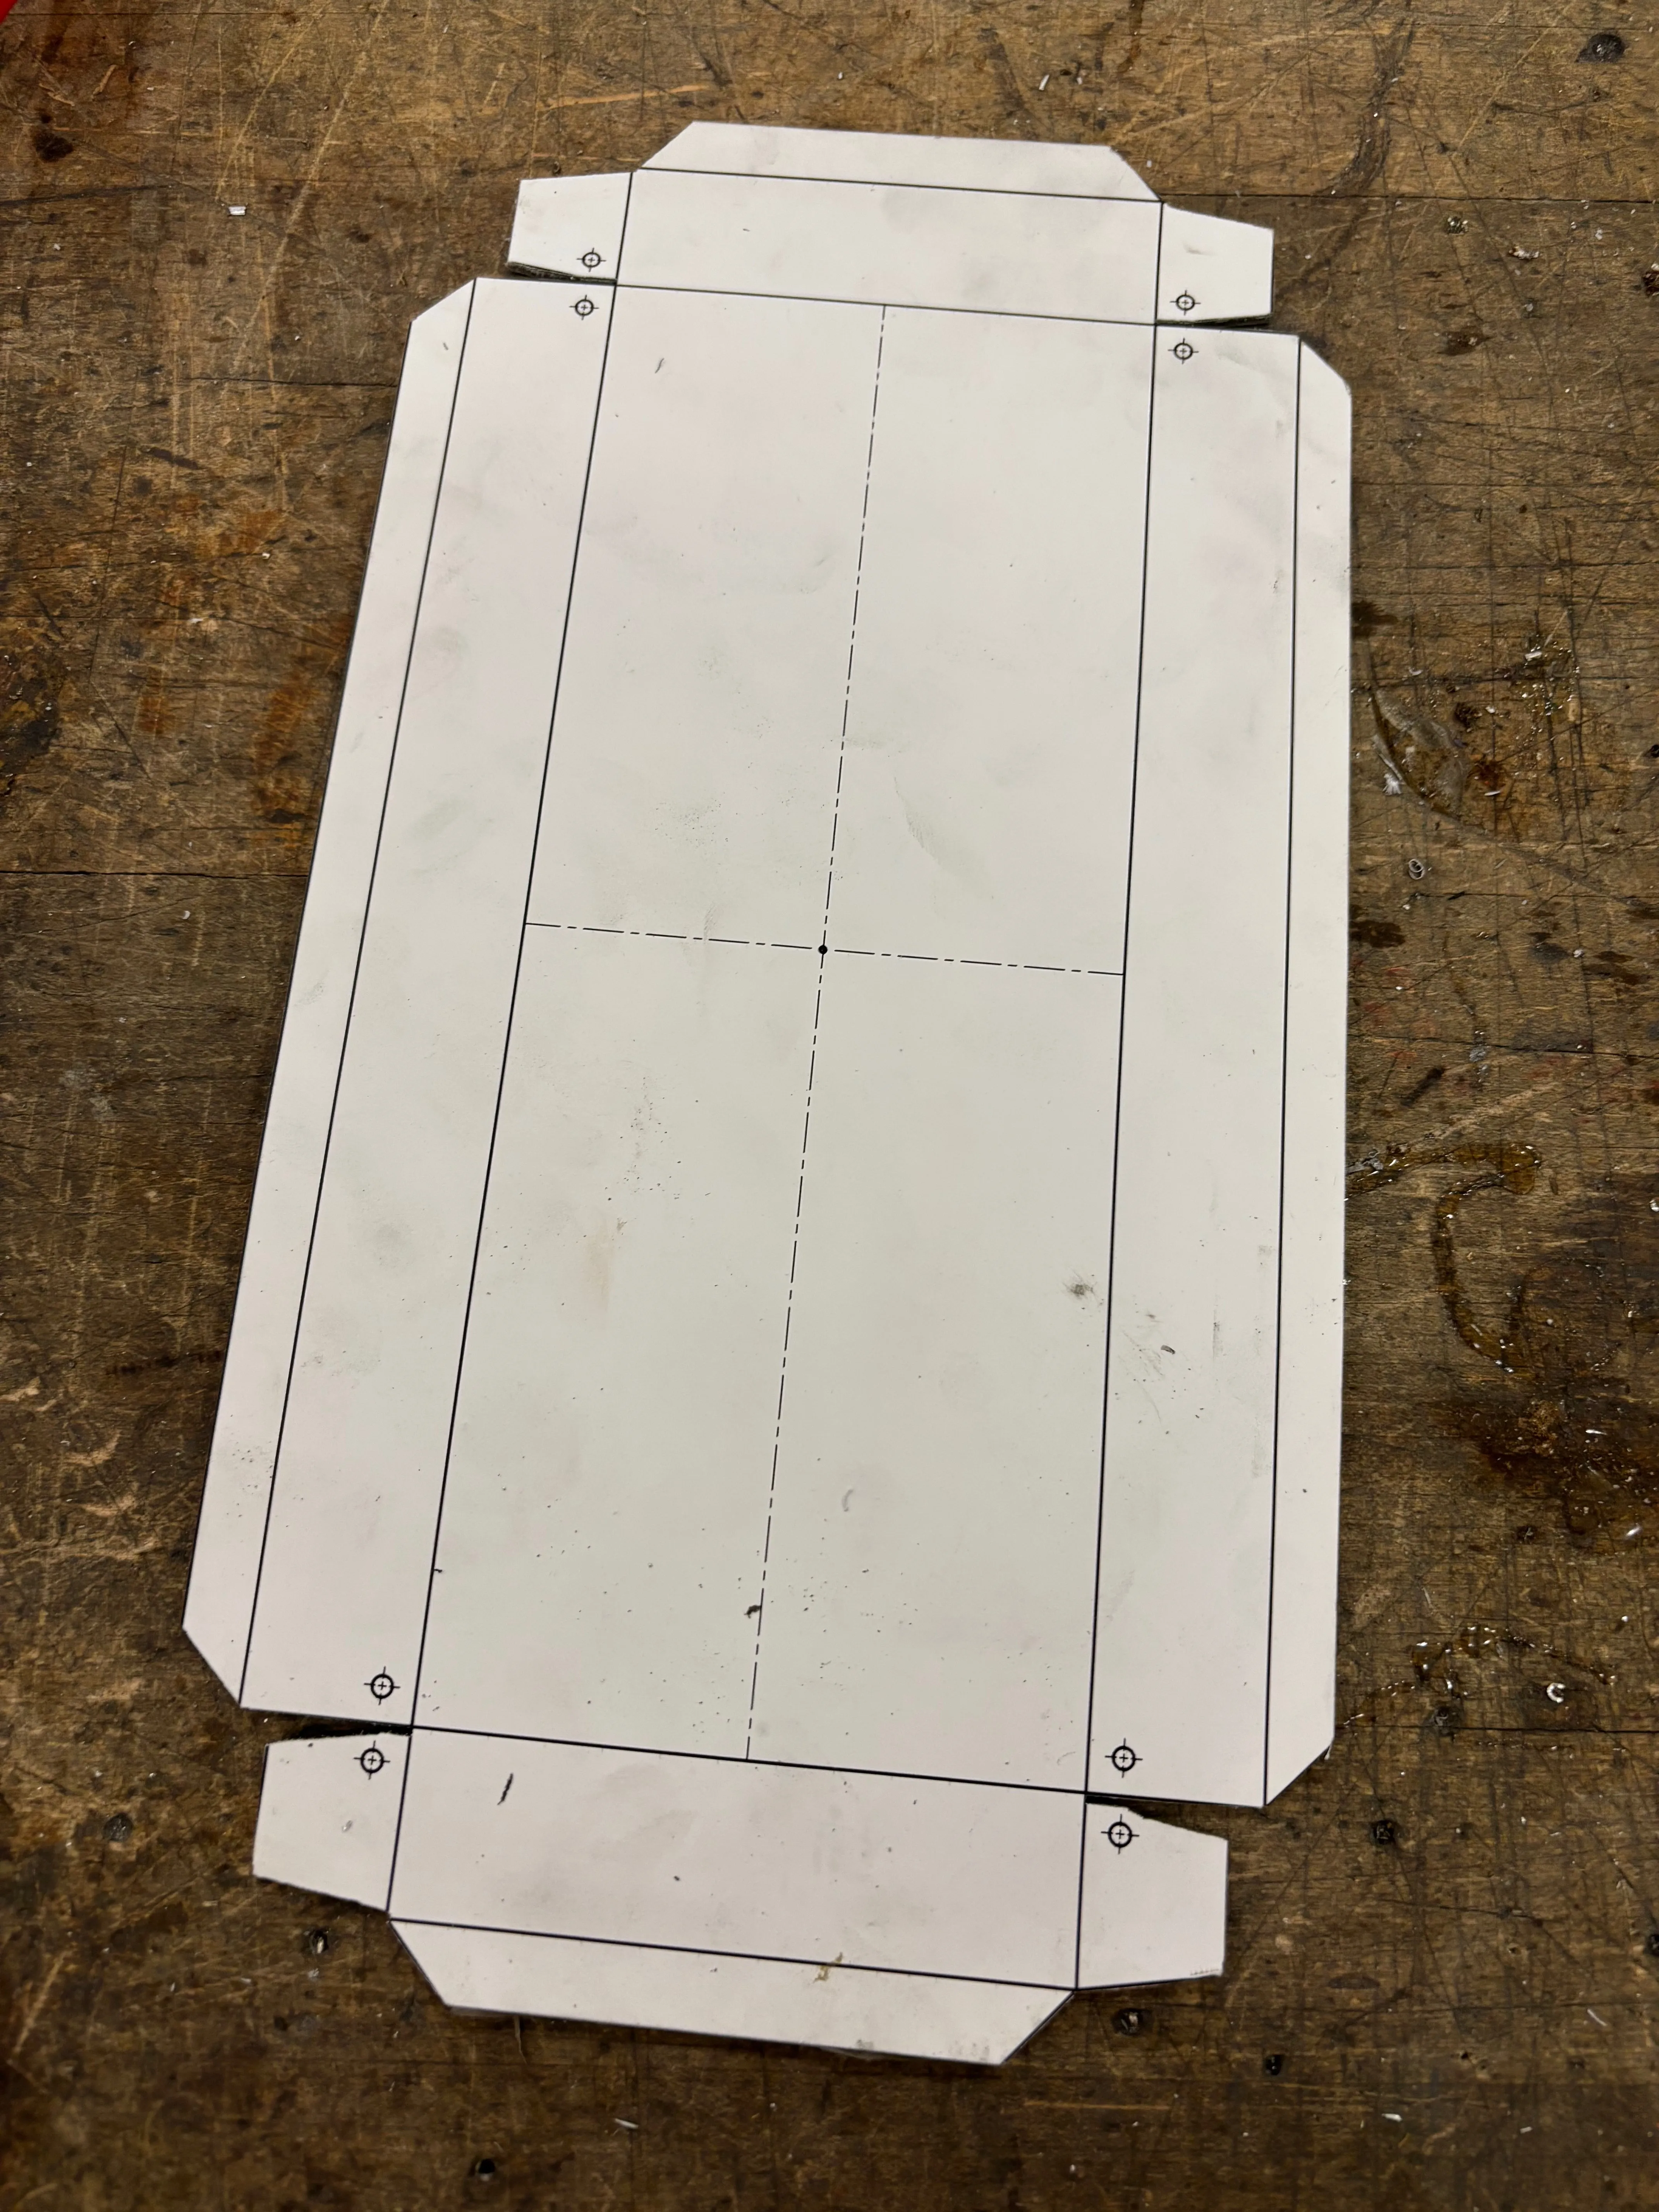
Now time to work on the bottom piece of the tissue box!
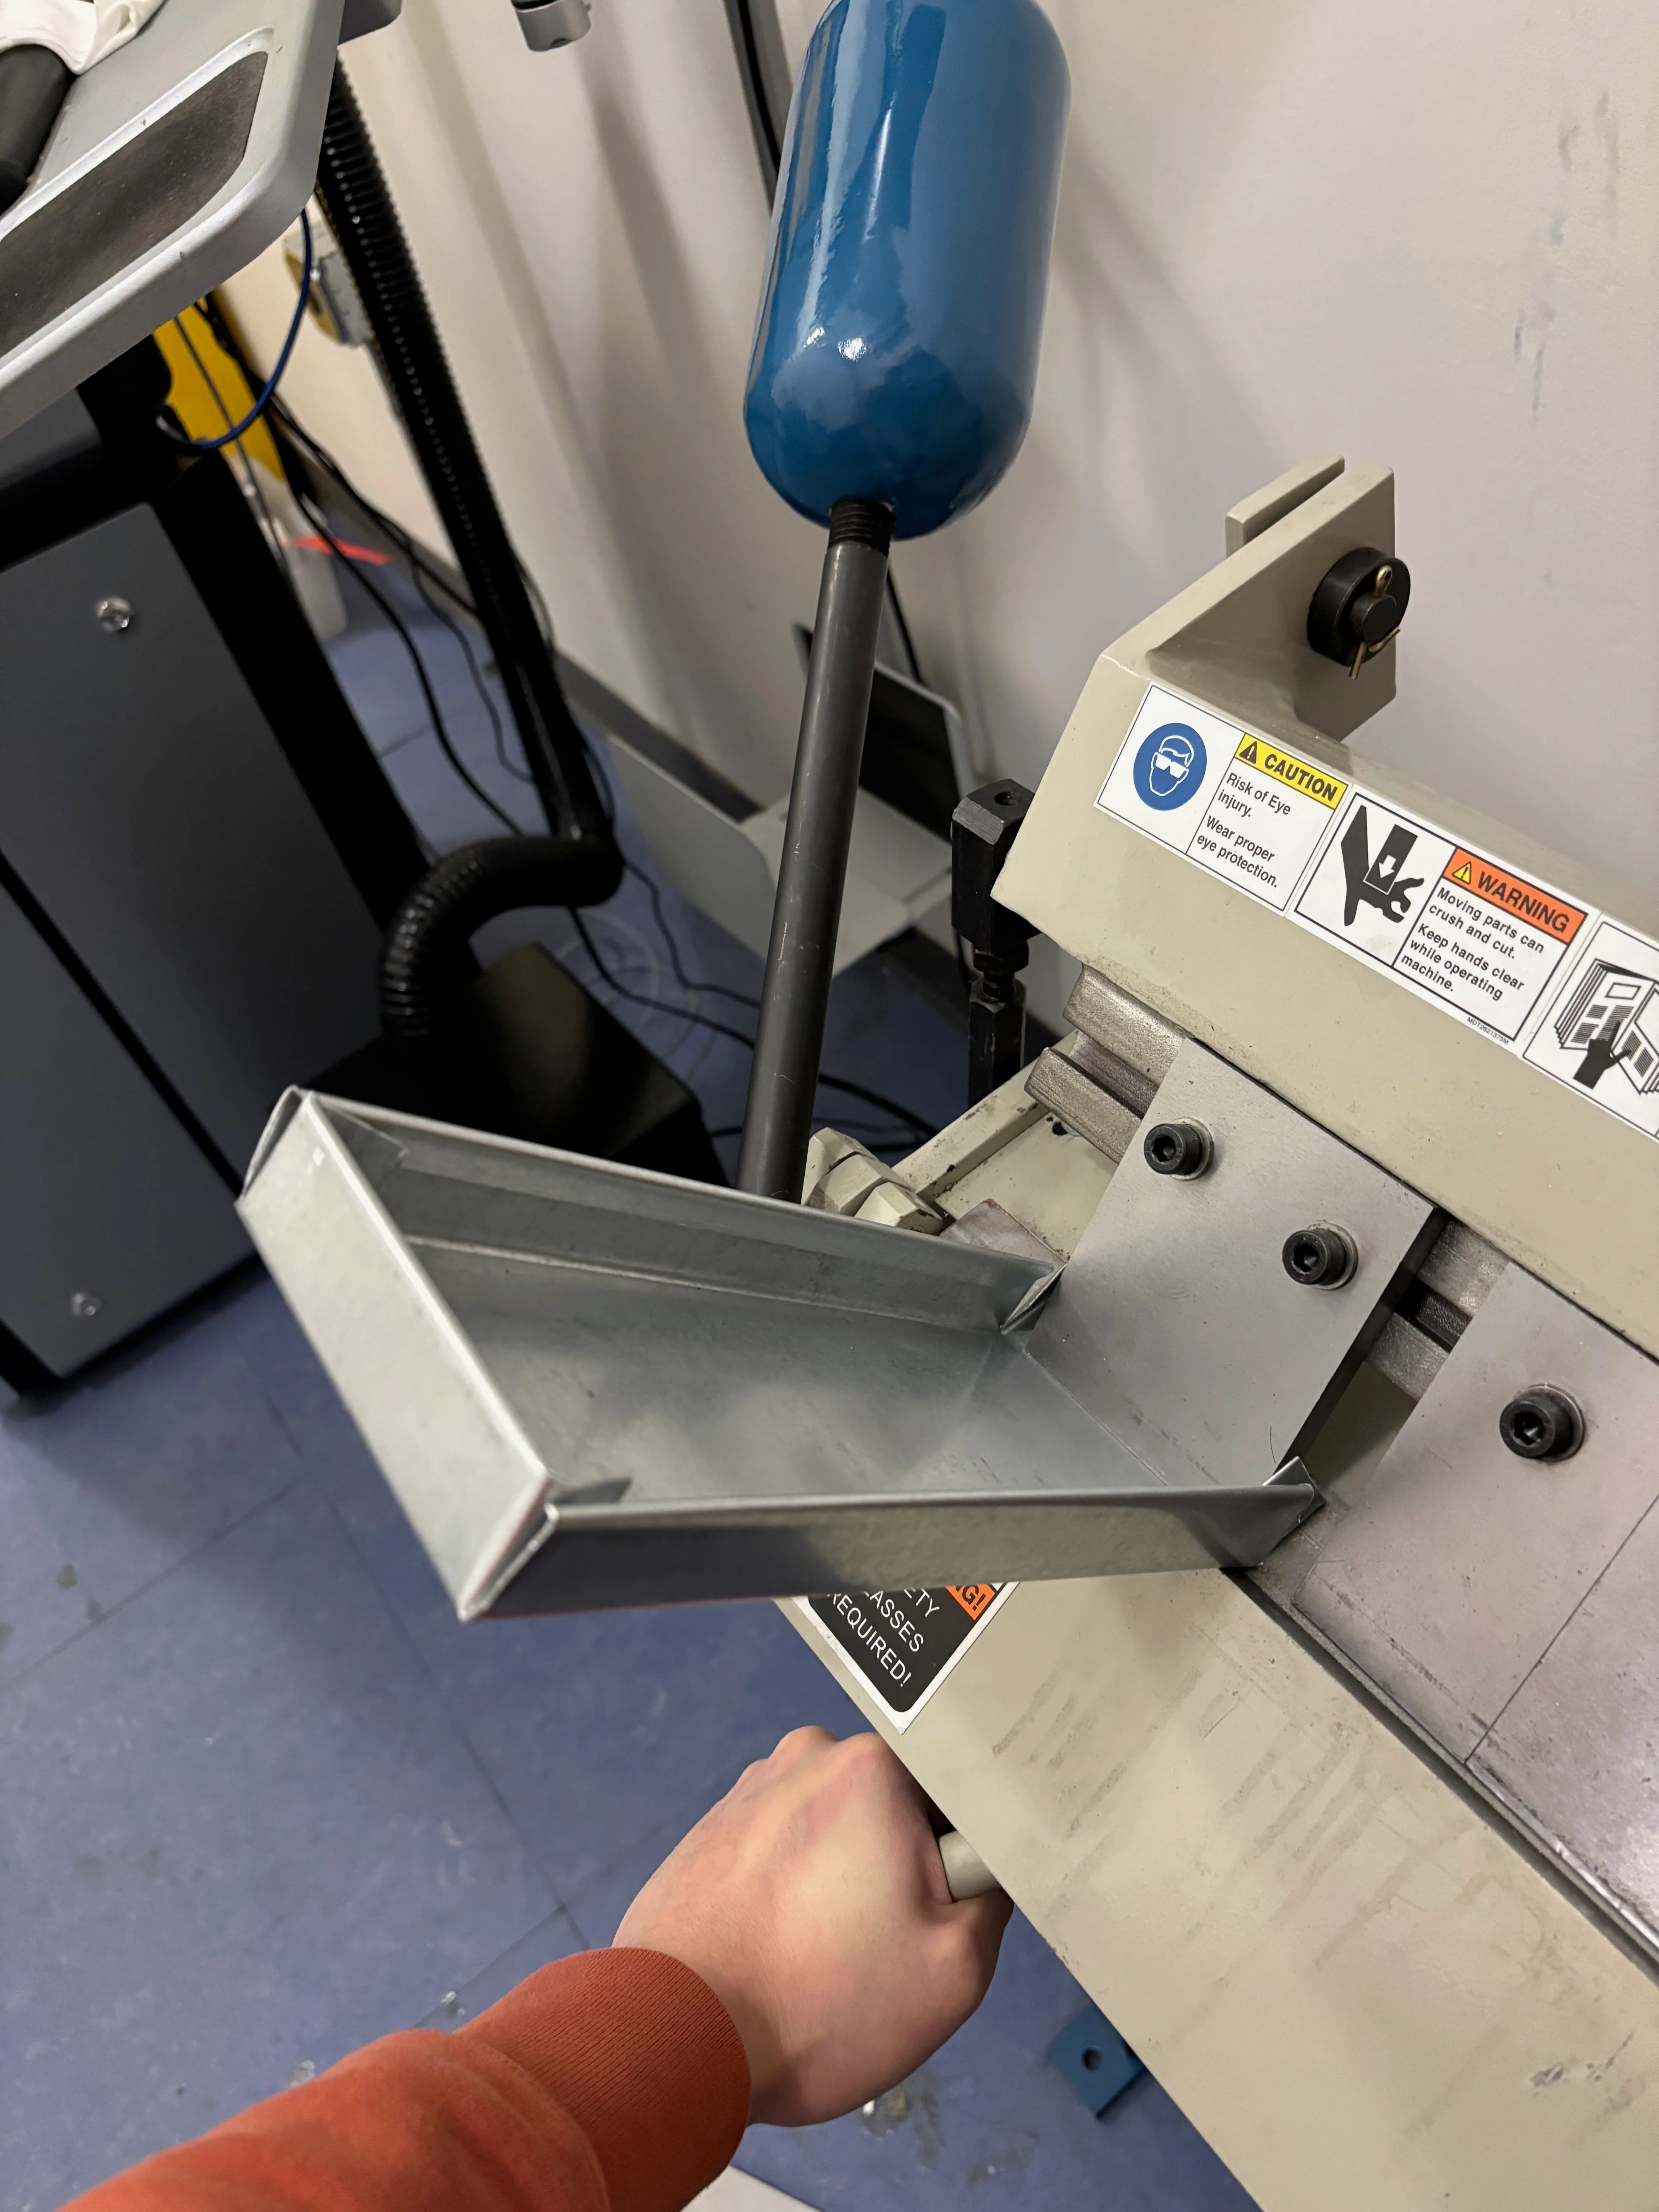
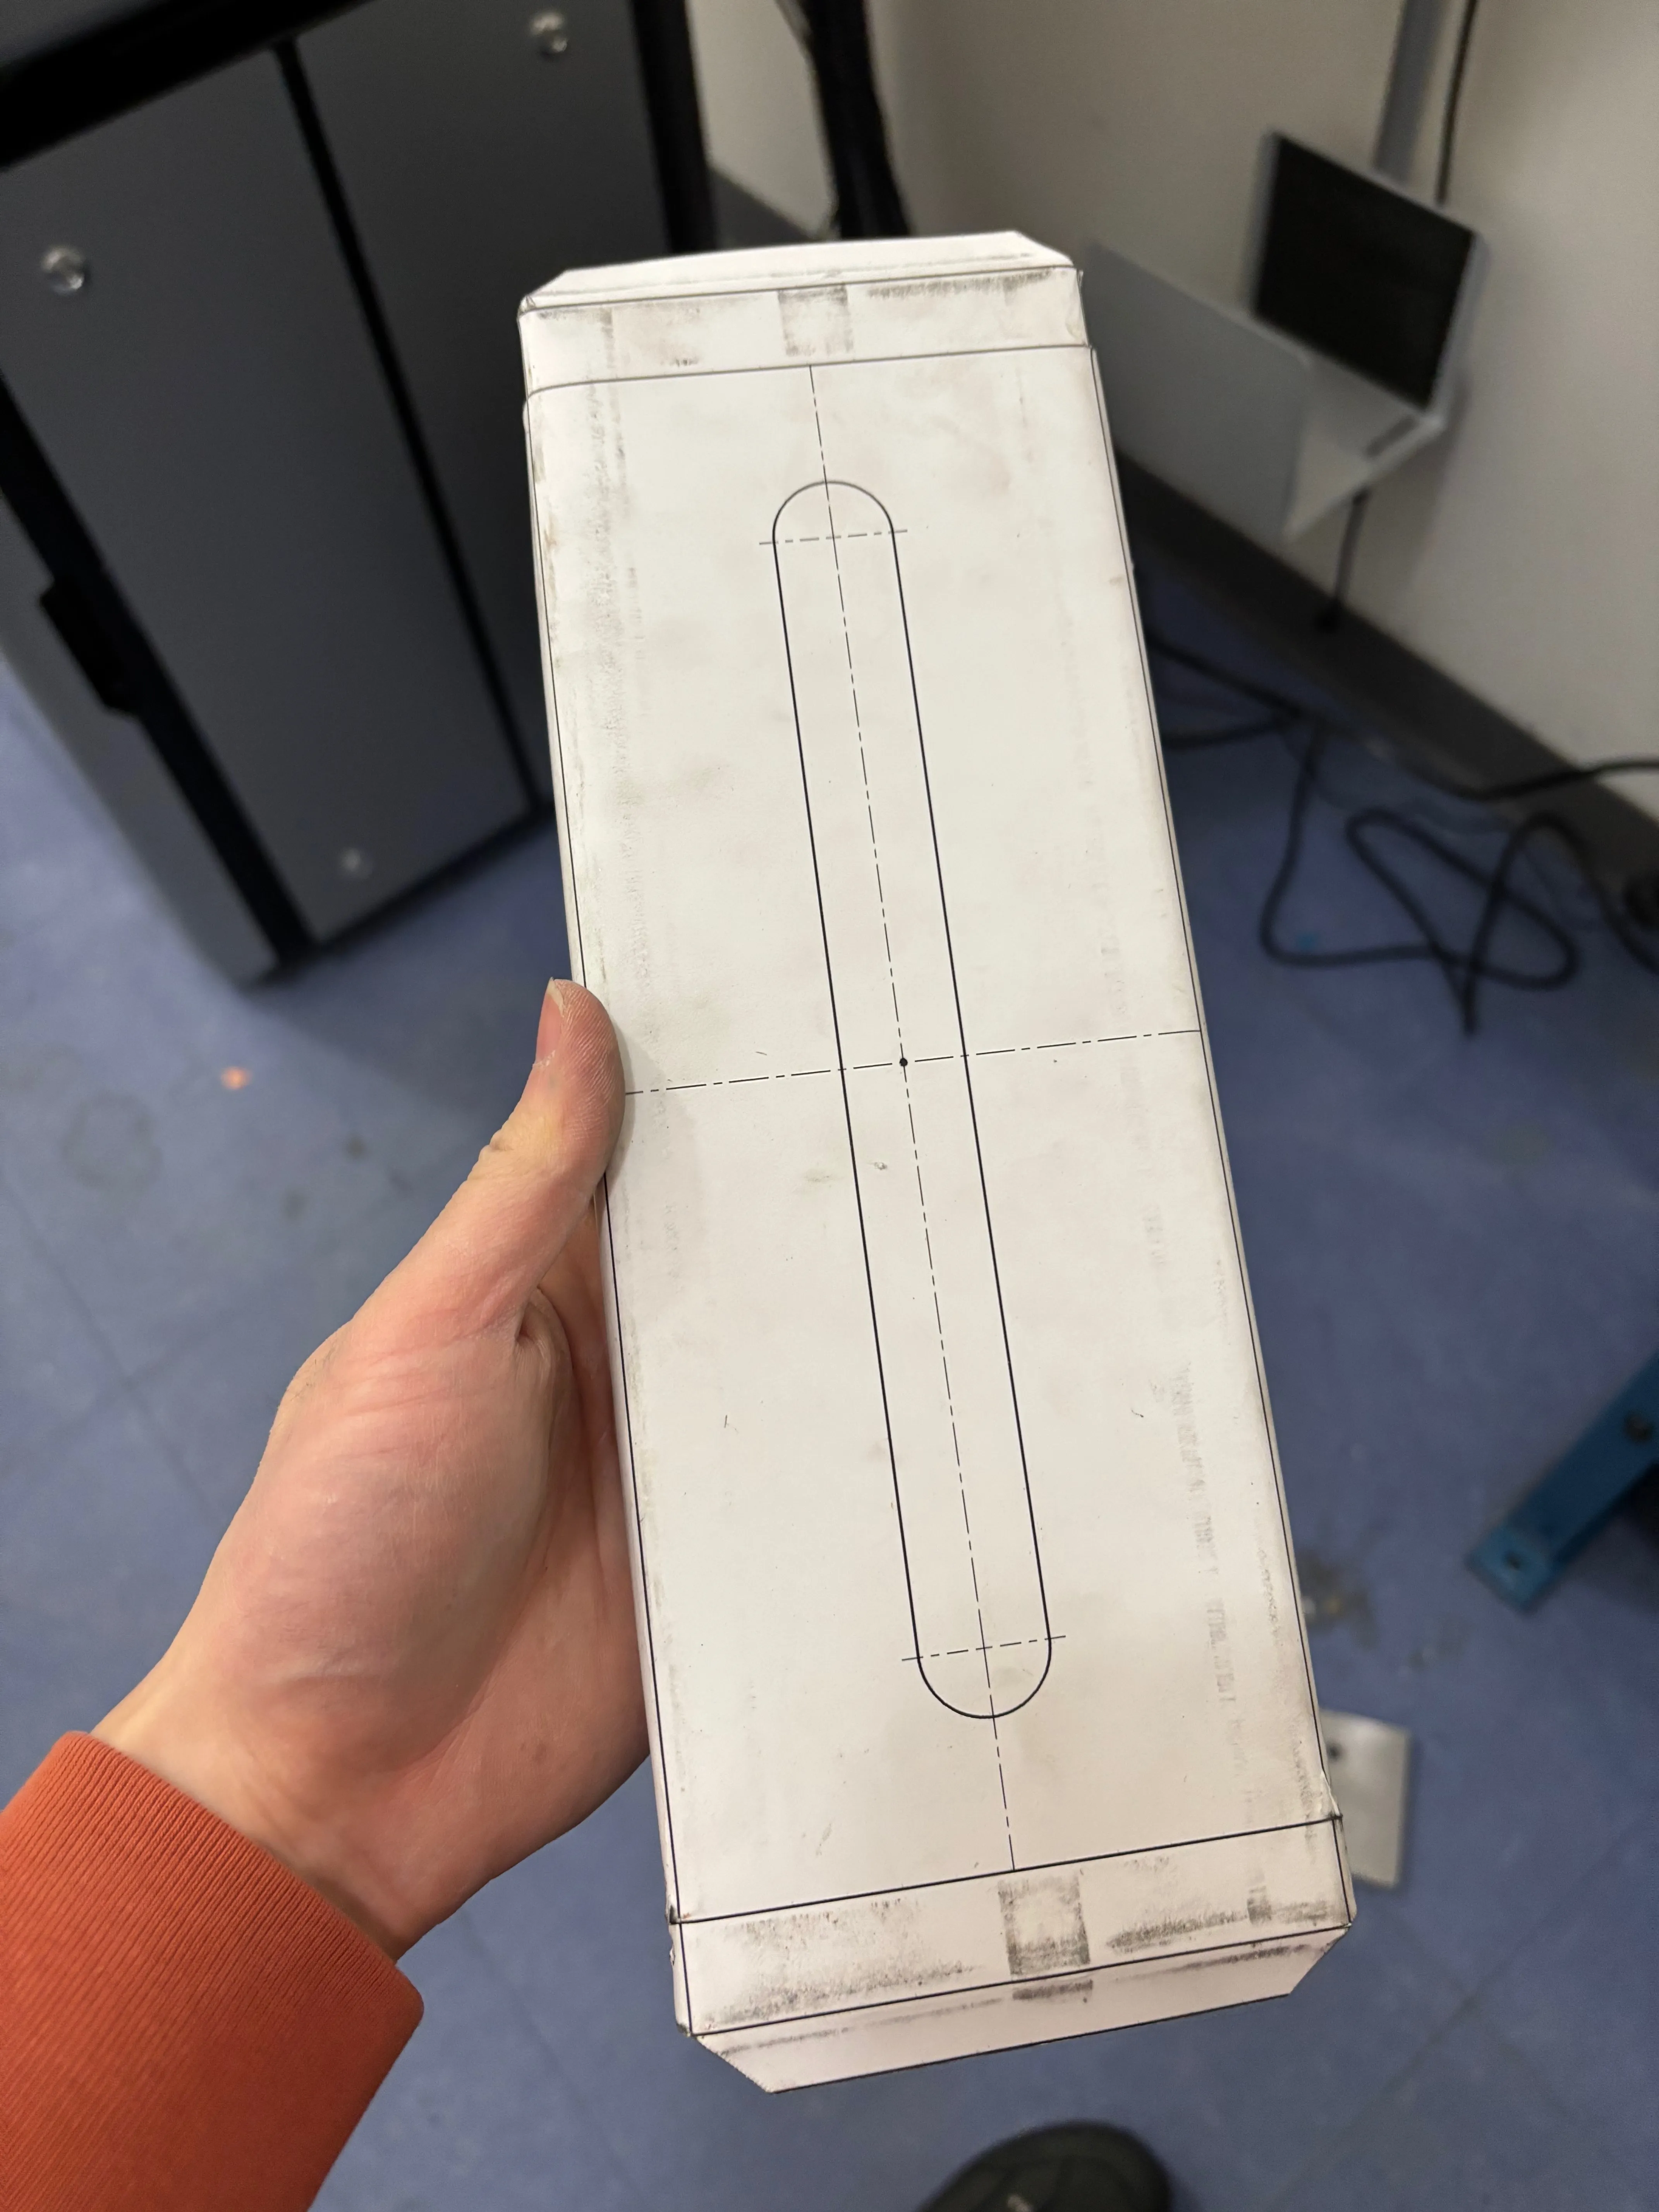
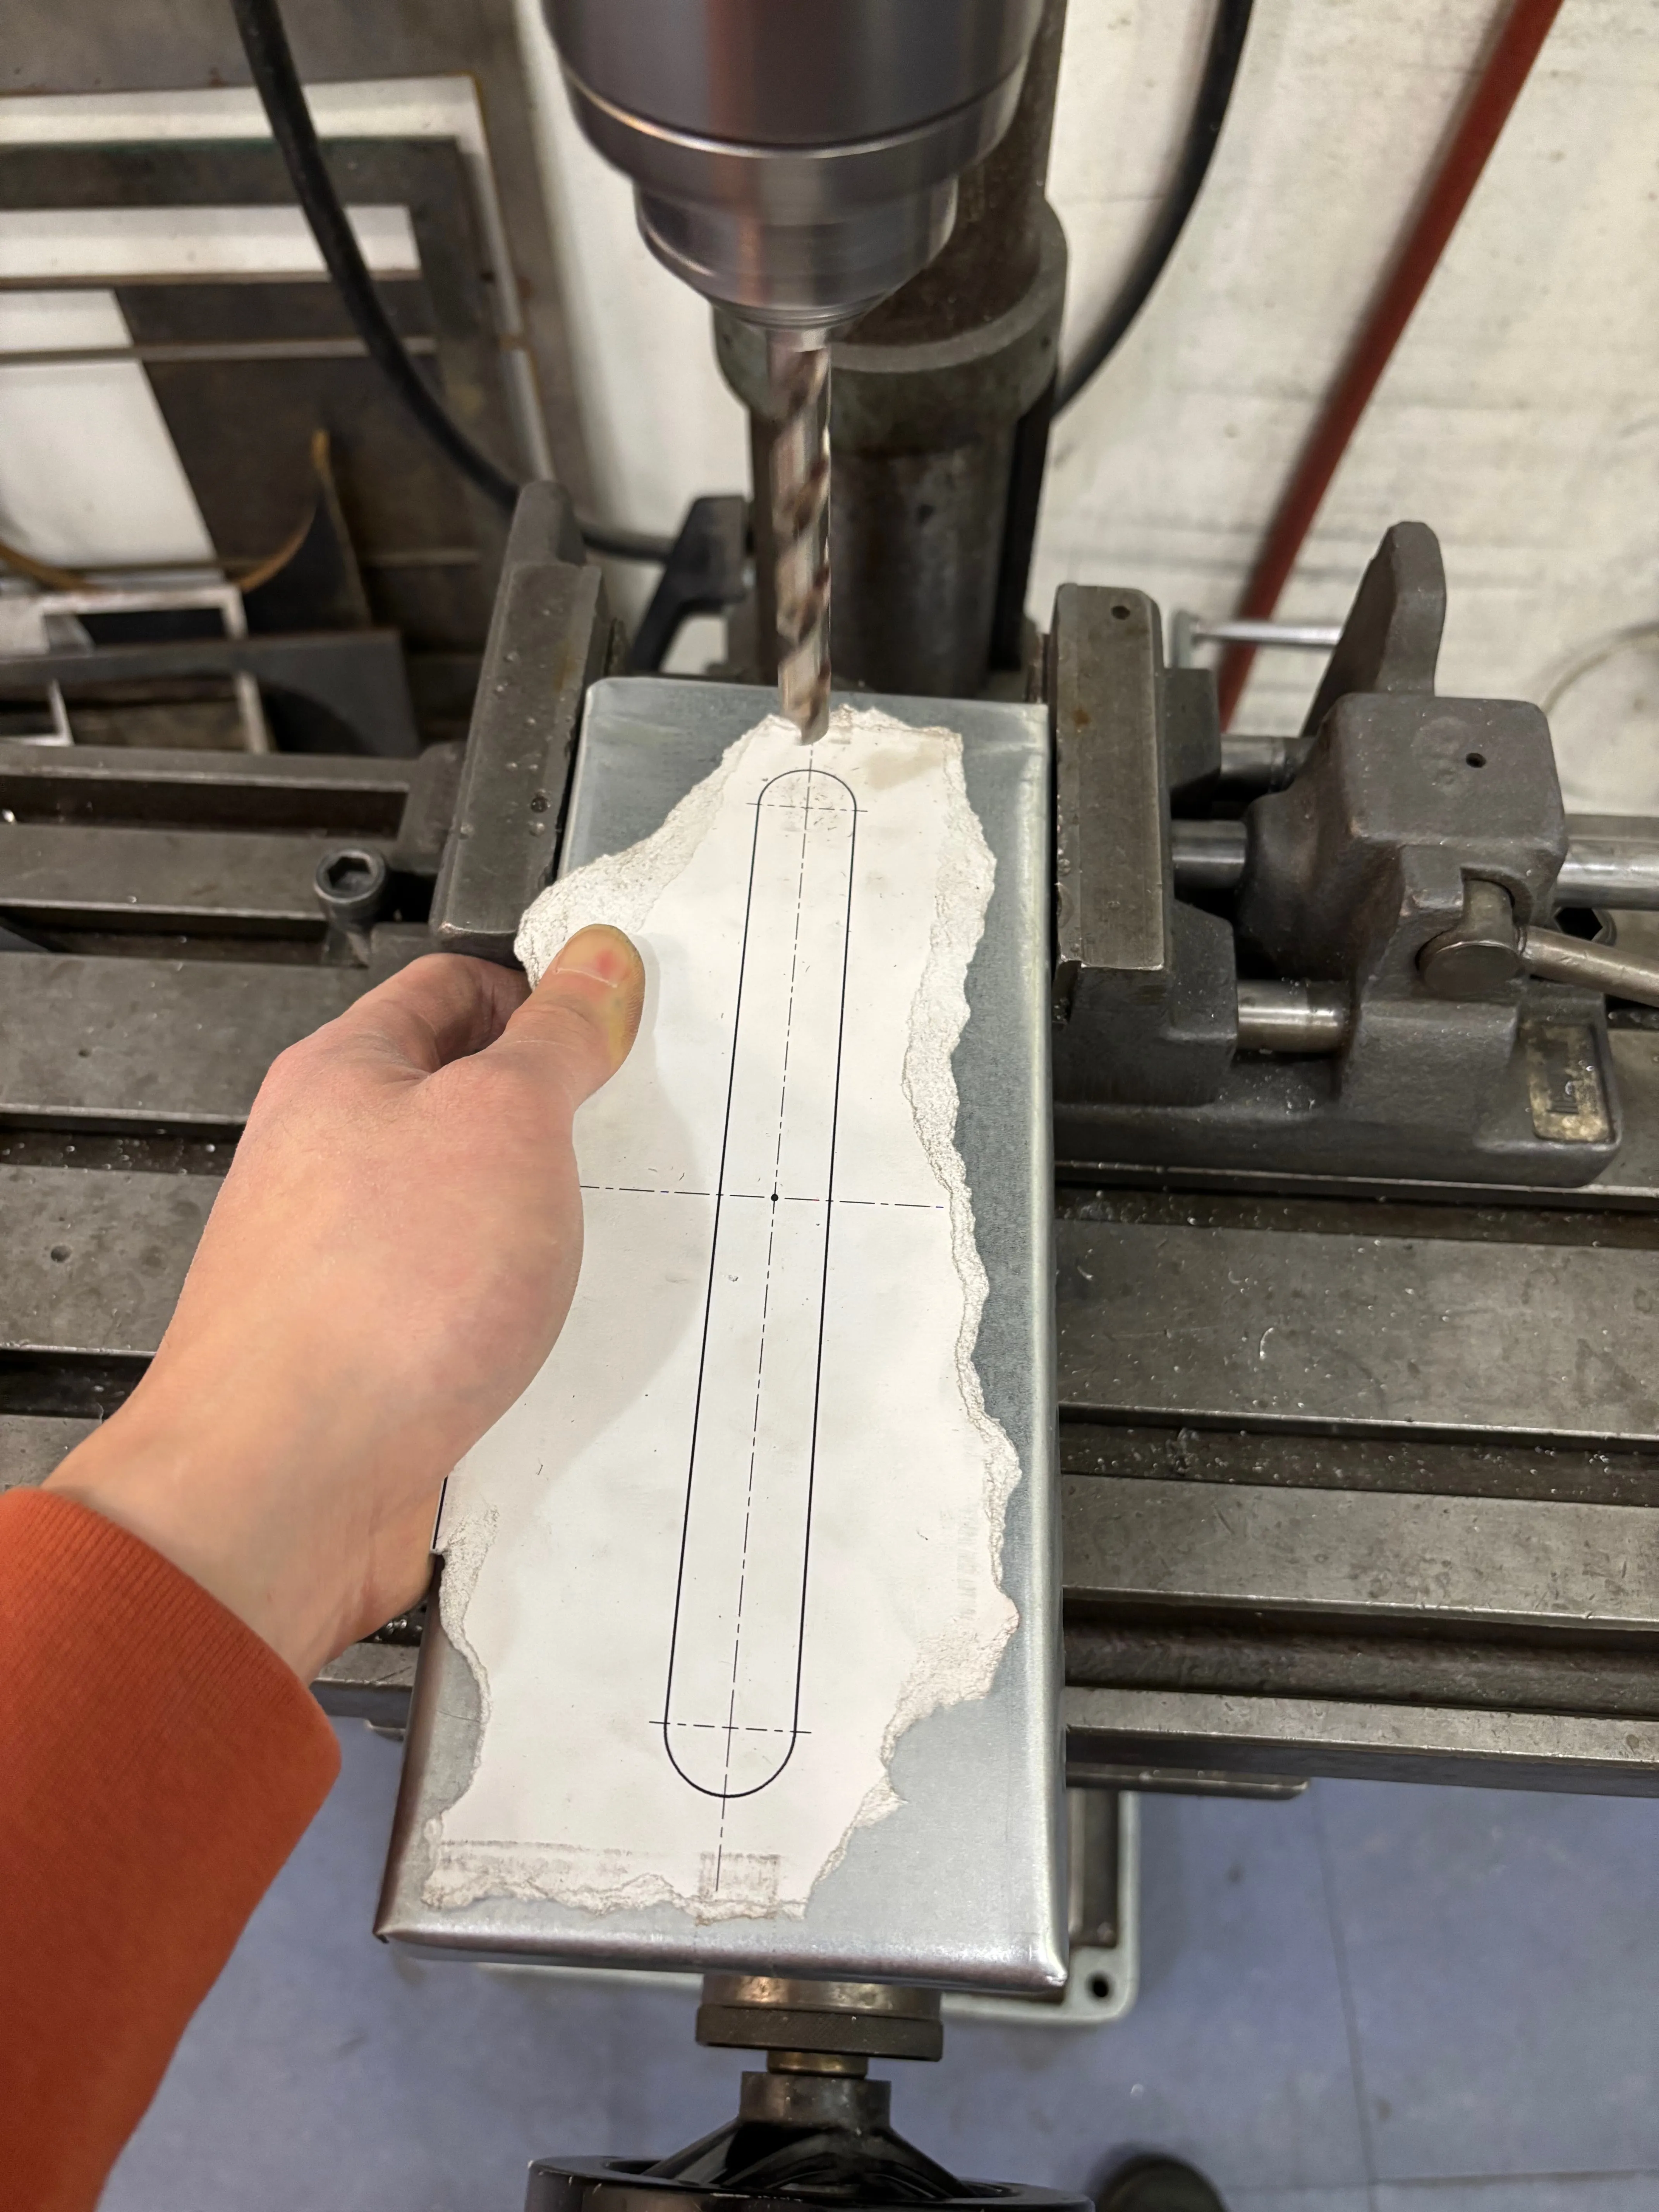
I then cut out the slot in the top by drilling two holes and connecting them with an angle grinder, and then filed the edges down.
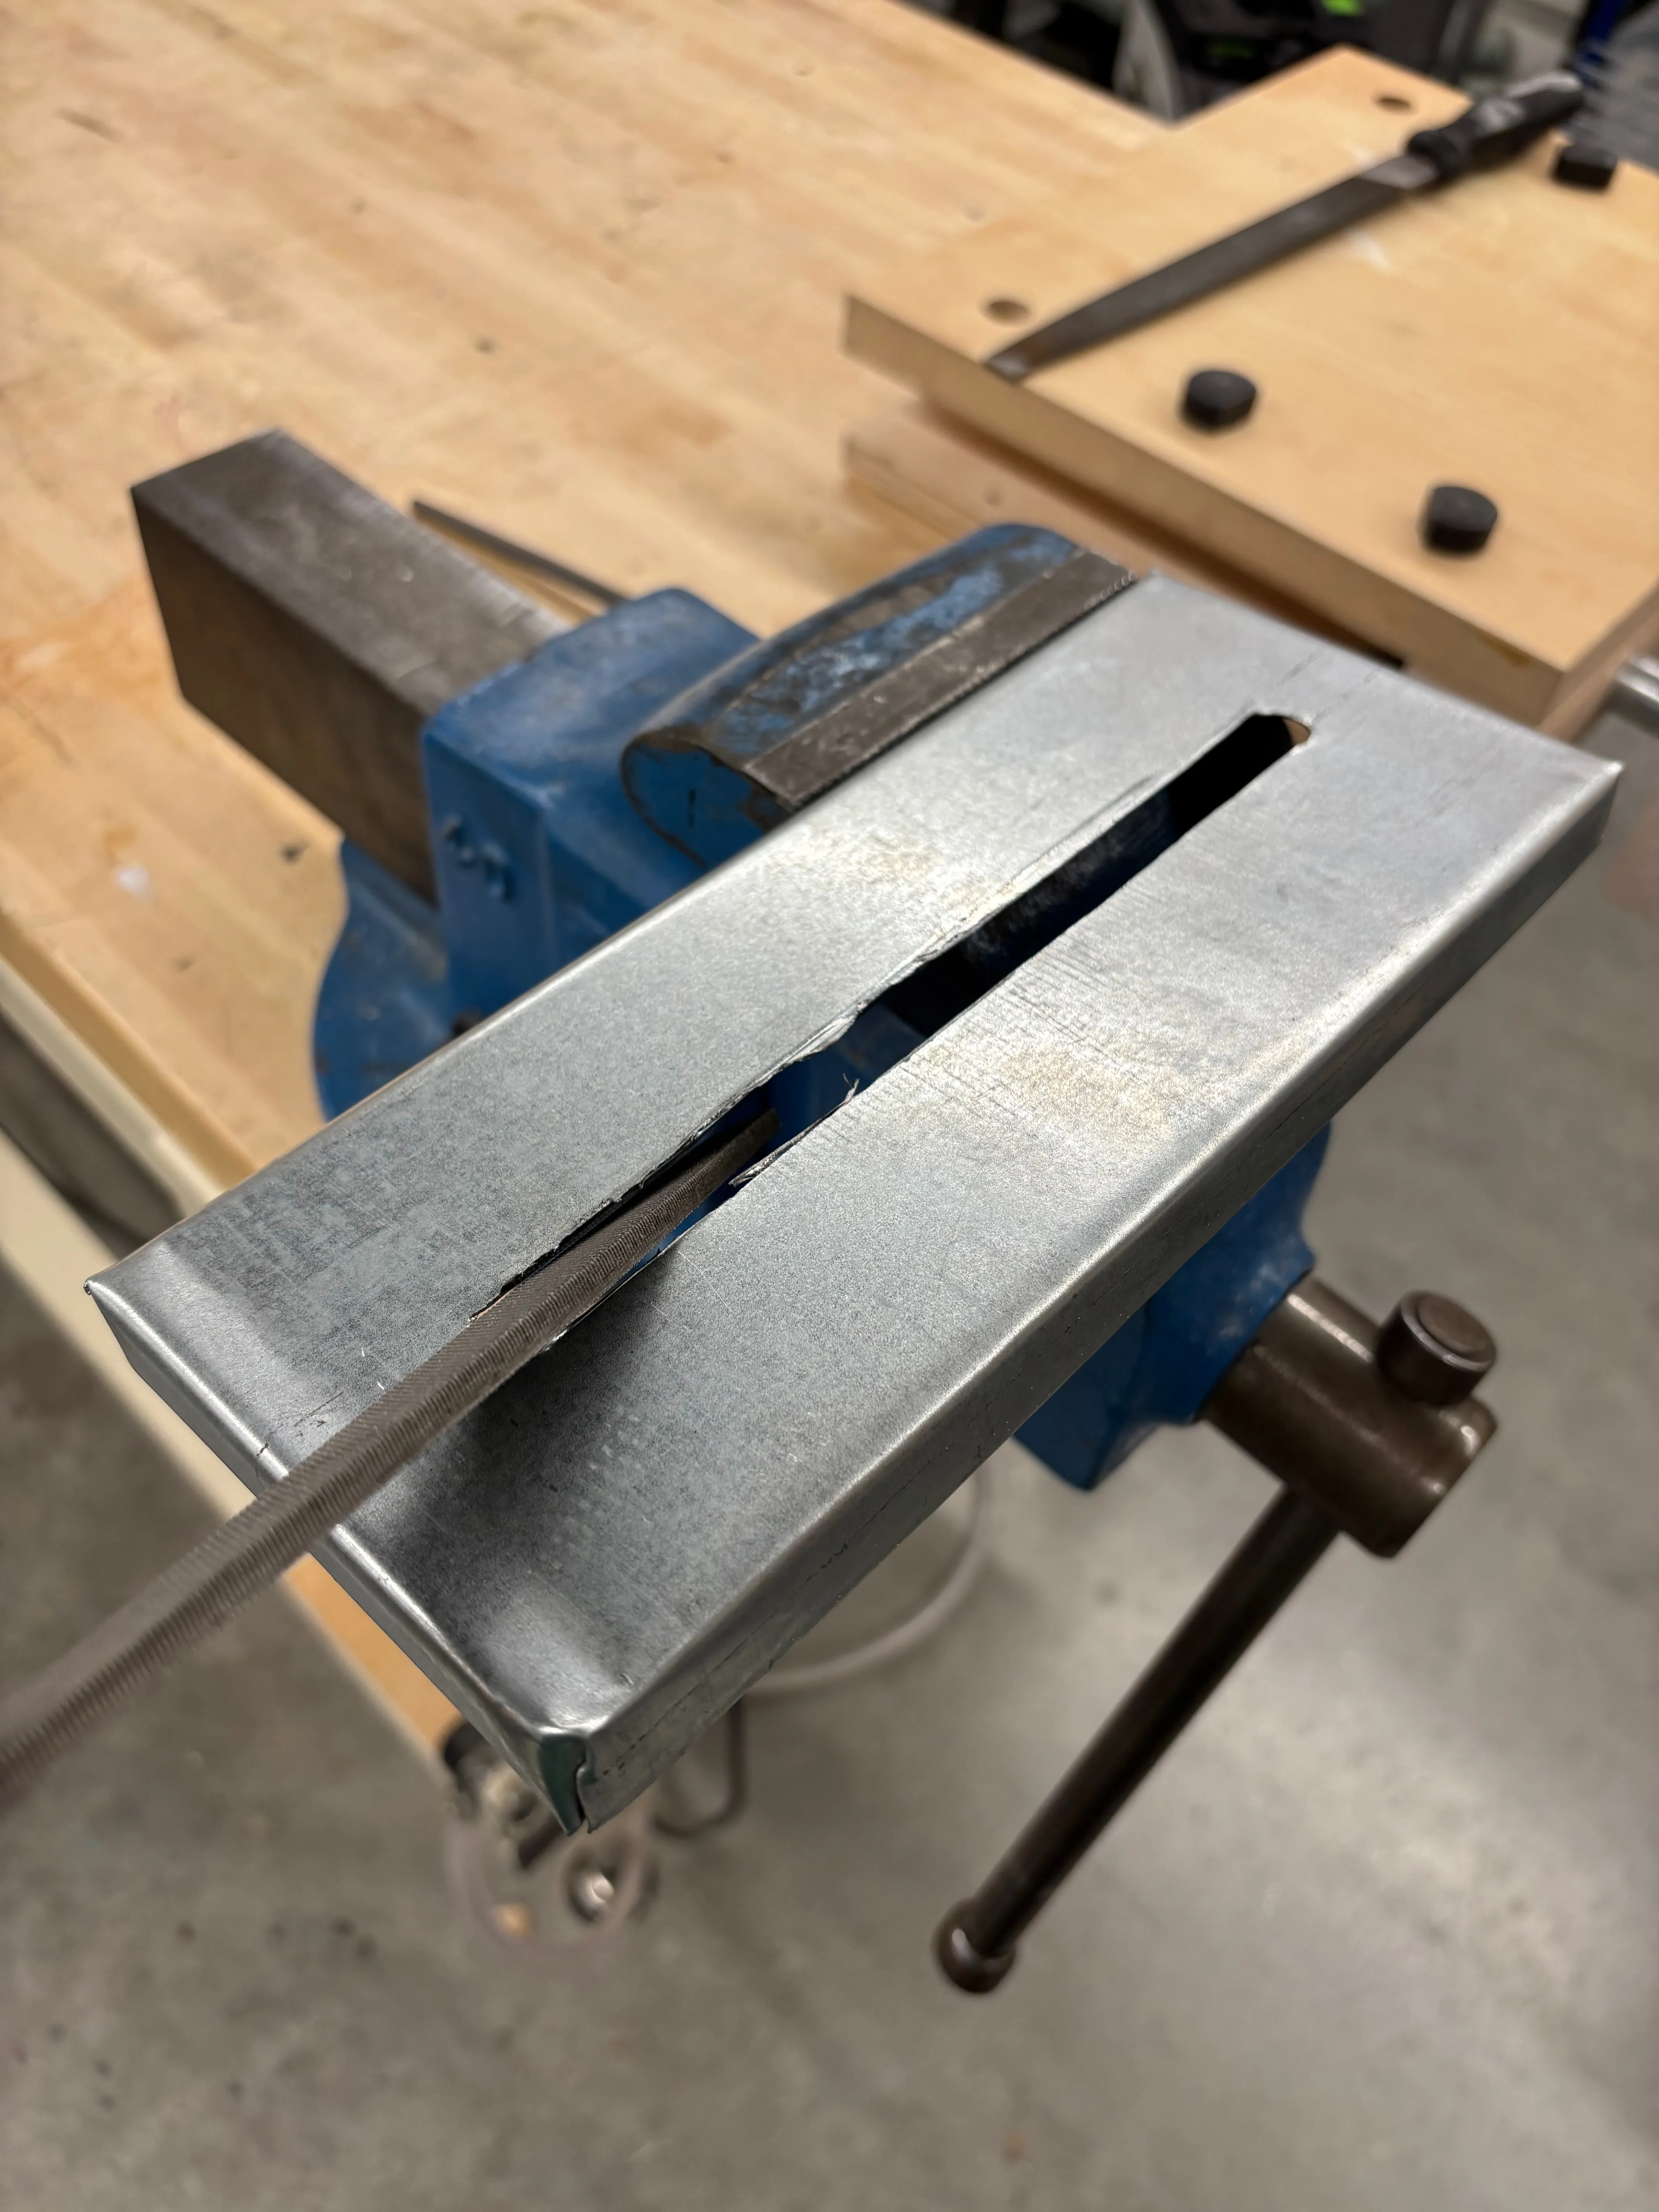
I should have done a better job with filing down the edges of the slot because when I tested it with real tissue, I found that it would get caught on the edges and tear. I solved this by putting some tape around the slot from the back that acts kind of like the plastic lips around the openings of cardboard tissue boxes, and this worked well enough as a fix.
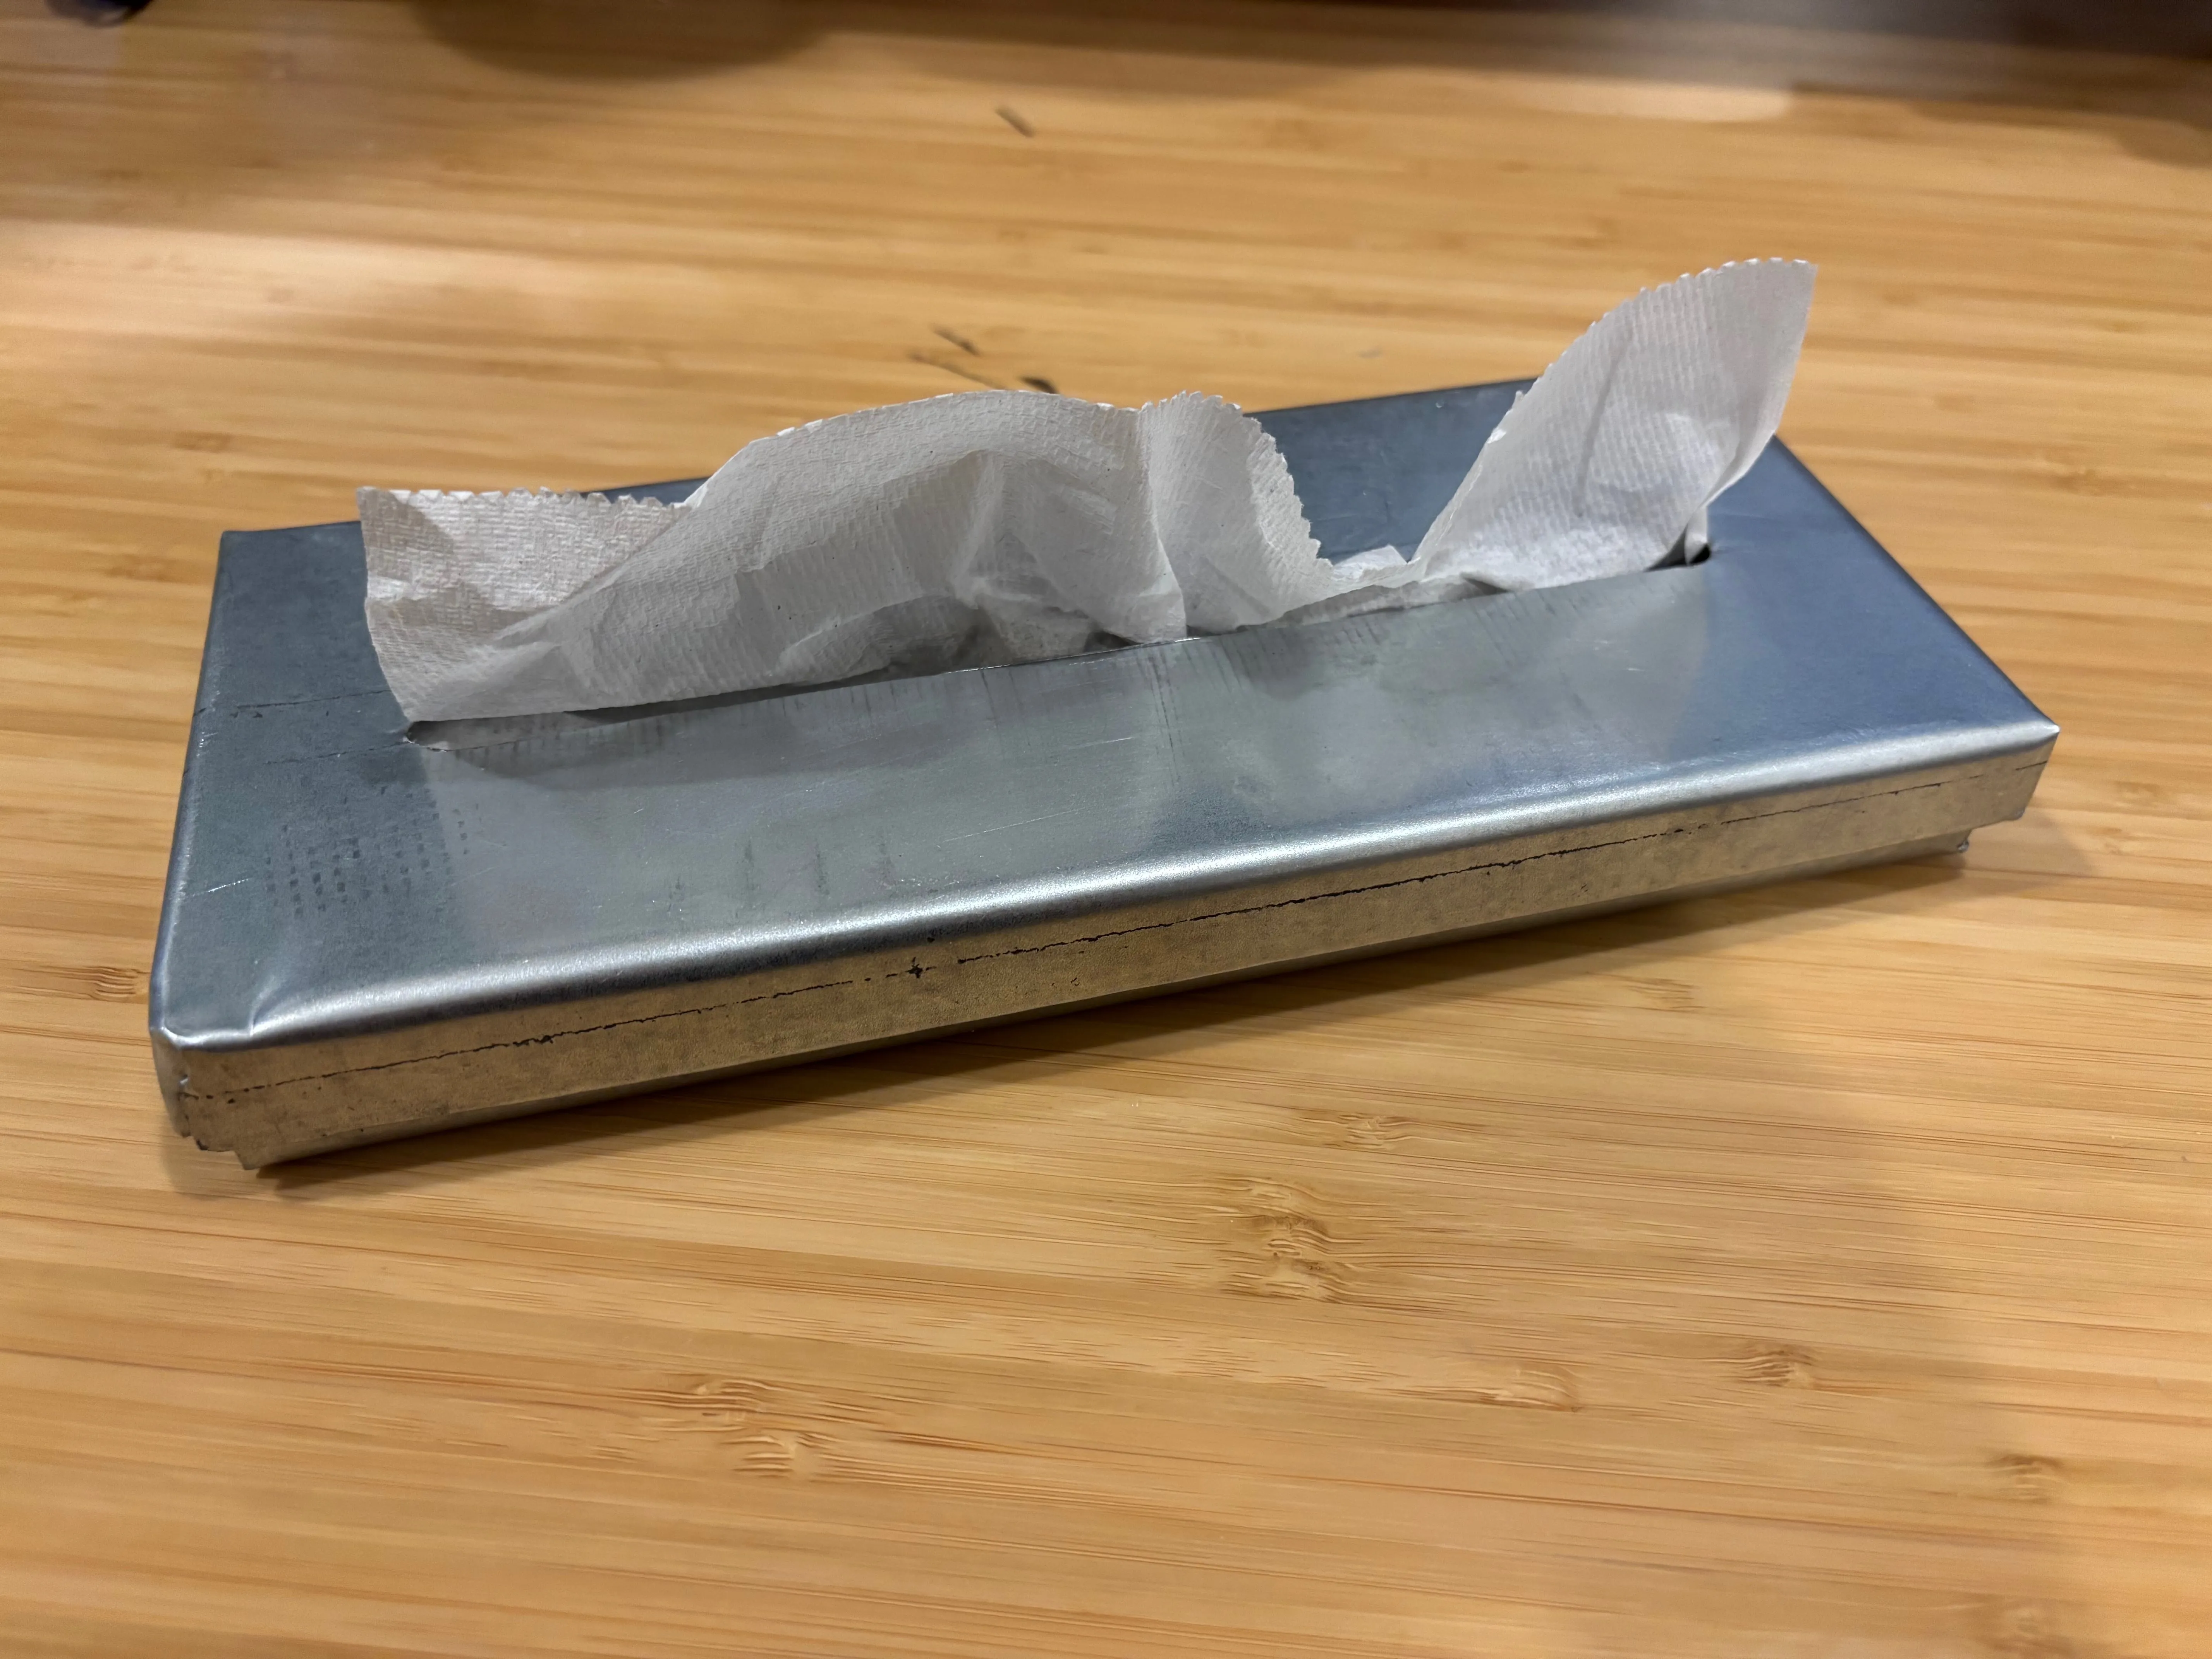
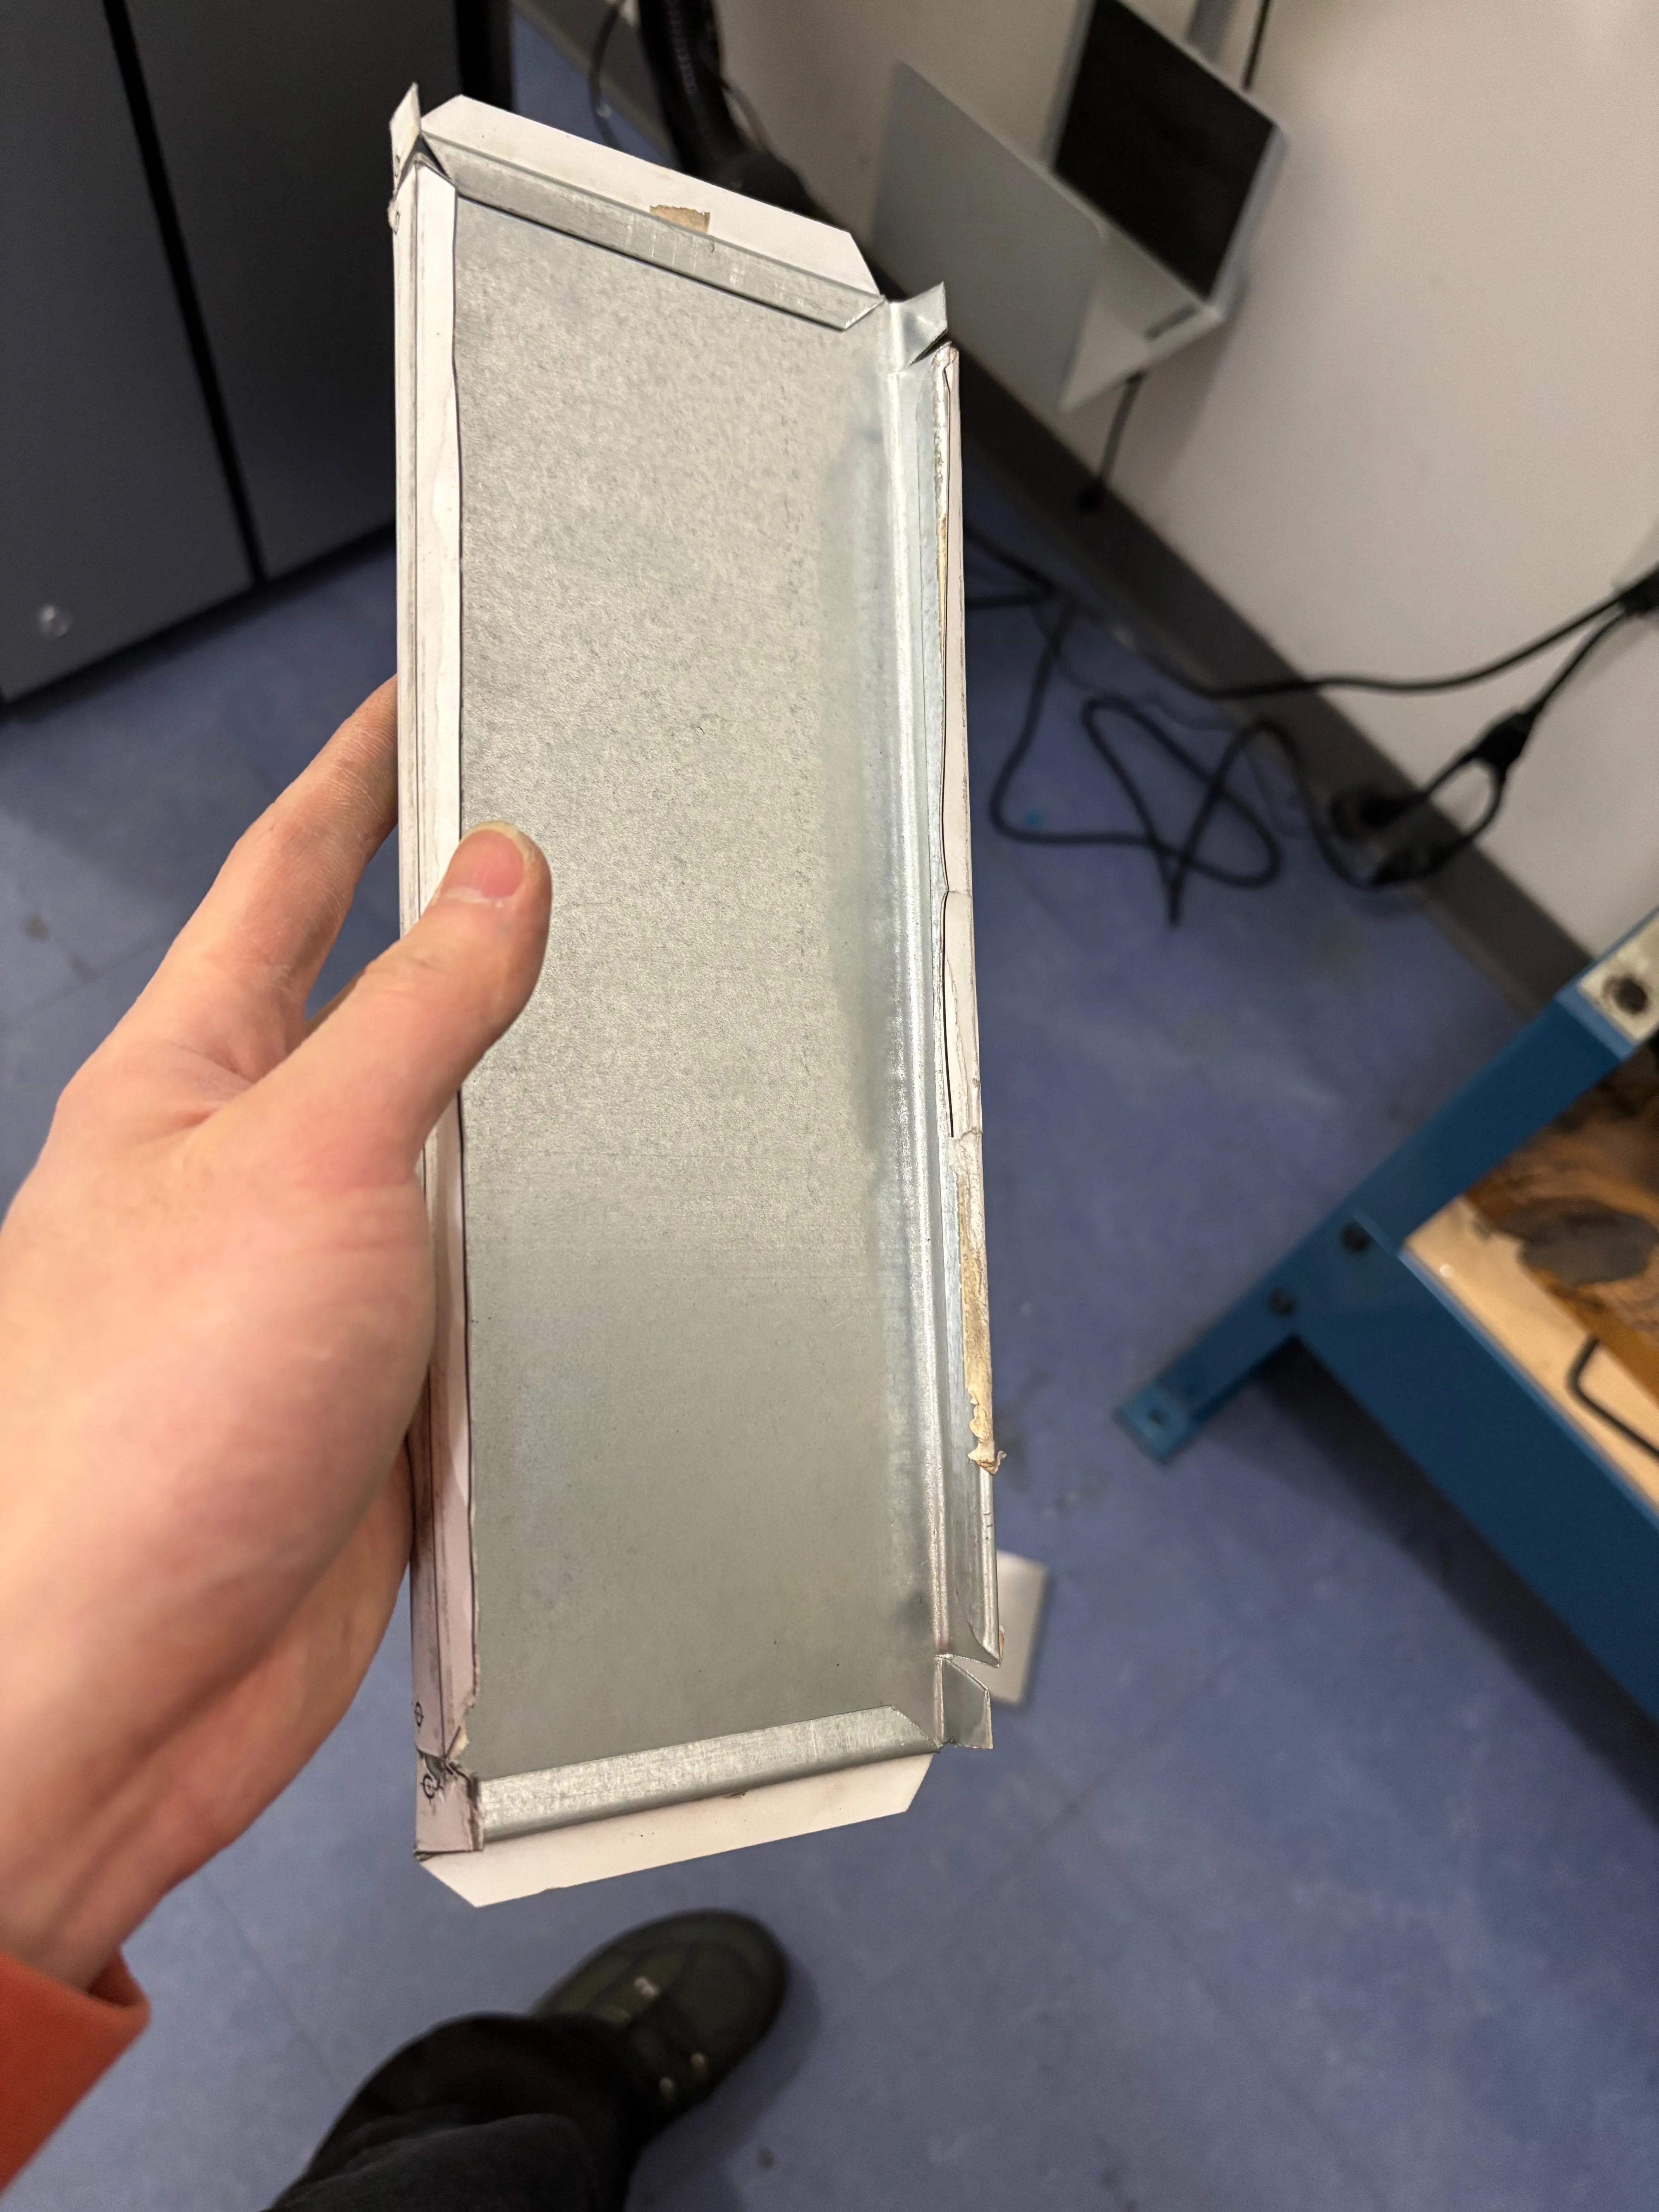
And ta-da! That was it! Just cleaned it up with alcohol and filled it with paper towels. It eventually migrated from being tucked away in the middle shelf to just sitting on the top shelf instead. I pushed my monitors back to make more room, and having it just out in the open did make taking tissues a lot more efficient. I also feel it looks kind of nice with the tissue sticking out more at the top (so not like the image below and more like the image at the top of the page).
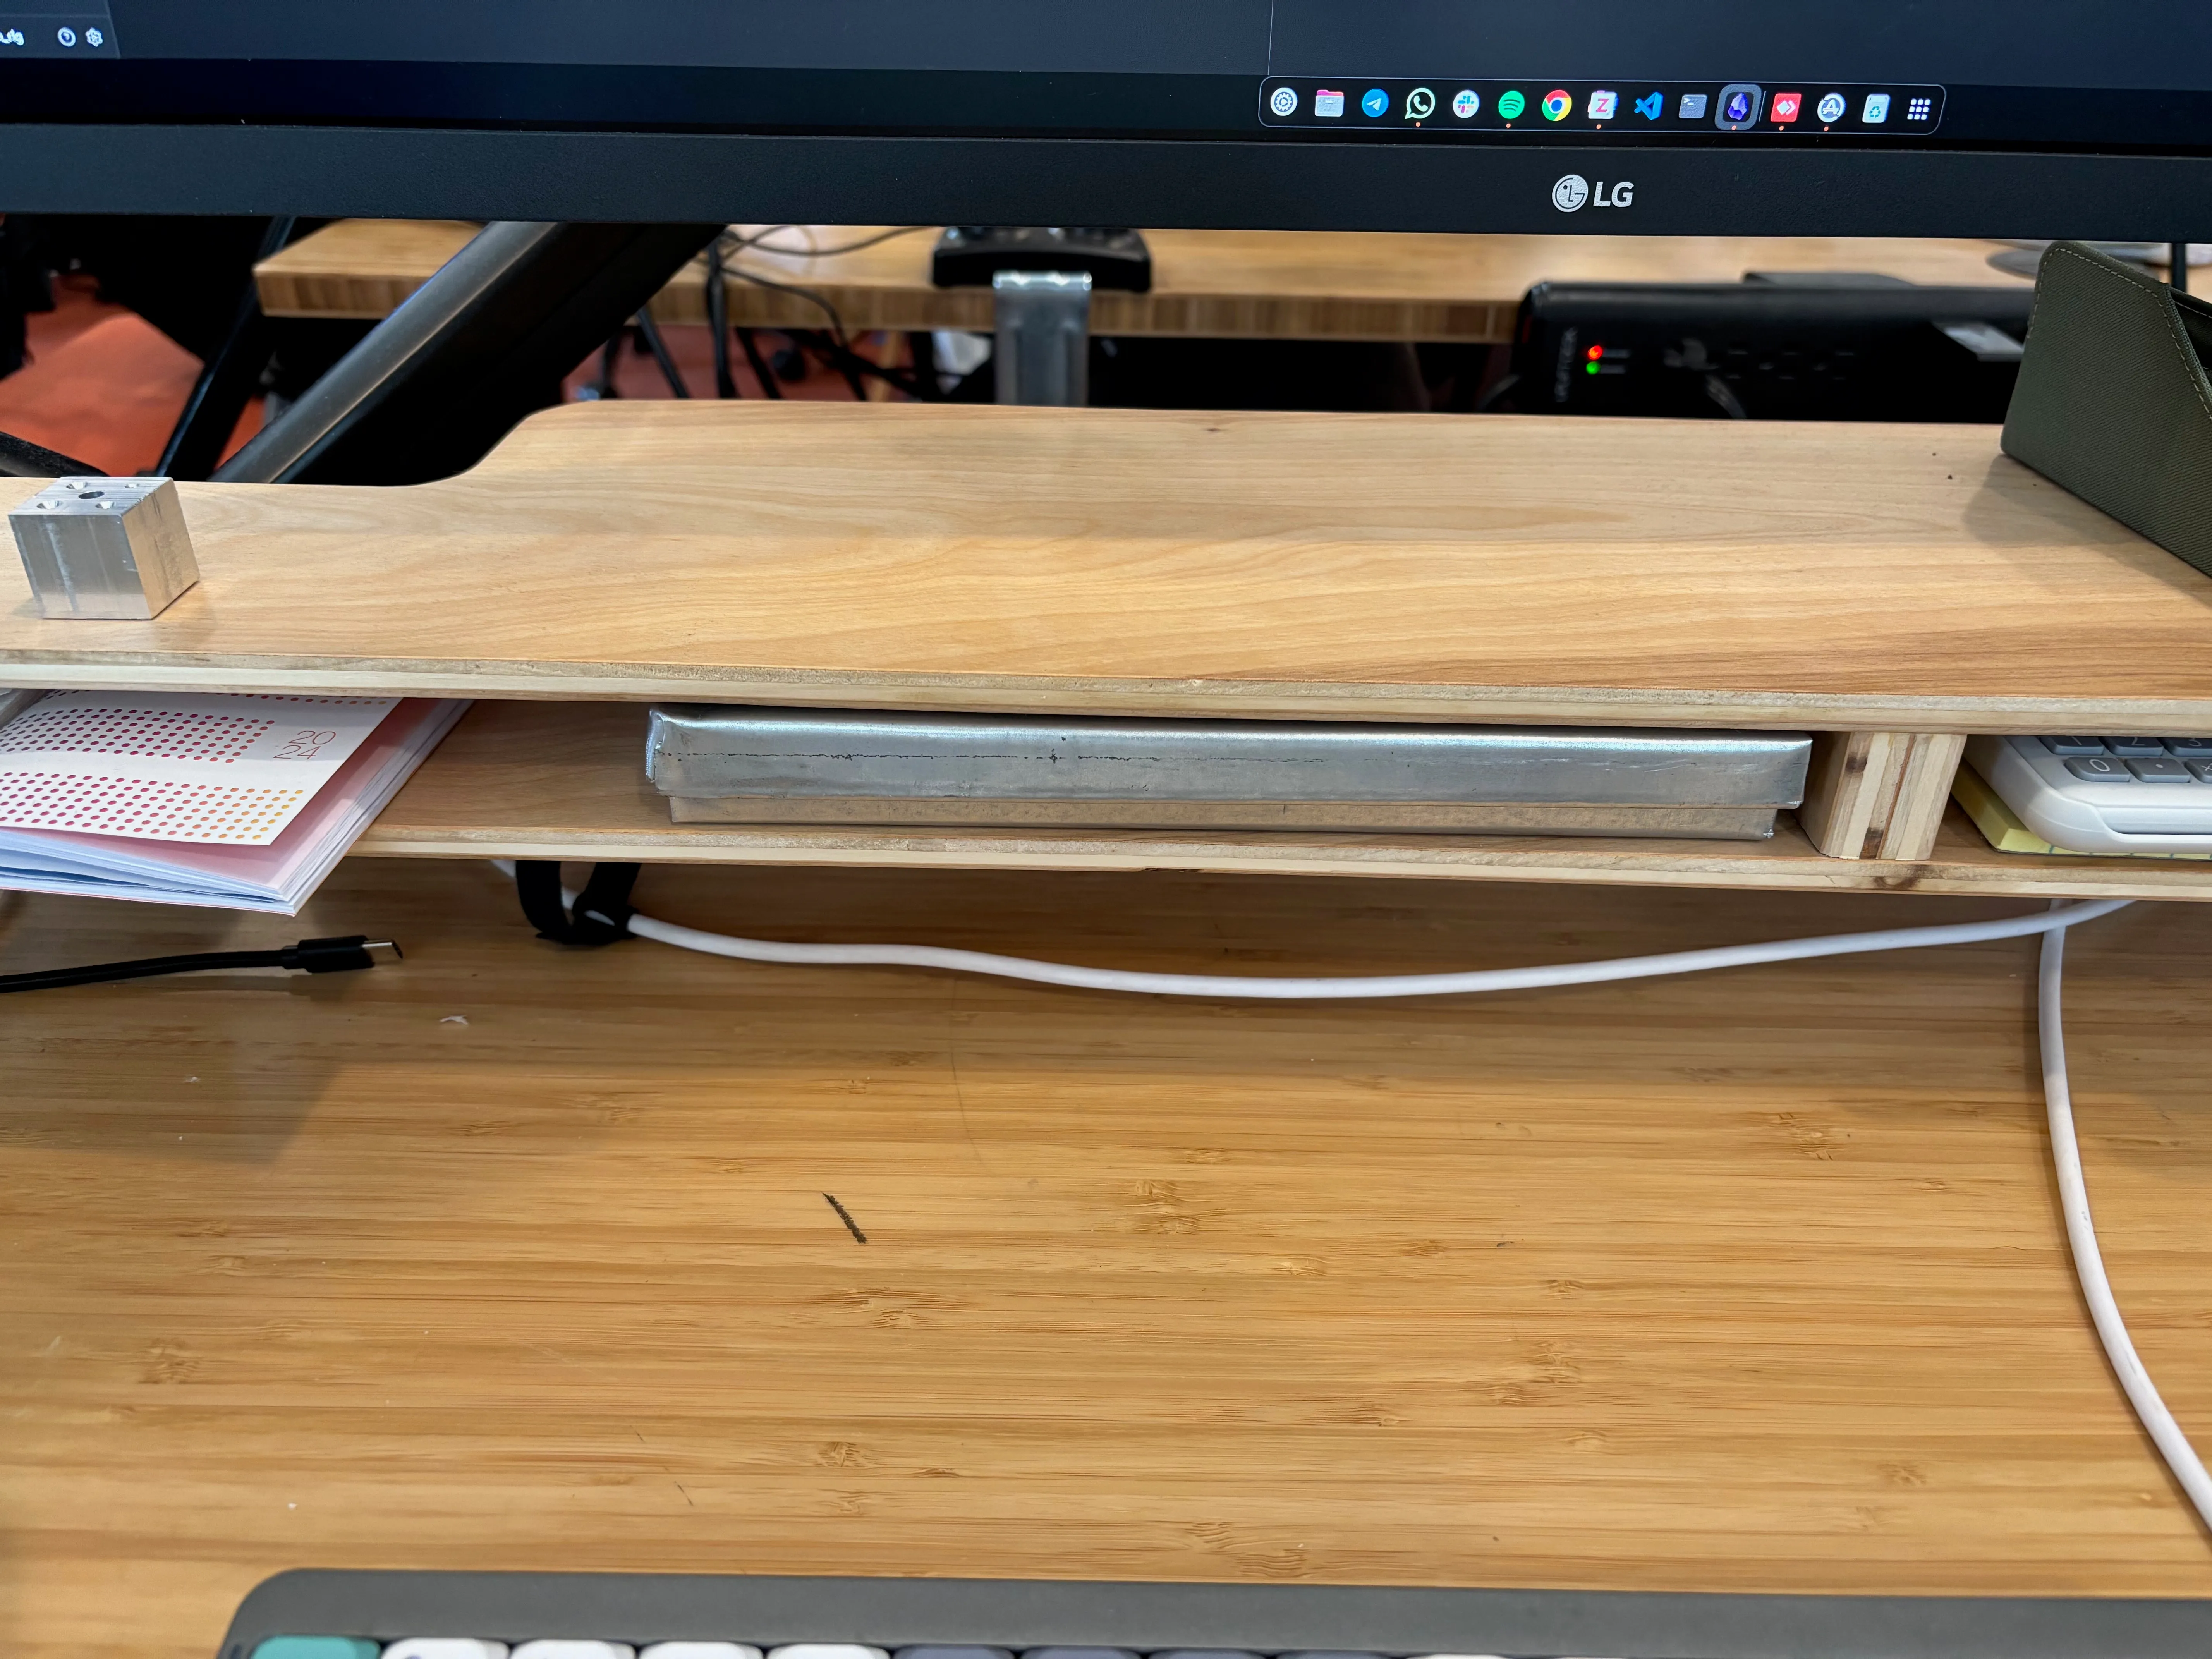
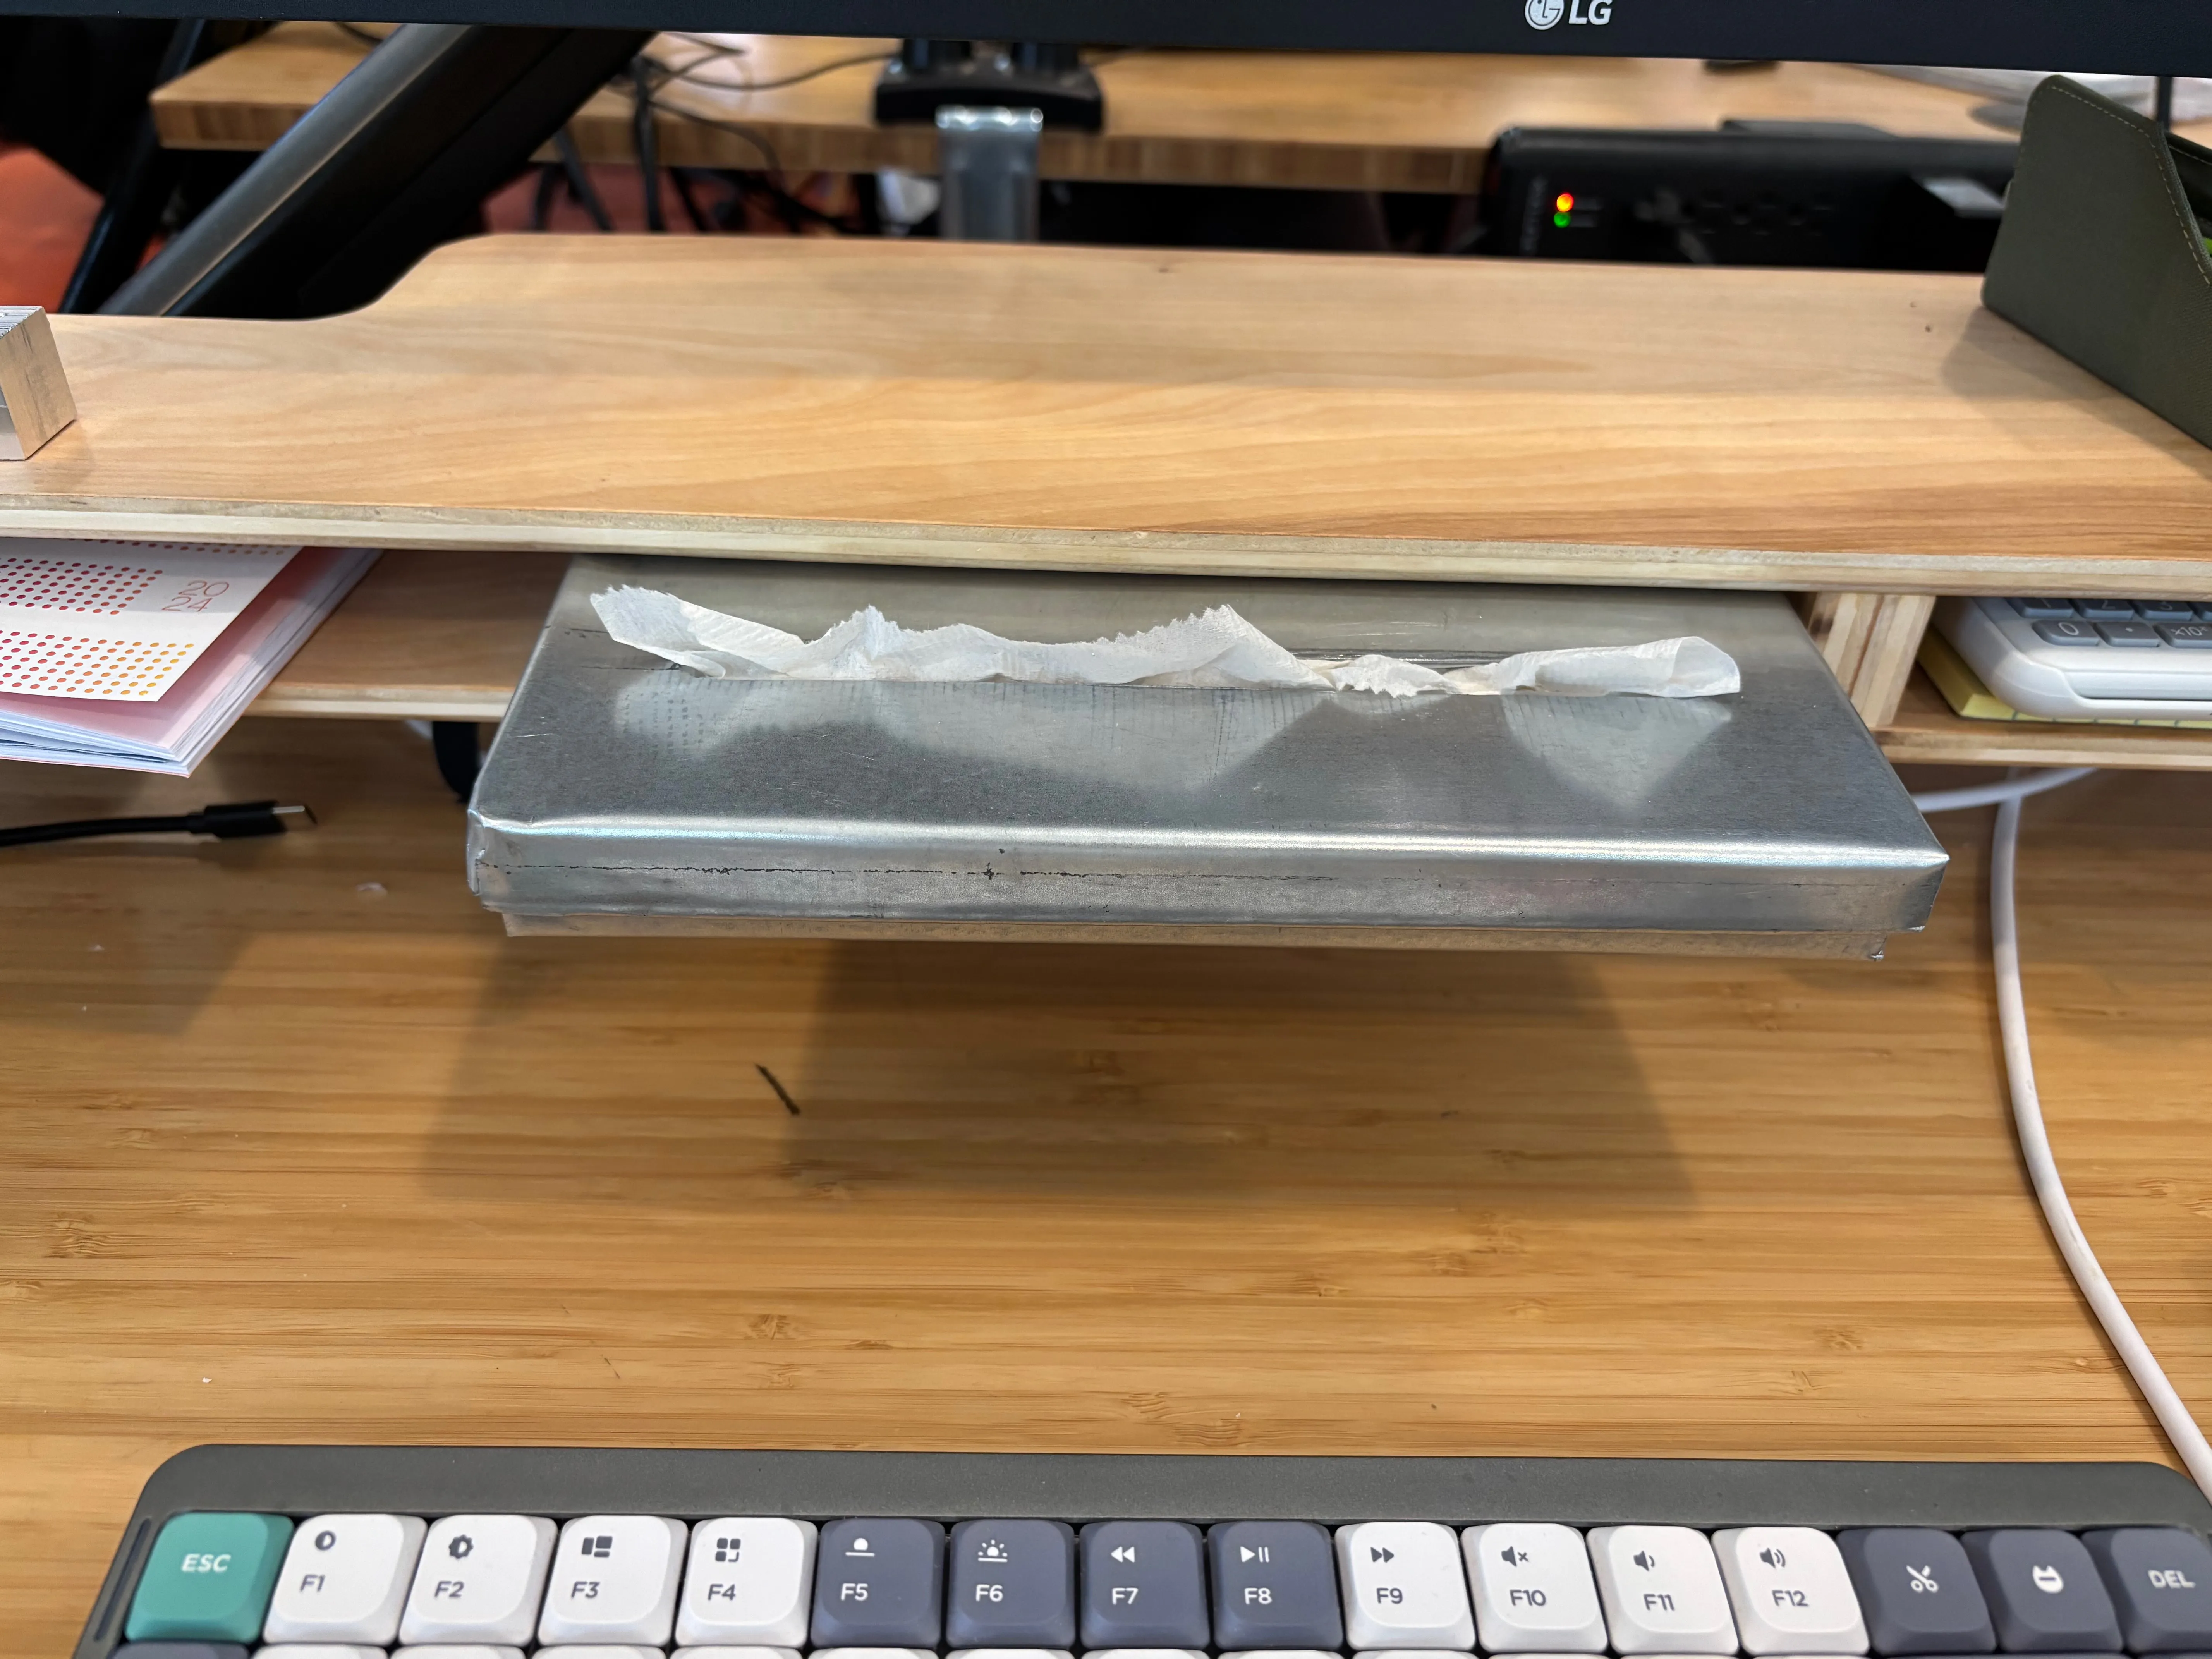
That black line you see on the front of the tissue box is actually residue from the double-sided tape I used to stick the paper template on the metal. I eventually scratched all of it off with my fingernail.